
Robert Rieke
Los Alamos, NM
1/8 inch aluminum braces to support the Y axis. Designed to work with the MWP Y Axis Belt Dust Guards, although they can be used alone.
1 minute
This project was designed to be used with the Y-Axis Dust Guard project (Link), which uses acrylic mirror ~1/8" thick. If you decide not to make the dust shields replace all 12mm M5 bolts with 10mm. If you decide to make dust guards with material significantly thinner or thicker than about 1/8", replace the 12mm bolts with shorter or longer bolts, respectively.

30 minutes
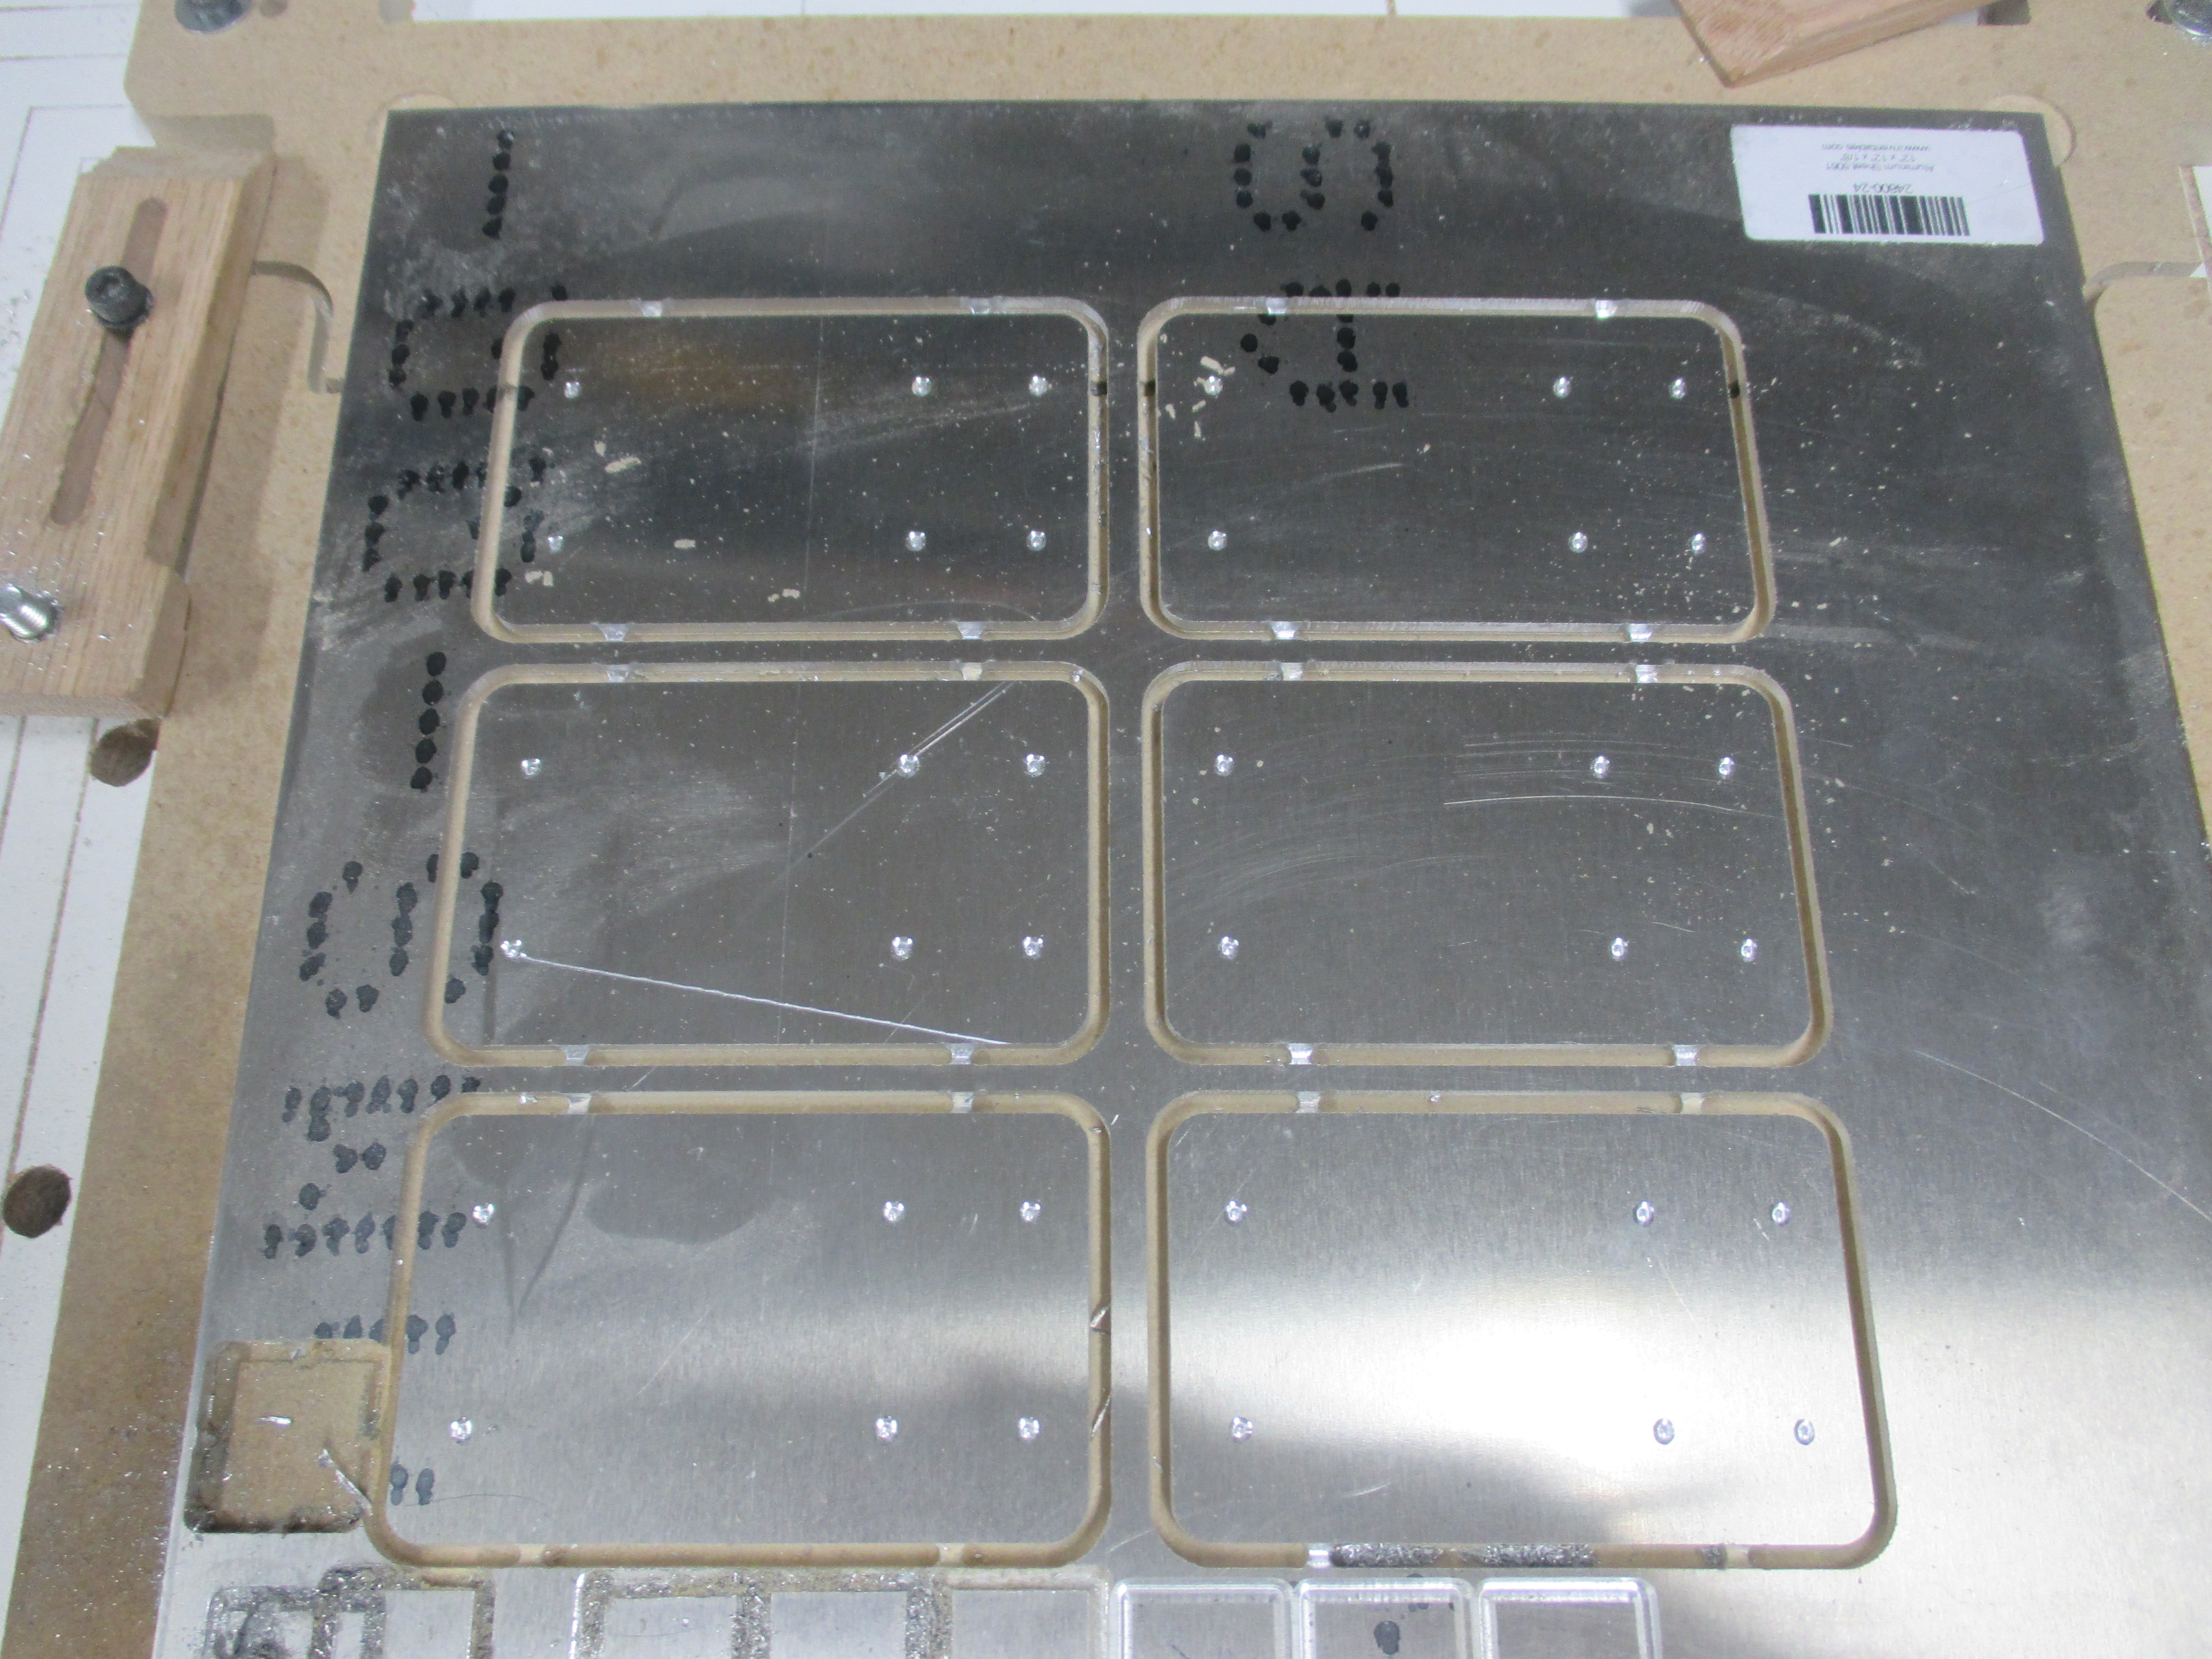
Since you are cutting aluminum, you will want a VERY flat wasteboard. Either flatten the wasteboard, or do like me and cut a .050" deep pocket slightly larger than the workpiece in a secondary wasteboard. I would recommend using a secondary wasteboard if you use the 2 flute upcut ball-end mill from Inventables since you will have to carve into the wasteboard to get flat edges.
In the picture associated with this step, you will see the secondary wasteboard I used. It was cut 12-1/8" square with large circles cut in the corner to fit the corners of the aluminum.
90 minutes
DO NOT ATTEMPT TO CUT ALUMINUM WITHOUT ENSURING YOUR MACHINE IS PROPERLY DIALED IN!
I have the Dewalt 611, and used these settings after doing feed/speed testing:
Bit: 2 flute upcut, ball end, standard from Inventables
Dewalt 611 speed: 5
Depth of cut: 0.1 mm
Feed rate: 800 mm per minute
The aluminum was best cut dry, any kind of lubricant caused the shavings to remain in the slot and messed up the edges.
Since the holes were about the size of the bit, I chose to drill them using a hand drill. This file will only make dimples to help ensure the drill bit stays in position.

Using a 7/32" bit, drill through all 6 holes in the braces.

60 minutes
Use a file or countersink to clean up the edges of the holes. Then use a file or other method remove the tabs and slightly round the edges of the aluminum so you don’t cut yourself.
Before painting, soak the braces in soapy water and scrub well to remove any oils or residual chemicals. Then spray paint with your desired color. I chose gloss black to match the machine.
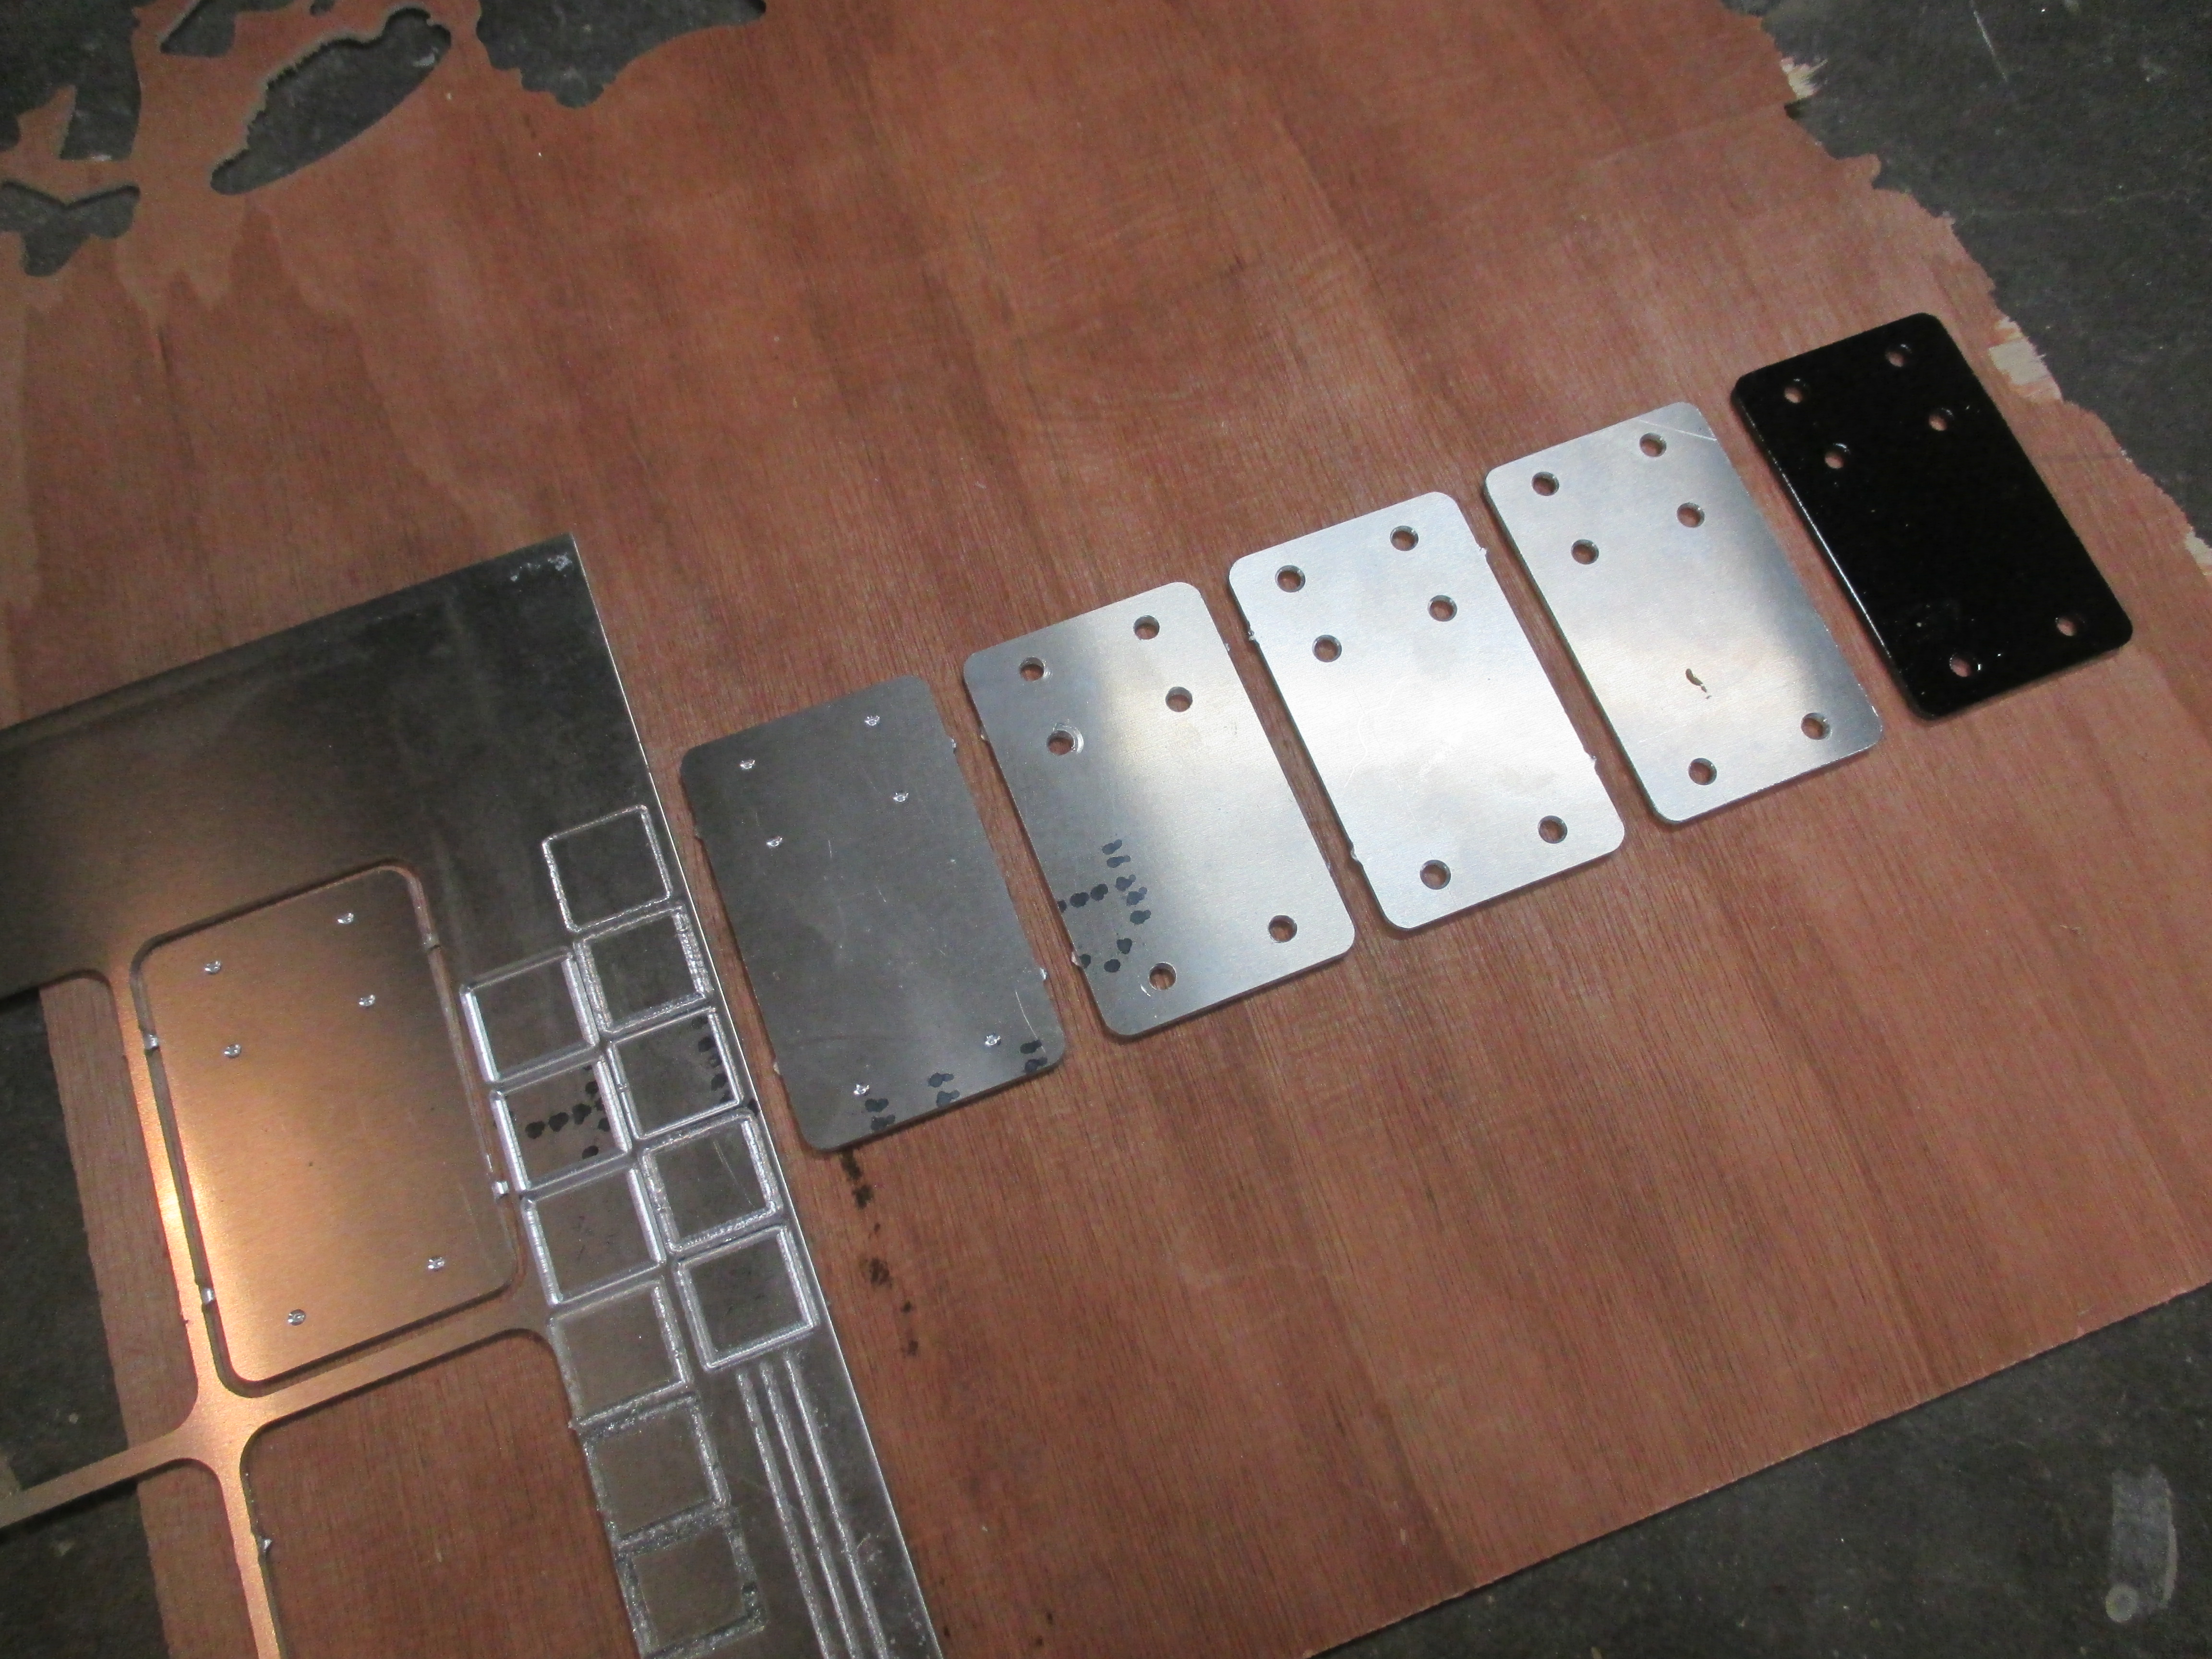
The picture associated with this step shows the following braces (shown left to right):
1: Cut, still in sheet
2: Removed from sheet
3: Holes drilled
4: Countersink used on holes
5: Tabs removed and edges rounded
6: Painted
60 minutes
Remove one makerslide end plate on one Y-axis makerslide and insert 6 t-slot nuts into each slot on the inside of the makerslide. Then insert 6 t-nuts into the outside-facing slot on the bottom piece of extrusion. (I ended up drilling a hole to allow me to insert the t-nuts in the bottom piece instead of taking it all apart).
Use washers and 10mm bolts to connect the braces through the bottom and top holes in the braces. The center set of holes is designed to hold the dust guards (Link). If you aren’t going to use the dust guards, use washers and 10mm bolts in the center holes.
Repeat for the other Y-axis makerslide.

1 minute
Your Y-axis is now significantly stiffer and better supported. Go make something and enjoy the increased accuracy and decreased chatter. A good project would be the dust guards (Link).


Martin
Martin
Robert Rieke
Alex Felicioni
Jay Johnson
Alexander McClure
Geno Nemetz
Ewan Cowan
Robert Rieke
Robert Rieke
James Nelson
Robert Rieke