
Rick Ratayczak
Las Vegas, USA
Adds brackets to the gantry and holds a 20×20 extrusion which holds a led light bar. The lights can turn on and off.
30 minutes
Open the project in Easel.
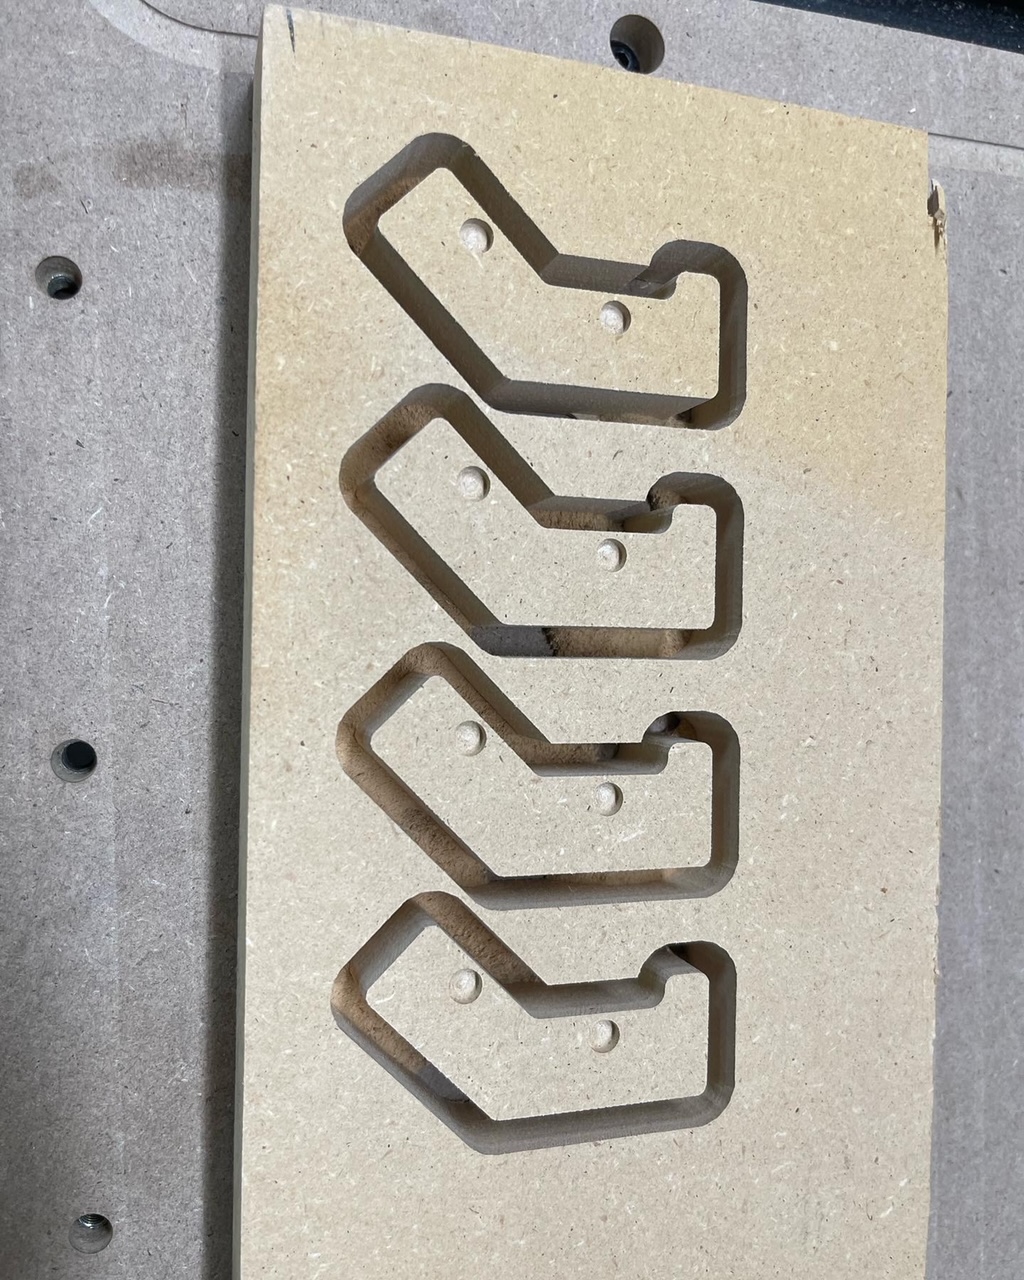
Set up a piece of wood to cut the gantry brackets and light bar mounts on the X-Carve Pro. 12×24 in will suffice. It has to be 3/4 inch thick. I used MDF.
Cut a 48 × 3/4 inch strip of wood. It does not have to be thick. I used 1/4 thick plywood.
10 minutes
Drill two holes in each mount as seen in the pic above. The side holes are just to be a visual aid to where to drill the hole on the face.
For the end stop pieces, there is a lip which sits on top of the aluminum extrusion. Drill a hole that corresponds to the middle of the extrusion when the end stop is on it.
15 minutes
Glue the light bar brackets onto the 48 inch piece of wood. It is glued on the non-lip side of the bracket.

15 minutes
I chose not to paint the brackets and LED wood bar.
Depending on the USB LED light strip you use, it may have double sided tape on the bottom. Affix the LED strip to the 48 inch long board.
I chose to superglue the light strip so it’s permanent.
Requires: Superglue (optional)

10 minutes
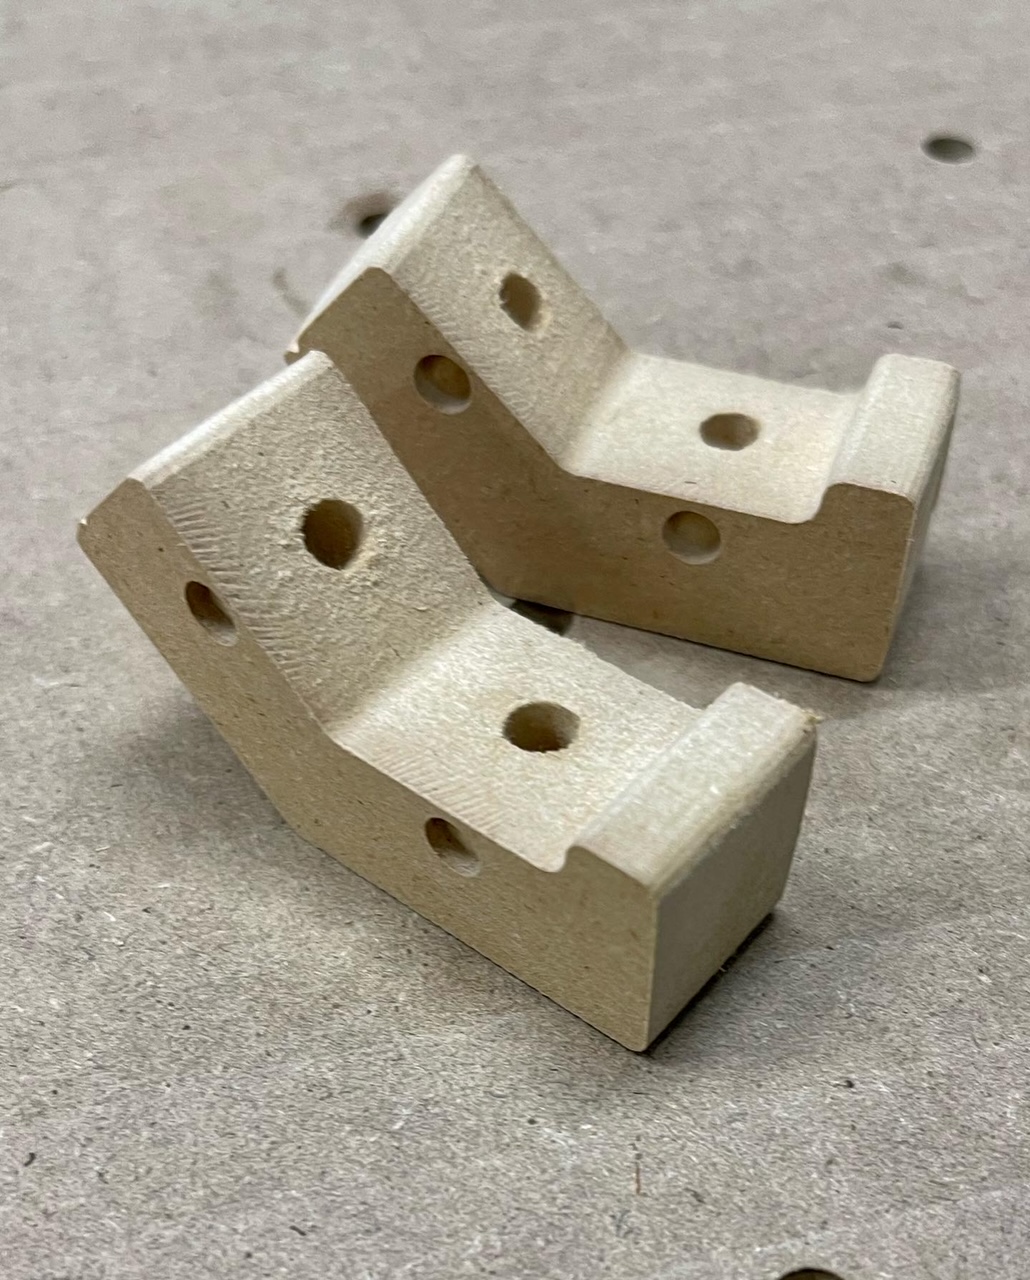
The Gantry Extrusion brackets have two pieces to them and must be glued together. One is the opposite of the other.
The other two parts on the brackets workpiece are end stops for the extrusion.
Remove the two M3 screws from the gantry as shown in the pic, and use longer M3 screws.
Required: M3X25mm socket cap screws.

20 minutes
Add the extrusion to the brackets so it spans the whole gantry. A part of it will have to be trimmed. You can use a table saw or a band saw to cut the extrusion to length. Don’t use a SawStop without turning on bypass mode.
Once you have the extrusion cut to size, add T-Slot nuts to both sides for the end stops.
Add 4 more T-Slot nuts to the extrusion on the opposite side for the light bar..
Attach the end stops to the extrusion with a M5X16 socket cap screw into the T-Slot nut. The overhang is on the top.
Required: 20×20 aluminum extrusion in 2000 mm length. A table saw or band saw to cut the extrusion. M5X16 screws. T-Slot nuts.

6 minutes
Using M3X16 screws, attach the LED light bar to the opposite side of the end stops on the extrusion using T-Slot nuts to attach the brackets. The bracket lips go on top.
Place the extrusion back into the gantry brackets by moving the end stop on one side to be able to slide it towards the outside and fit the other end through the bracket hole.
Requires: M5X16 screws. T-Slot nuts.
10 minutes
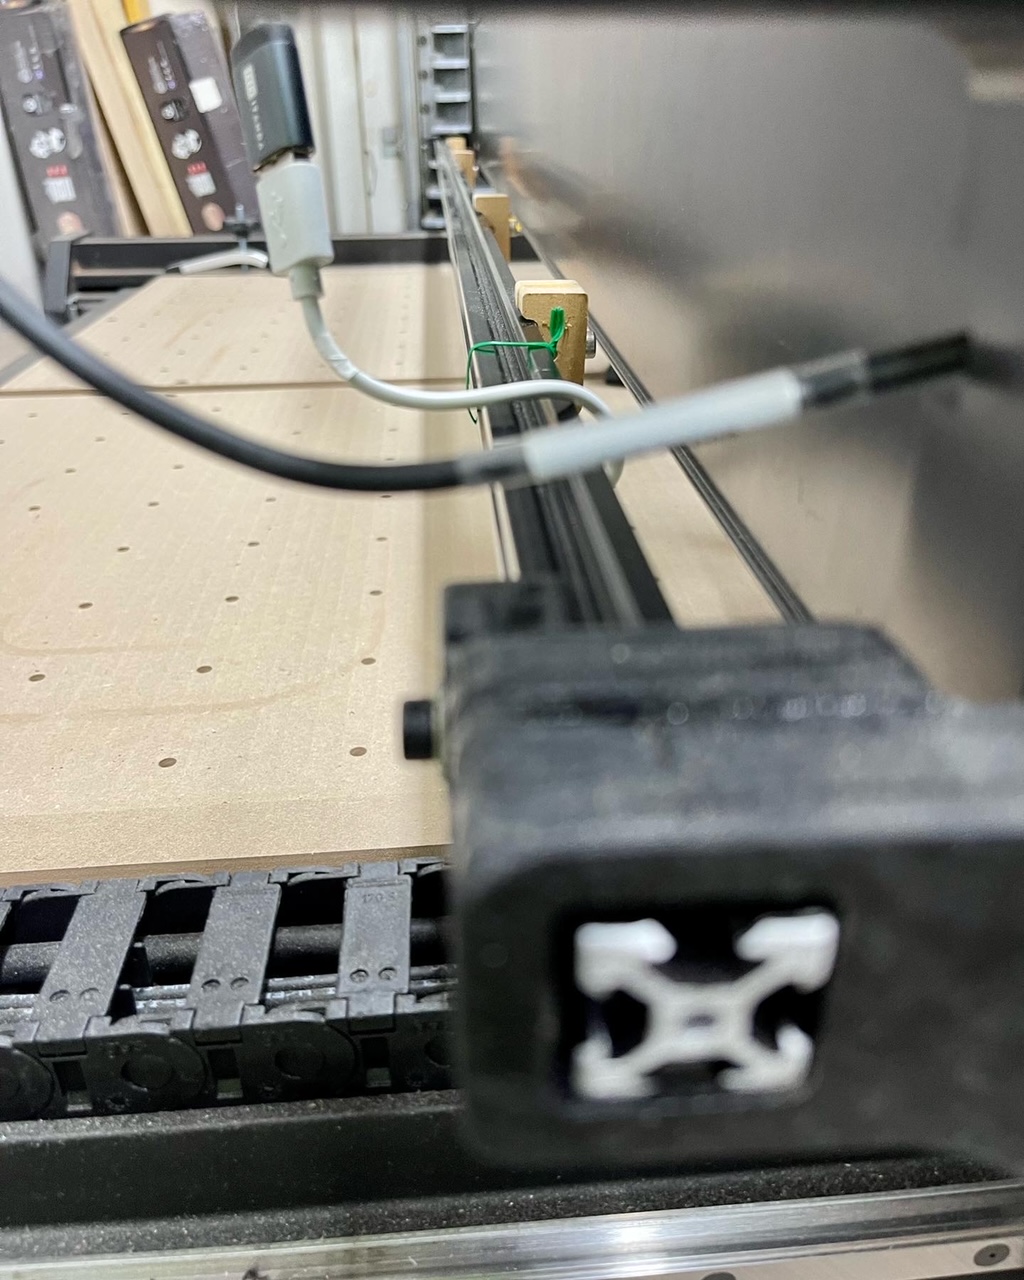
Carefully use a small flathead screwdriver to open the drag chain links. Feed the USB extension cable through.
Requires: Flathead screwdriver

2 minutes
Using a 2A USB charger plug, connect the male end of the USB cable from the drag chain in the charger. Plug the charger into the “Normally On” outlet on the IoT Relay.
Requires: Iot Relay from Digital Loggers. 2A USB charger plug.

Connect the wire to the 1/4 plug using a tiny flathead screwdriver. Make sure the ] end is the same one that goes into the [ of the IOT Relay.
On the relay, you can pry out the small green two wire connector with your hands and use a small flat head screwdriver again to connect the other end of the two wires, matching the [-] and [+] wires.
Push the green connector back into the IoT Relay. Then plug the 1/4 inch jack into the back of the X-Carve Pro controller, in the “MIST” port.
Open a web browser and go to easel. In the machine menu, click “Edit Your Machine”. Check the coolant check box and click Save. Now it’s ready!
Requires: Five feet of two conductor wire. Tiny flathead screwdriver. 1/4 inch male plug to screw terminal adapter.
NOTE: The 1/4 jack I picked came with a tiny flathead screwdriver


