
A solid Wasteboard with lots of clamping options is a must! Whether you need to replace your current wasteboard or the shipping costs are tough on your wallet this step by step guide will have your machine up and running in no time!
| Material | Description | Price | ||
|---|---|---|---|---|

|
Socket Head Cap Screw - Packs of 10 each |
Length: 30mm, Quantity: 10, Thread Size: M5 |
||
|
|
Socket Head Cap Screw - Packs of 10 each |
Length: 50mm, Thread Size: M5, Quantity: 10 |
$6.99 |
|

|
Threaded Inserts |
Size: M5 Dont use, Quantity: 100 Dont use |
||
| This project's Bill of Materials is not complete. Add to Cart |
$6.99 |
|||
5 minutes
Tools Required:
-Drill
-3/16" Drill Bit
-Countersink Bit
-Orbital Sander
-Saw (Table saw, Circular Saw or Jig Saw)
-Pencil
Materials:
MDF (1/2" for 500mm and 3/4" for 1000mm)
M5 Threaded Inserts
M5 Socket Head Bolts
3 minutes
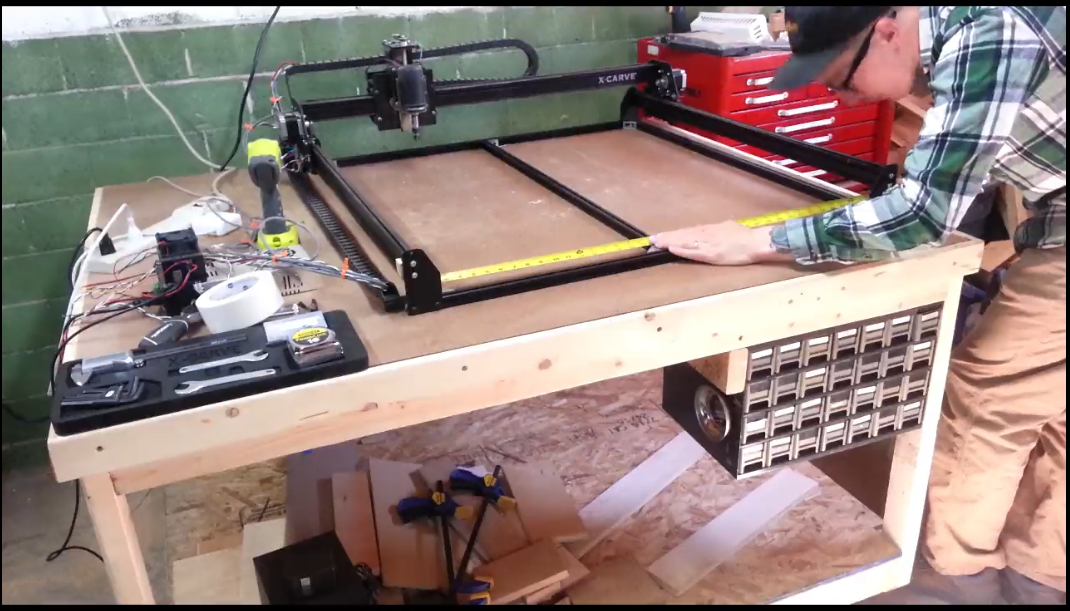
Start by measuring both the X and Y rails. Measure the front and back as well as the left and right side to ensure your machine is square.
The 3/4" MDF will hit the V-wheels on the Y axis if it sits directly underneath them so ensure it is clear of the Y axis before getting final measurements.
10 minutes
You can use a Tablesaw, circular saw or jig saw to cut the wasteboard to final size.
Note: If you do not have access to any of these saws or if the MDF doesn’t fit in your vehicle many big-box stores will cut sheet goods for you.

15 minutes
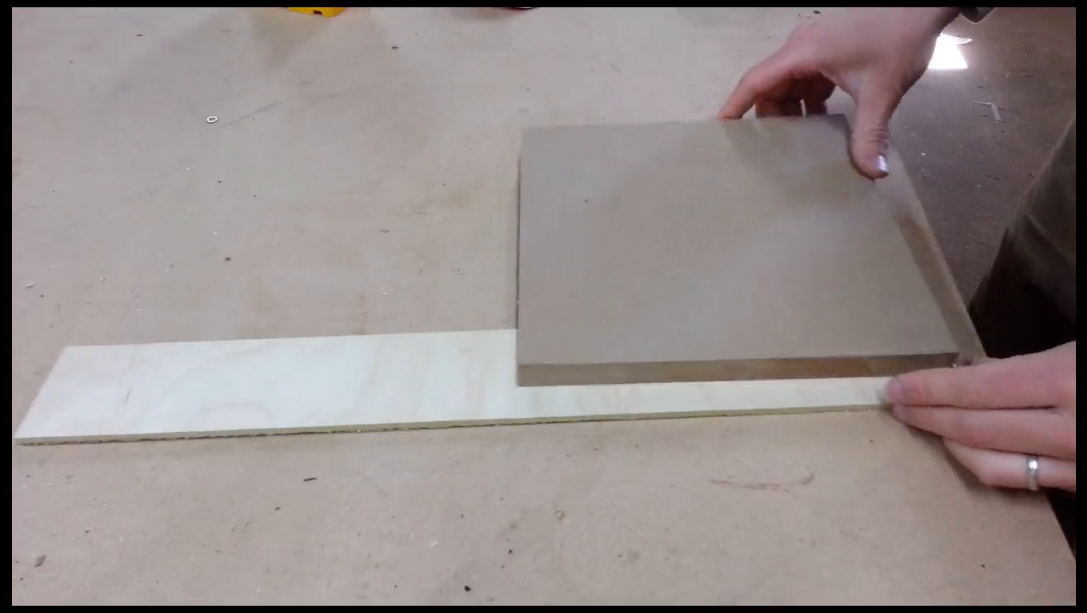
Rip a piece of scrap 1/8" material to about 3" wide and cut to the same length as your x-axis wasteboard dimensions.
Determine the total number of holes you want across your wasteboard, add one and divide by the dimension of your drill template.
Example: If your X axis is 34" and you want 10 holes, Divide 34" by 11 = 3 1/16" Spacer Block
Use the spacer block to transfer evenly spaced lines onto your drill template.
Draw a centerline through the entire drill template intersecting with the lines drawn on the spacerblock.
Repeat the process for your y-axis, transferring the lines instead to both the y-axis sides on the wasteboard.
15 minutes
Using a 3/16" drill bit, drill holes at the intersecting points on the drill template.
Clamp the drill template to the wasteboard being sure to alight the centerline on the drill template with lines drawn on both sides of the wasteboards y-axis.
Drill through the template holes all the way through the MDF.

10 minutes
Flip the wasteboard to the underside and use a countersink bit to countersink all the drilled holes, this will allow for the threaded inserts to sit flush or below the surface of the MDF.
Sand both sides of the wasteboard with a low grit sandpaper and orbital sander to remove any tearout or burs insuring a flat surface.

5 minutes
Add the threaded inserts to the underside of the wasteboard. Use a drill and not a driver as the threaded inserts are very soft and strip easily. Drill them until the heads are flush or below the surface.

Drill additional holes above the groves in your x and y rails. Add insertion nuts to the rails and bolt it to the machine.
Additionally I added 3" screws through the wasteboard and directly into the top of the workbench securing the machine to the bench.
Screw and 24"x 6"x 1/8" piece of MDF to the front left corner of the wasteboard. Run the attached easel file cutting through the 1/8" MDF completely giving you a 90 degree bump stop square to the machine.
Search through the projects section for great clamp projects. I have been using the spiral clamps as they seem to work really well!


Chris Rader
Justin C
TLG
Theo Retos
Jeff Taylor
Jeff Taylor
MICHAEL ILLINGBY
don merrifield