
A playful spinner toy that can be customized with your own text and images.
This project was originally created for the 2018 Traverse Conference in Boulder, Colorado, to inspire educators with the awe of possibilities that digital fabrication and 3D carving makes available to them.
1 minute
In addition to the items in the Bill of Materials section, the following items were also used in this project:
18 – 4-40 × 1/2" Button Head Socket Cap Screws
18 – 4-40 Hex Machine Screw Nuts
8 – 8mmx30mm Round Fluted Wooden Craft Dowel Pins (trimmed after being inserted into the MDF base
1 – Wooden Drawer Knob (drilled to fit dowels)
Also, the following tools were used in the assembly process:
- Wera (Model 05118076001) 2054 Screwdriver for Hexagon Socket Screws, 1/16″ × 60mm
- Drill
- 5/16" drill bit
Two last notes:
1) The HDPE used for the gears and the medallions can be changed to any single or two-color style desired, so long as they are 1/4" thick pieces.
2) This project was originally designed so that it could be completely fabricated within the size limits of the Carvey. It can of course be adjusted and optimized for the working limits of an X-Carve.

45 minutes
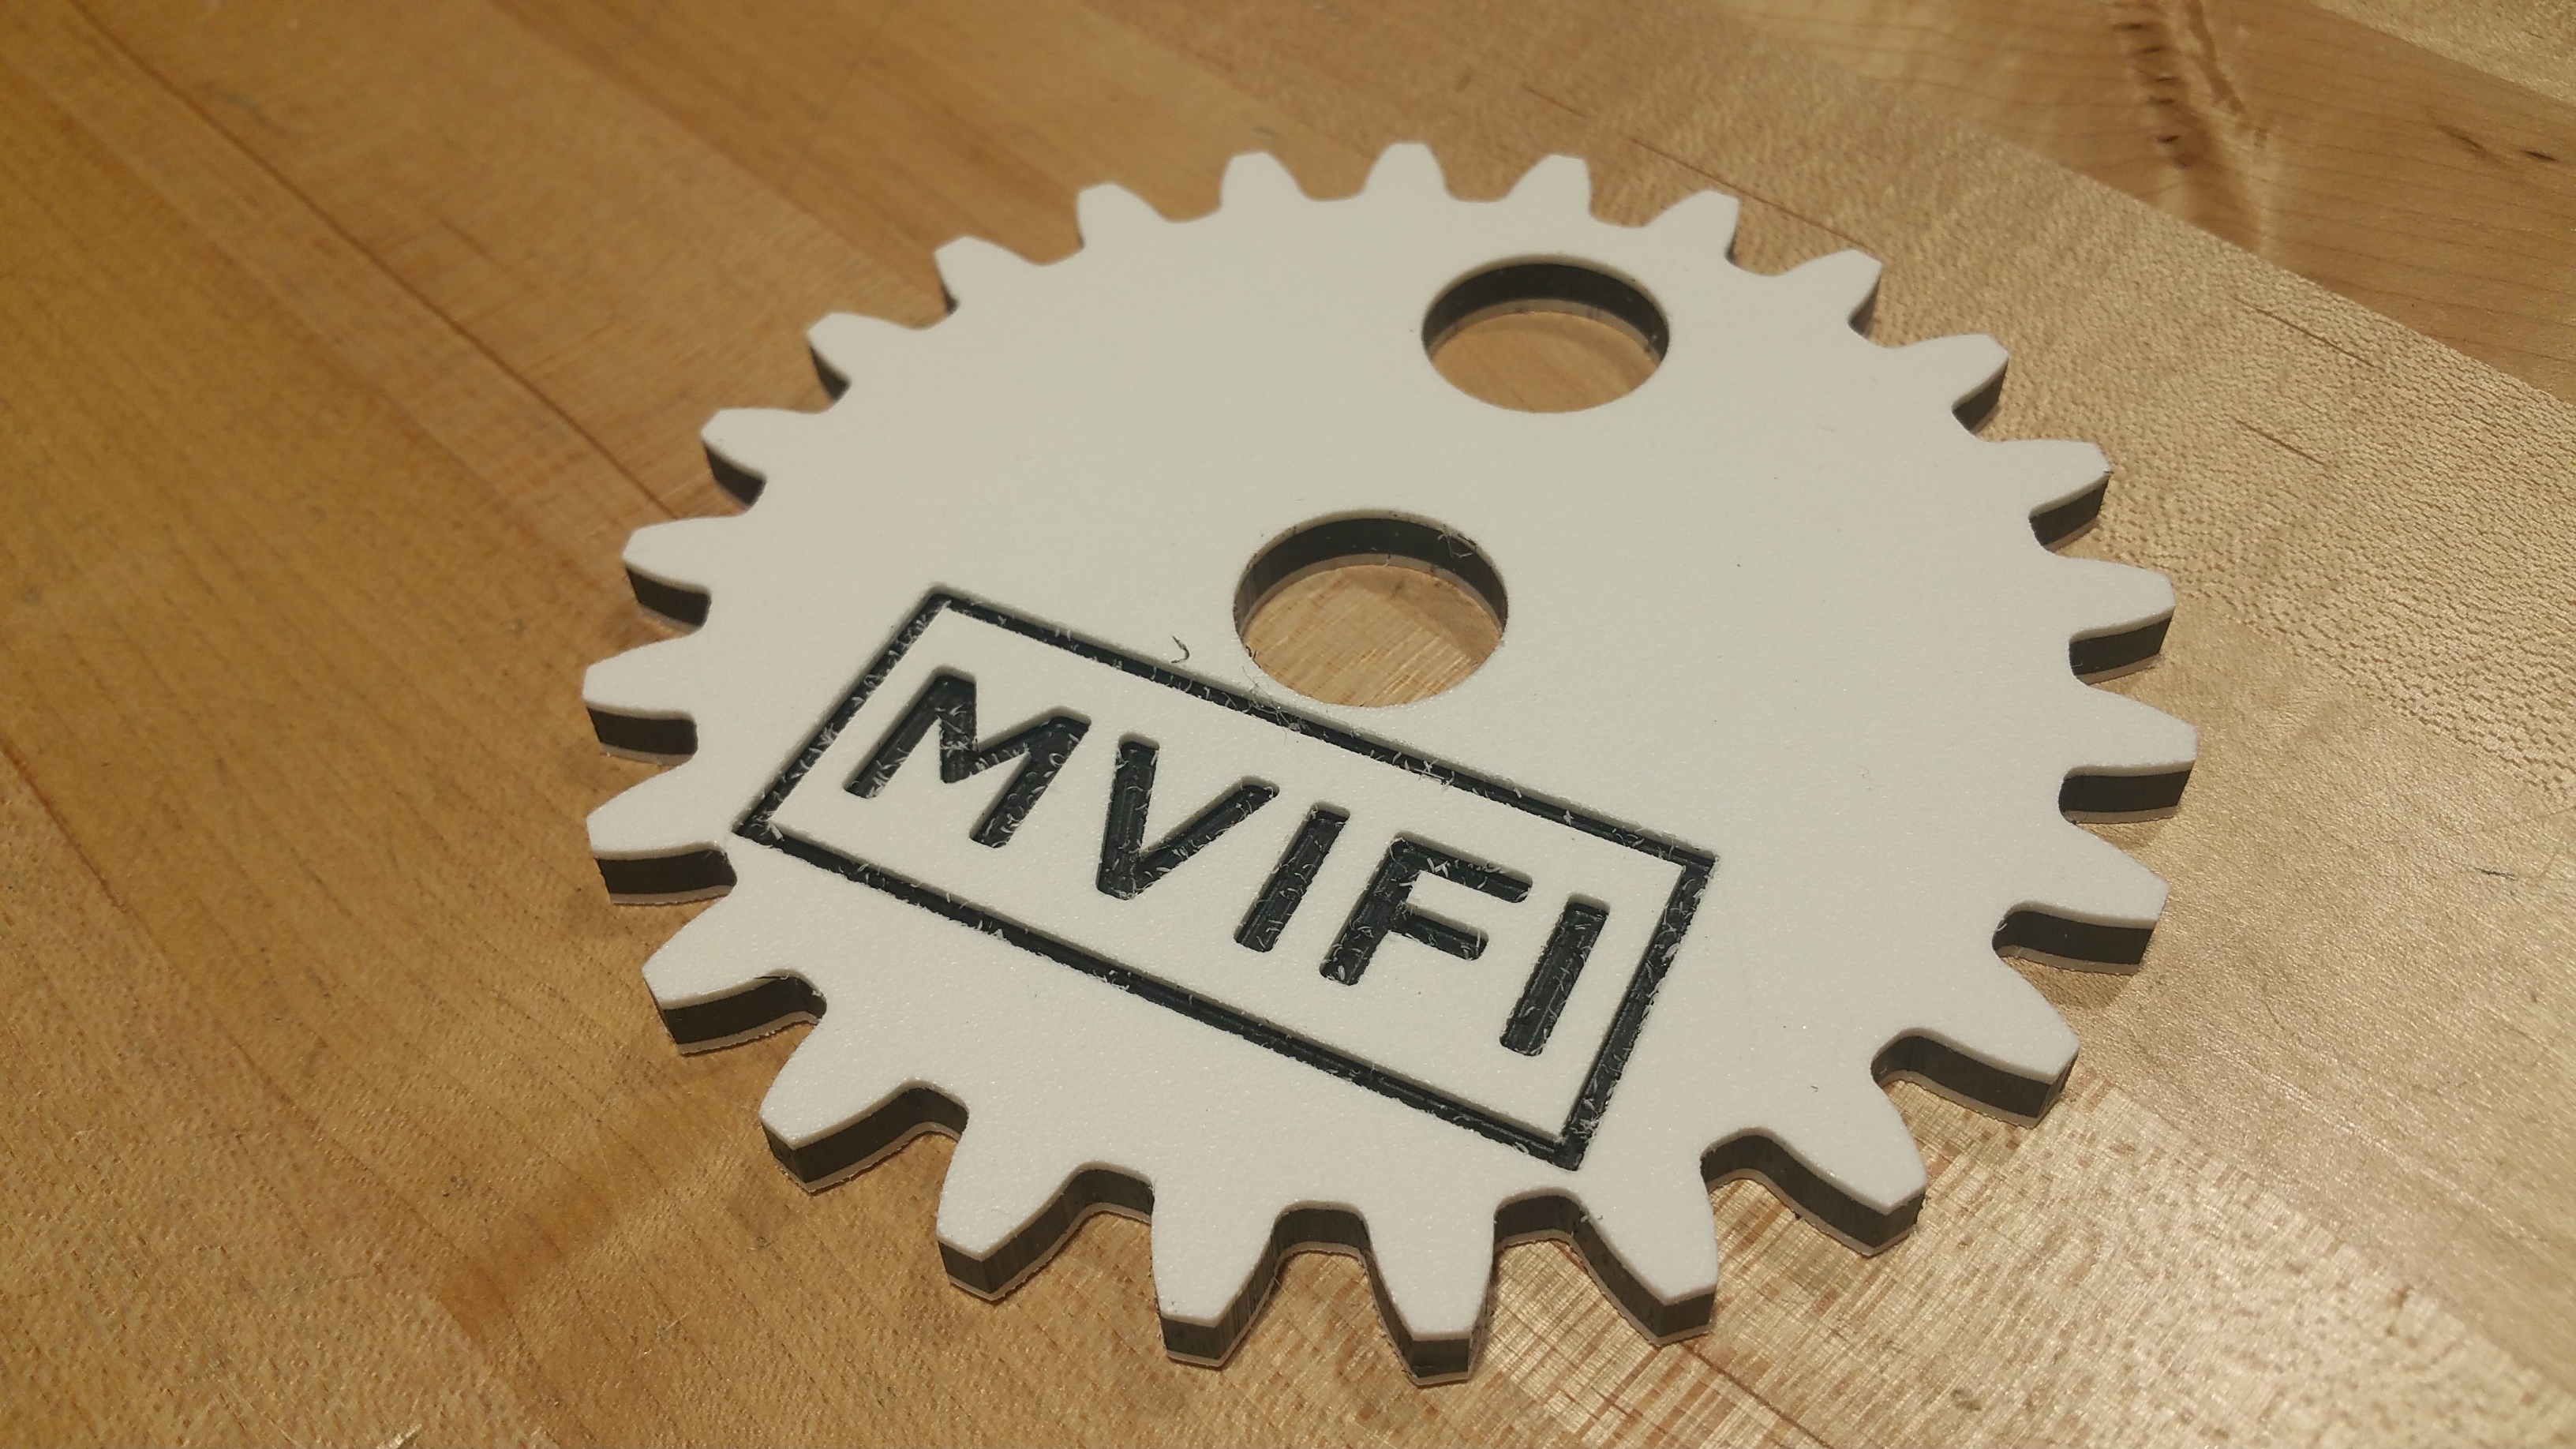
Depending on the material you have, use the correct workpiece in Easel to carve either a single gear, or multiple small gears, so that you have a total of 6.
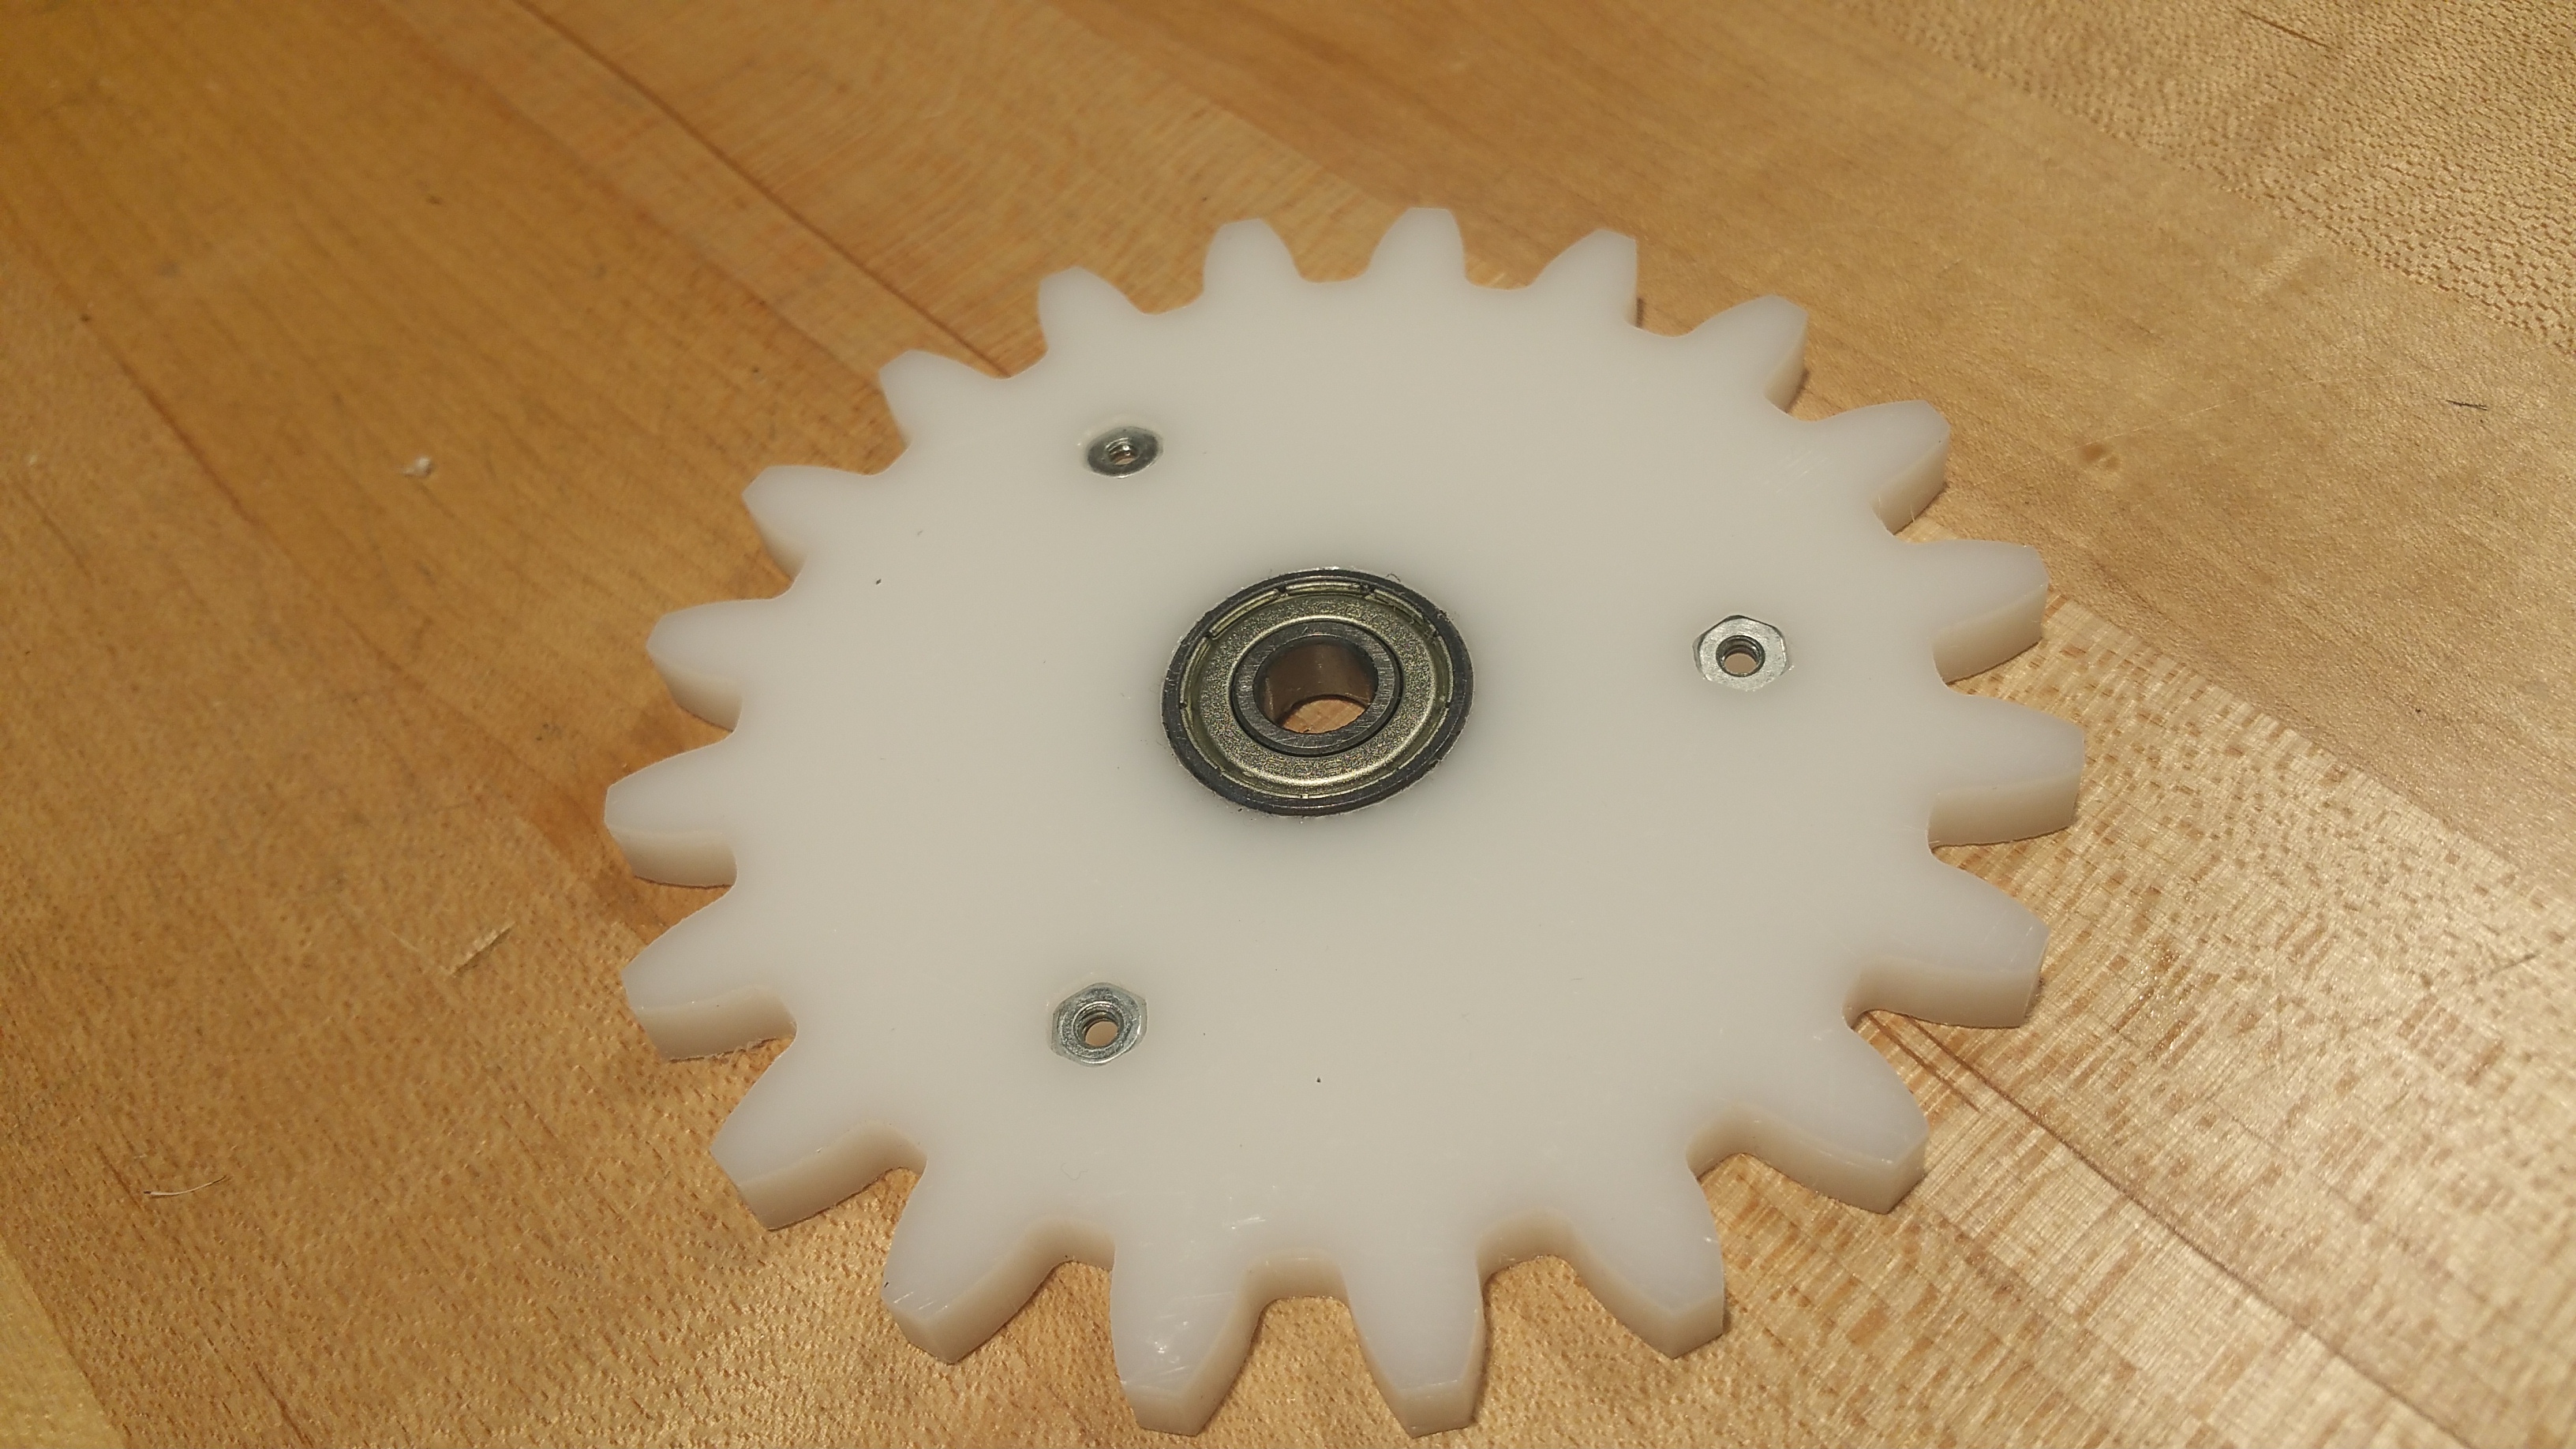
Insert a bearing into the large hole in the gear.
Insert the hex nuts into the recessed sections of the gears.
**If you need to know more about the small gears, check the “Notes” for the various workpieces in the Easel file.

11 minutes
After adding any desired text or images to the large central gear, carve it out of a piece of HDPE.
While the machine is doing it’s thing… :-)
…use a 5/16" drill bit and drill to make a bigger hole in the wooden know so that the dowel can be inserted. A bit of glue might be needed to make the dowel stay.
When the carving is done, insert the bearings into the two large holes.
The wooden dowel will have to be trimmed to make it stick out of the gear at your desired height.
**If you need to know more about the large geas, check the “Notes” for the correct workpiece in the Easel file.


60 minutes
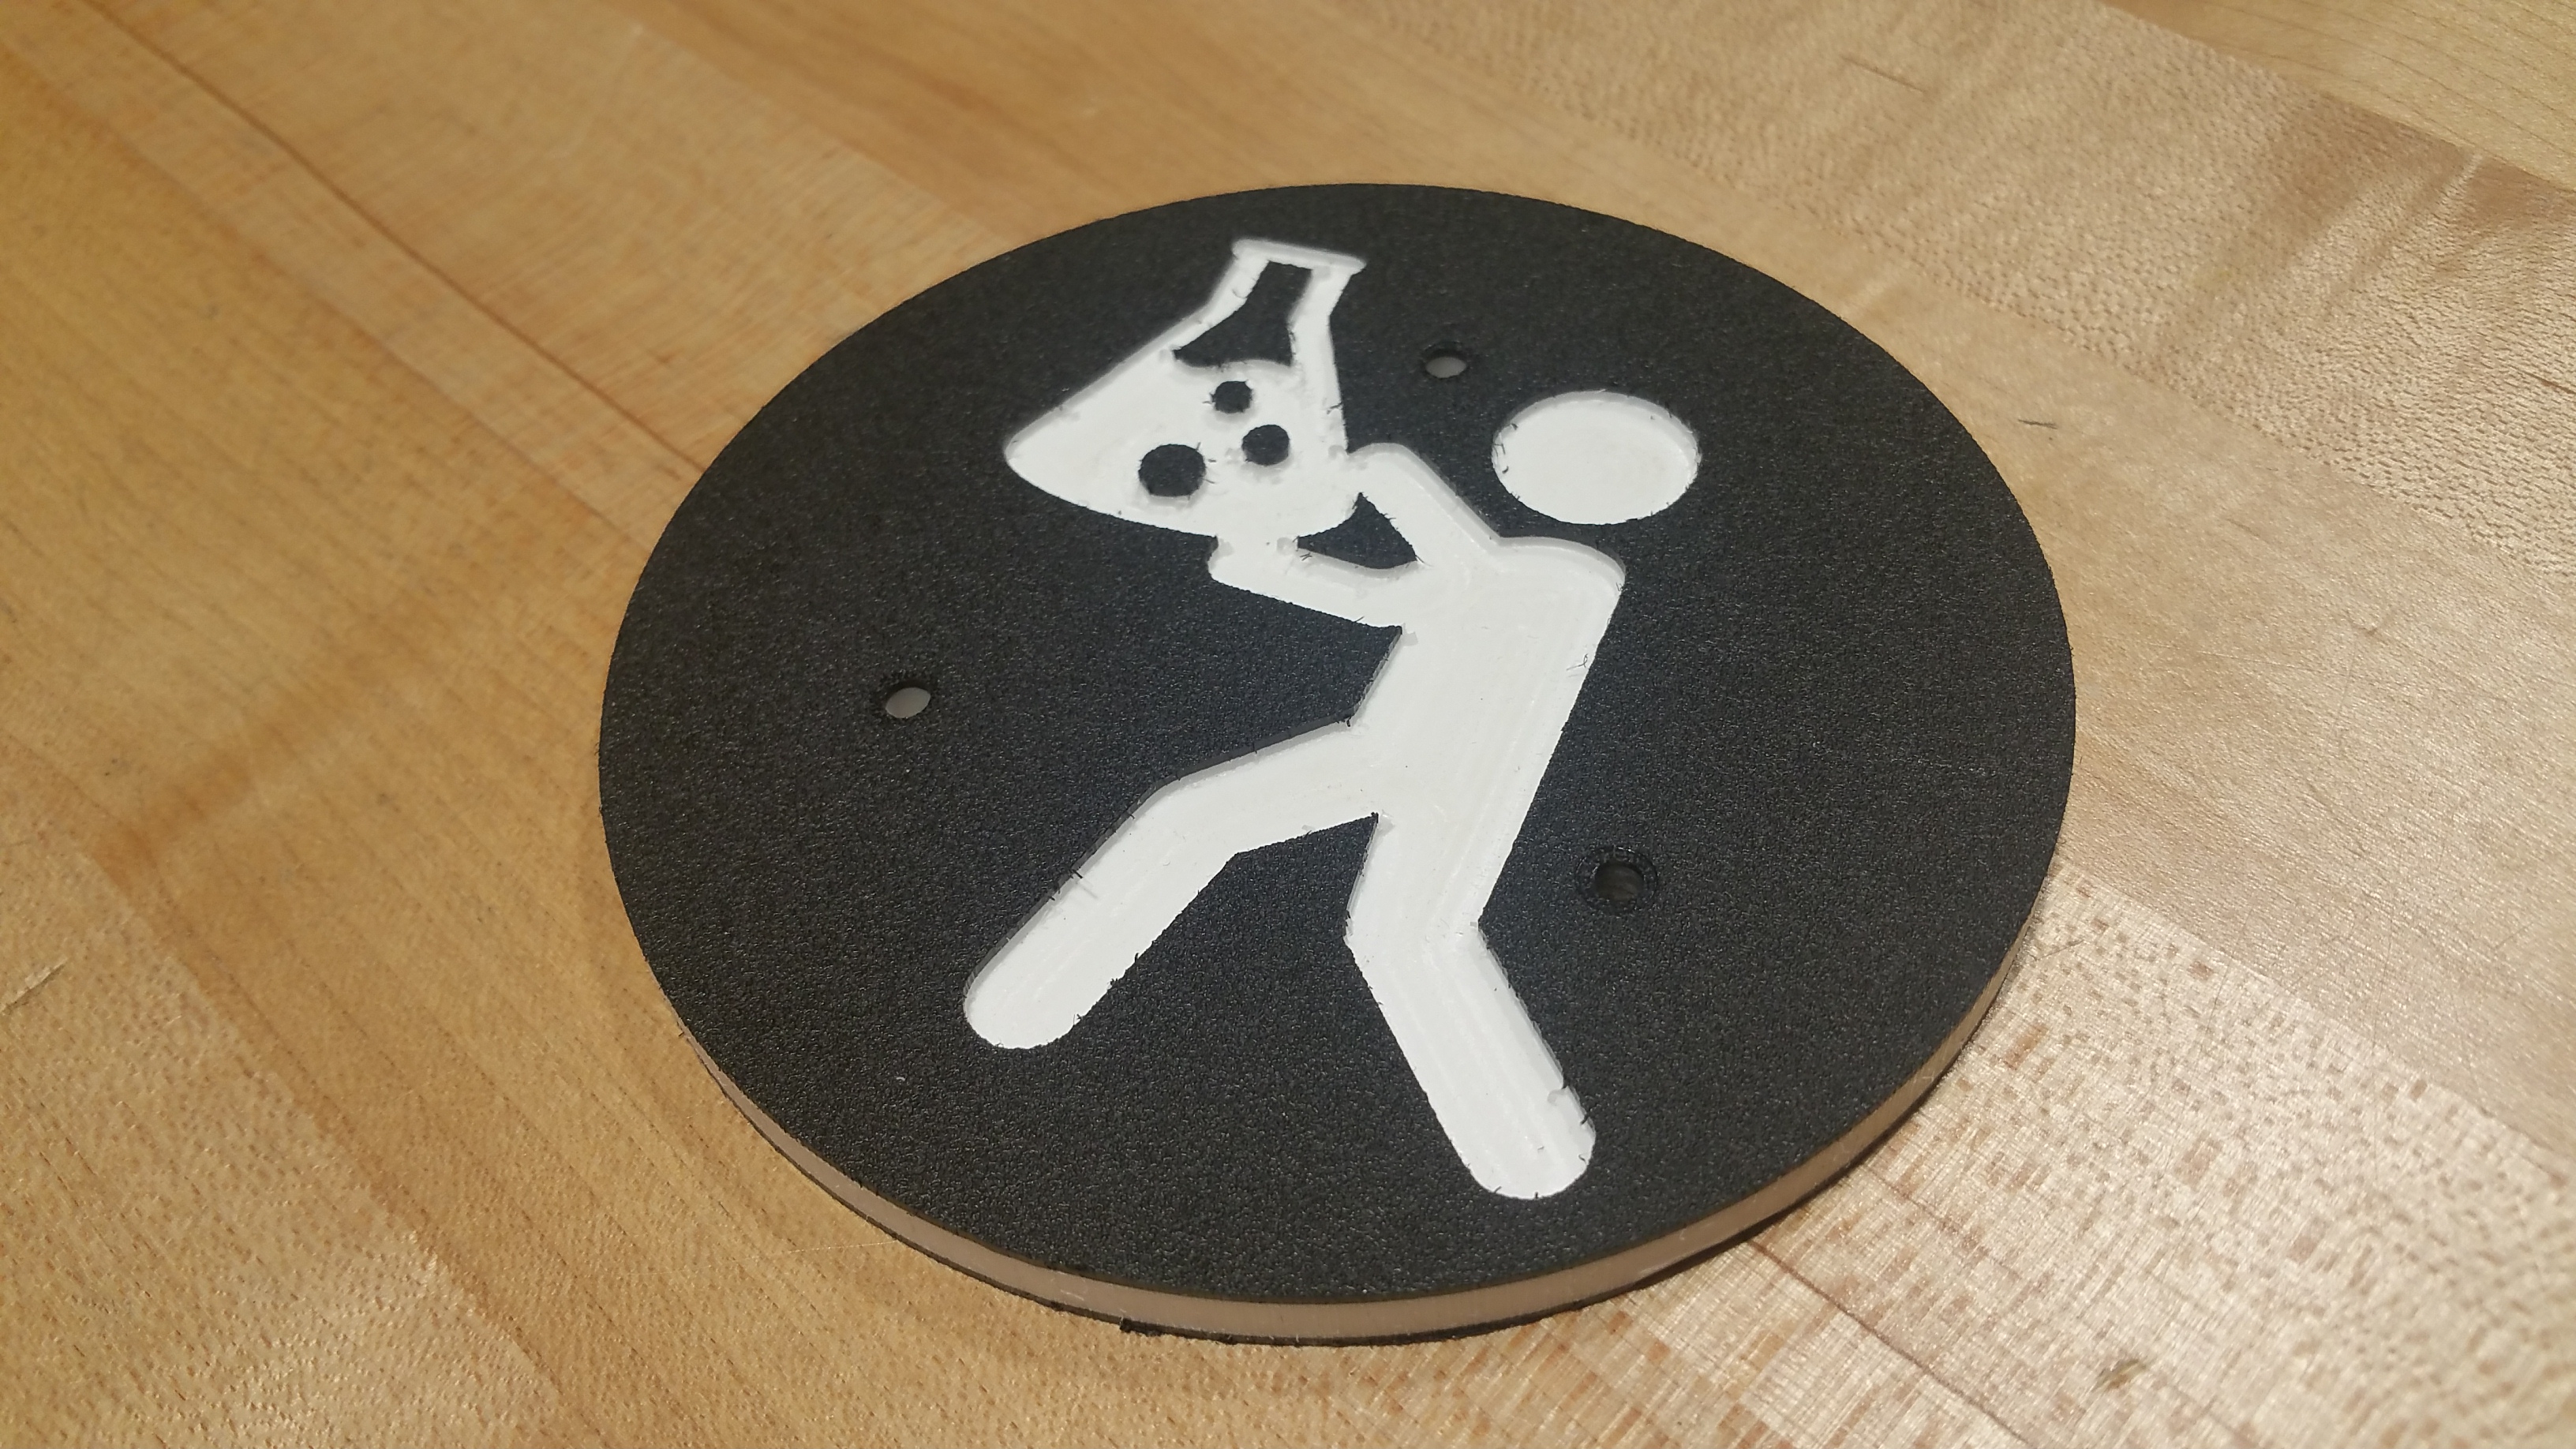
Based on the size of the material you are carving into, you can use the template in the Easel file to carve either a single medallion, or multiple medallions, at a time – just use the correct workpiece in the Easel file.
Add any desired text or images to your medallions, then let the carving begin!
NOTE: If one of the screw holes ends up being in the carved section of your design, you can center a 0.2" circle, with 0" carving depth, around the screw hole. This will create a ridge that the screw head can rest against without having the bottom of it stick out past the nut, that will eventually hold it in place, and scrape against the table base.
5 minutes
Build each “BoJimble” by putting a screw through the holes in the medallion piece and threading them into the hex nuts in the gear piece. Tighten until snug.


10 minutes
Insert the MDF into the Carvey, and open the final workpiece in the Easel file. In about 5 minutes, it’ll be done.
Insert the dowels.

10 minutes
Place the “BoJimbles” and the large gear onto the dowels of the table base. The “BoJimbles” will not rest on the table, and the center dowel will stick up through the large gear in the middle of the table.
This might be what you want, depending on who is going to use it.
For my project, I wanted to have small children be able to swap out the “BoJimbles” that were on the table base with extra ones that had been assembled. I did not, however, what them to be able to get the center gear off as easily. So I cut the center dowel flush with the top of the bearing, and the left the outside dowels long enough so that the “BoJimbles” would be far enough above the table that they could get their fingers under them to lift them off more easily.


Put on the rest of the “BoJimbles” and take your toy for a spin!! :-)

