
A sort of haphazard decoration, but this could also be framed and hung nicely. This is a three-color block printing of a classic Christmas holiday image. Using plain MDF for the blocks makes the image more spotty and rustic, giving it a nice feeling, in my opinion.
25 minutes
The first step is to simply carve the printing blocks. There are three of them, one for each color in the print. The final blocks are 7×7″ cut into 3/4" MDF. You could also cut these in 1/2" MDF and be fine (you have to adjust the easel file for this). Anything thinner than that, though, I think would not be rigid enough to withstand the block printing correctly.
The Easel file referenced above is the complete image, with all three color vectors in it. You really want to do them separately. Here are the separate project file links:
Green (leaves): http://easel.inventables.com/projects/xV0SMm6LObxFeD5MPocYXg
Red (berries): http://easel.inventables.com/projects/-D2puwXLBmboL-w4NU2bWQ
Black (veins): http://easel.inventables.com/projects/qGDvLQDRJK4h2XlojVl9qA
The carve files are set up for a 1/8" end mill bit. If you use something else, adjust the files.


Now that the blocks have been carved, you need to get them ready for printing.
First, sand around the carved bits to get rid of any fuzzies left in the MDF from the carving process. This goes very quickly, and can probably be done with even 400 grit sandpaper. MDF is soft stuff.
Then, coat the carvings with a few coats of shellac, just the parts that will be inked. Go ahead and flood it good – the MDF will soak up a fair amount, and you really want it sealed against soaking up the ink when you get to that stage. A few thick coats should do it.
Once that is all dry, sand the printing blocks a bit to get rid of any roughness from the shellac. This will take just a minute with 400 grit sandpaper again, but getting those inking surfaces nice and smooth will improve your contact with your printing surface and get you a cleaner image. You don’t have to get it perfect, though – imperfections in the final image add interest and character, in my opinion.


Get whatever medium you want to print on ready. I’m just using a simple linen water color paper. I left it large – I will trim it later. Clamp it down with some sort of registration guide on top of it. You can see in the photos I am using a square cut out of 1/4" MDF as a registration tool, making sure all my print blocks go in exactly the same spot. Truth is, this square is a little too large, so I really only use the bottom and one side of it. You could just as easily use a carpenter’s square or anything else with a 90 degree angle. Just be careful not to let your printing blocks slip!
Once your art medium and a registration tool are clamped, go ahead and ink and print your image. For this one, green goes first, then red, and finally black. Black (the veins of the leaves) has to go last, because it will cover some of the green that wasn’t carved out of the leaves in the initial carving (the 1/8" end mill couldn’t get all that, but it doesn’t matter as long as the black goes over the top of the green). For each block, ink it good with your chosen printing ink and a hard rubber brayer. Then press it down on your image, taking care not to let it slide around. Before you do the black one, you will have to let the green dry for a while so it doesn’t pull the green off when you lift the block instead of laying the black down. Touch up that black just a bit with a tiny brush if necessary.
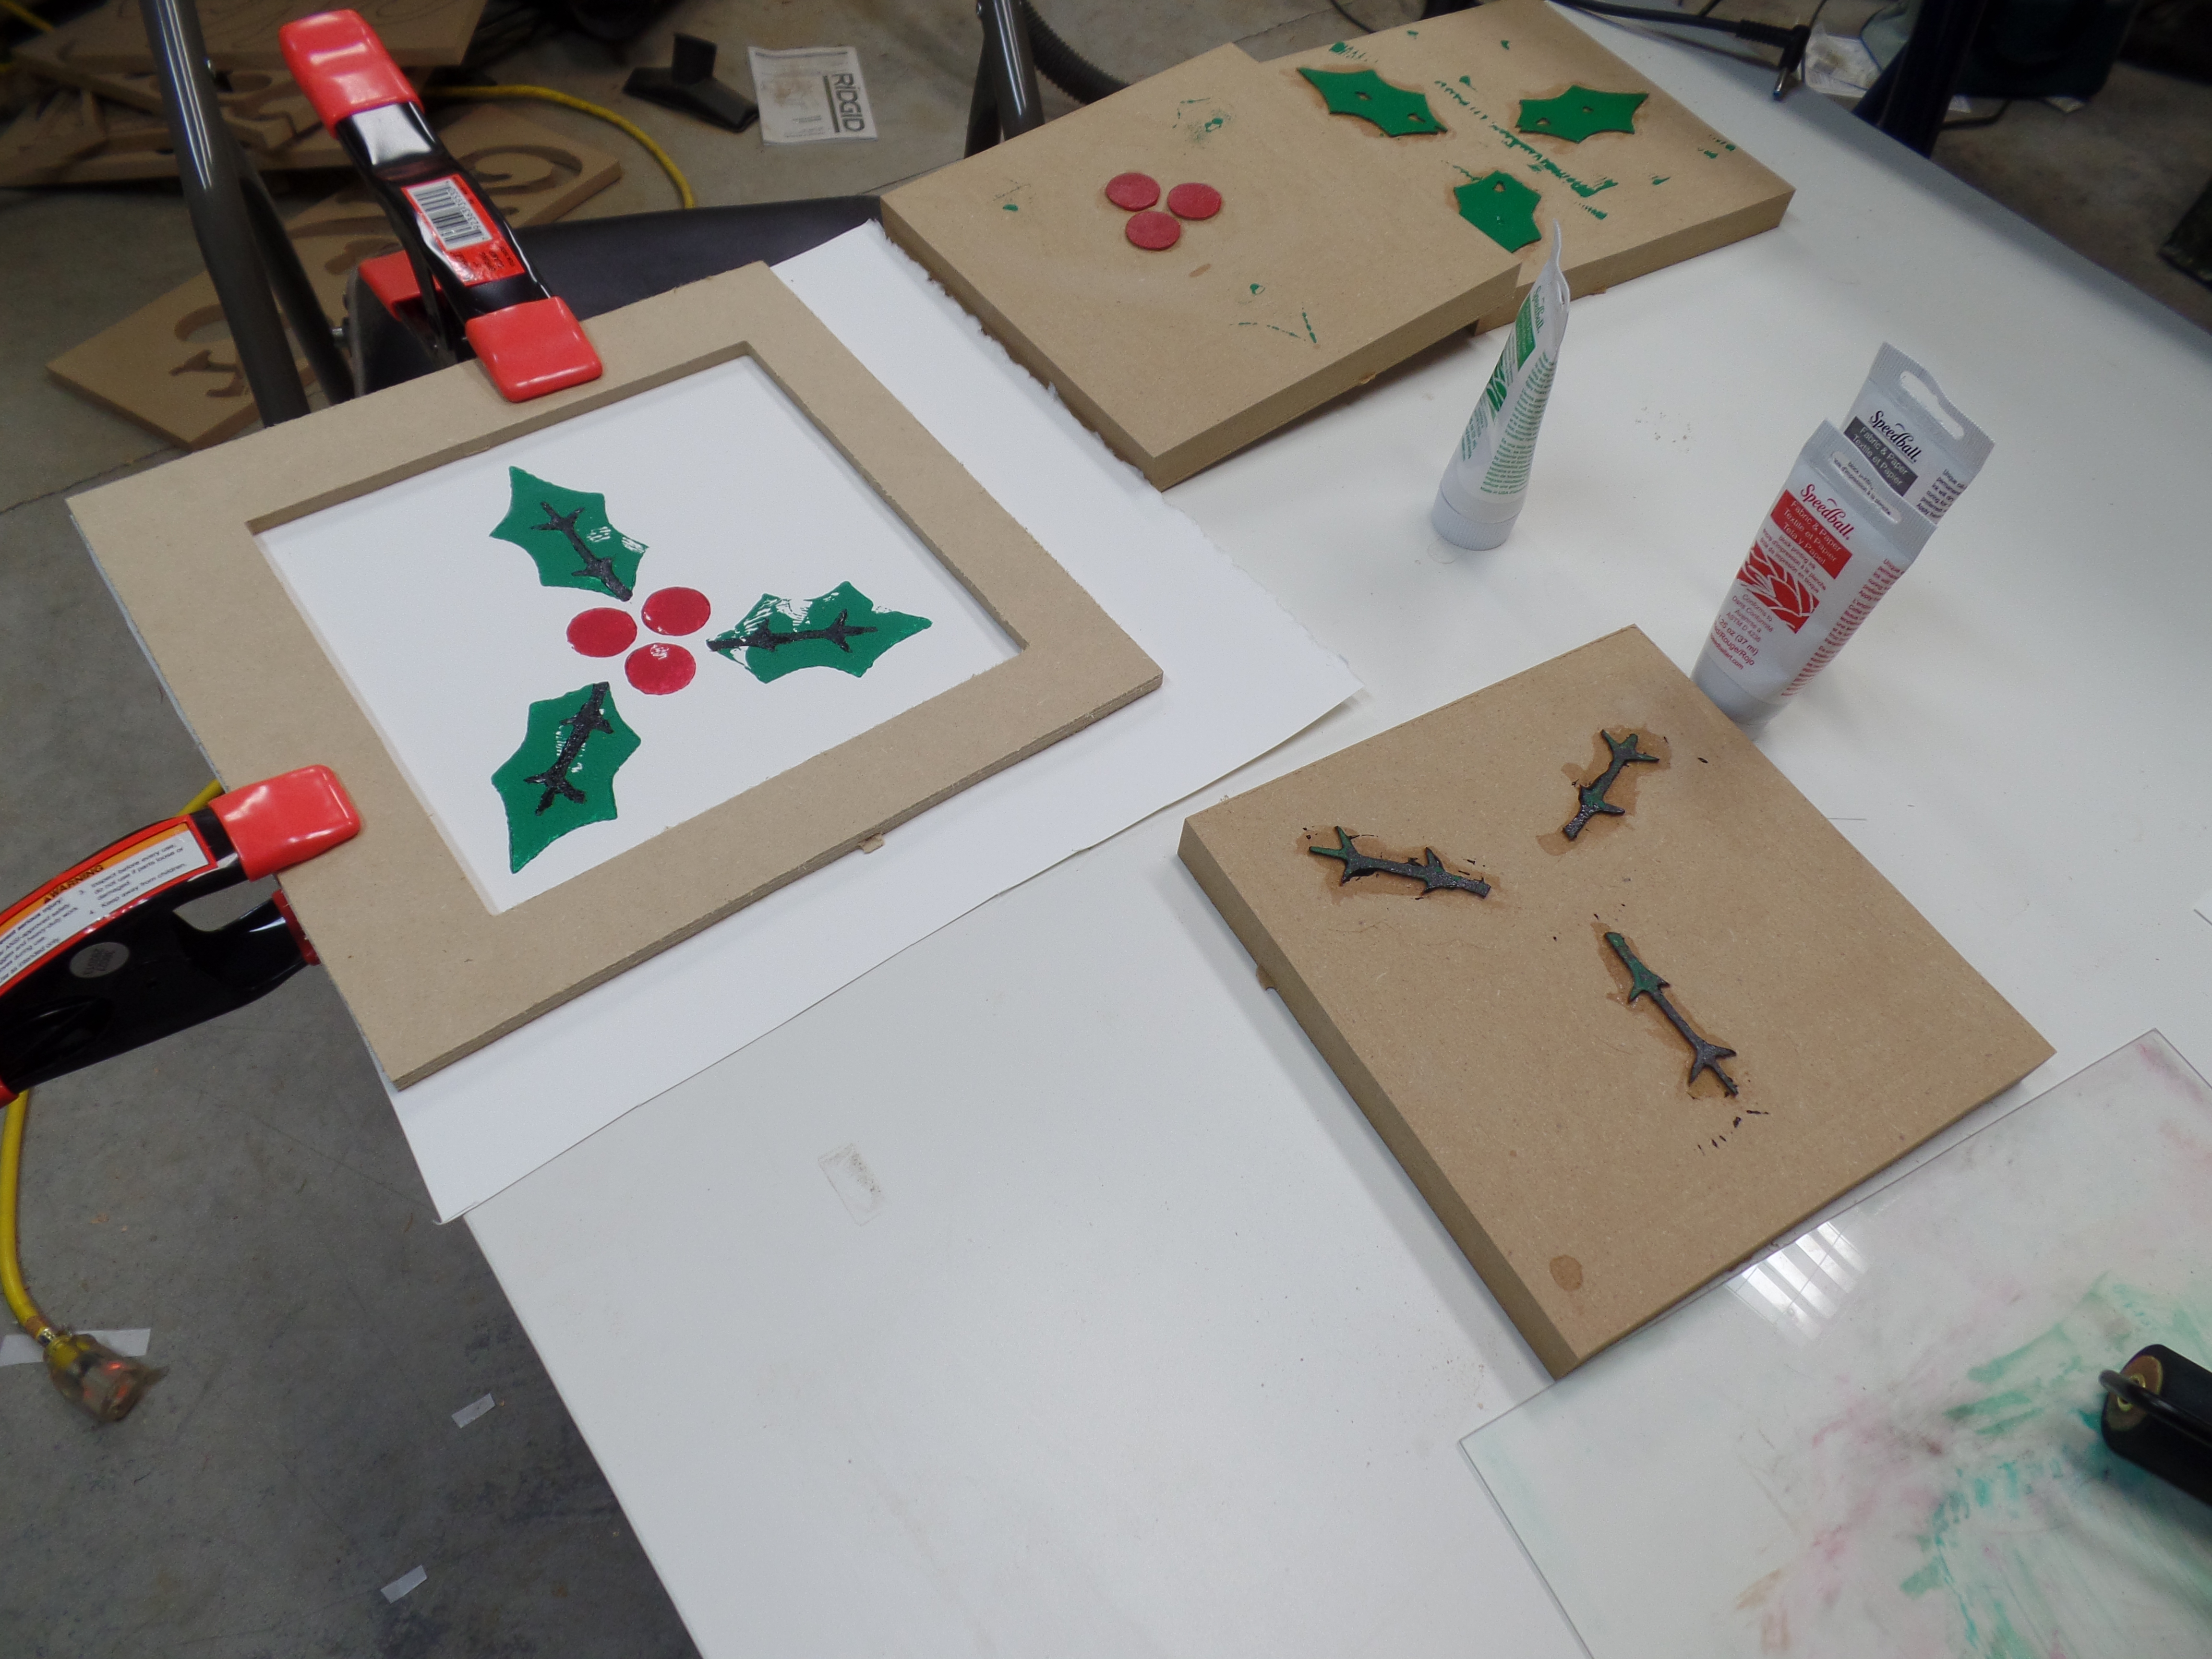


After letting the image dry overnight, I took the printed paper, pressed down a straight-edge, and tore the excess background white paper. I wanted a roughly square image with torn edges (not scissors-cut). Then, just to add a little detail, we ran a gray stamp pad over all the edges just to ink them up a bit and give it some more interest. With that all done, I decided to just stick it to the refrigerator with a home-made wood magnet. I like this one as a random decoration, placed haphazardly in any old location. If you prefer, use paper that you can properly frame or display in some more formal way.
And that’s it! Enjoy your Christmas decoration.


