
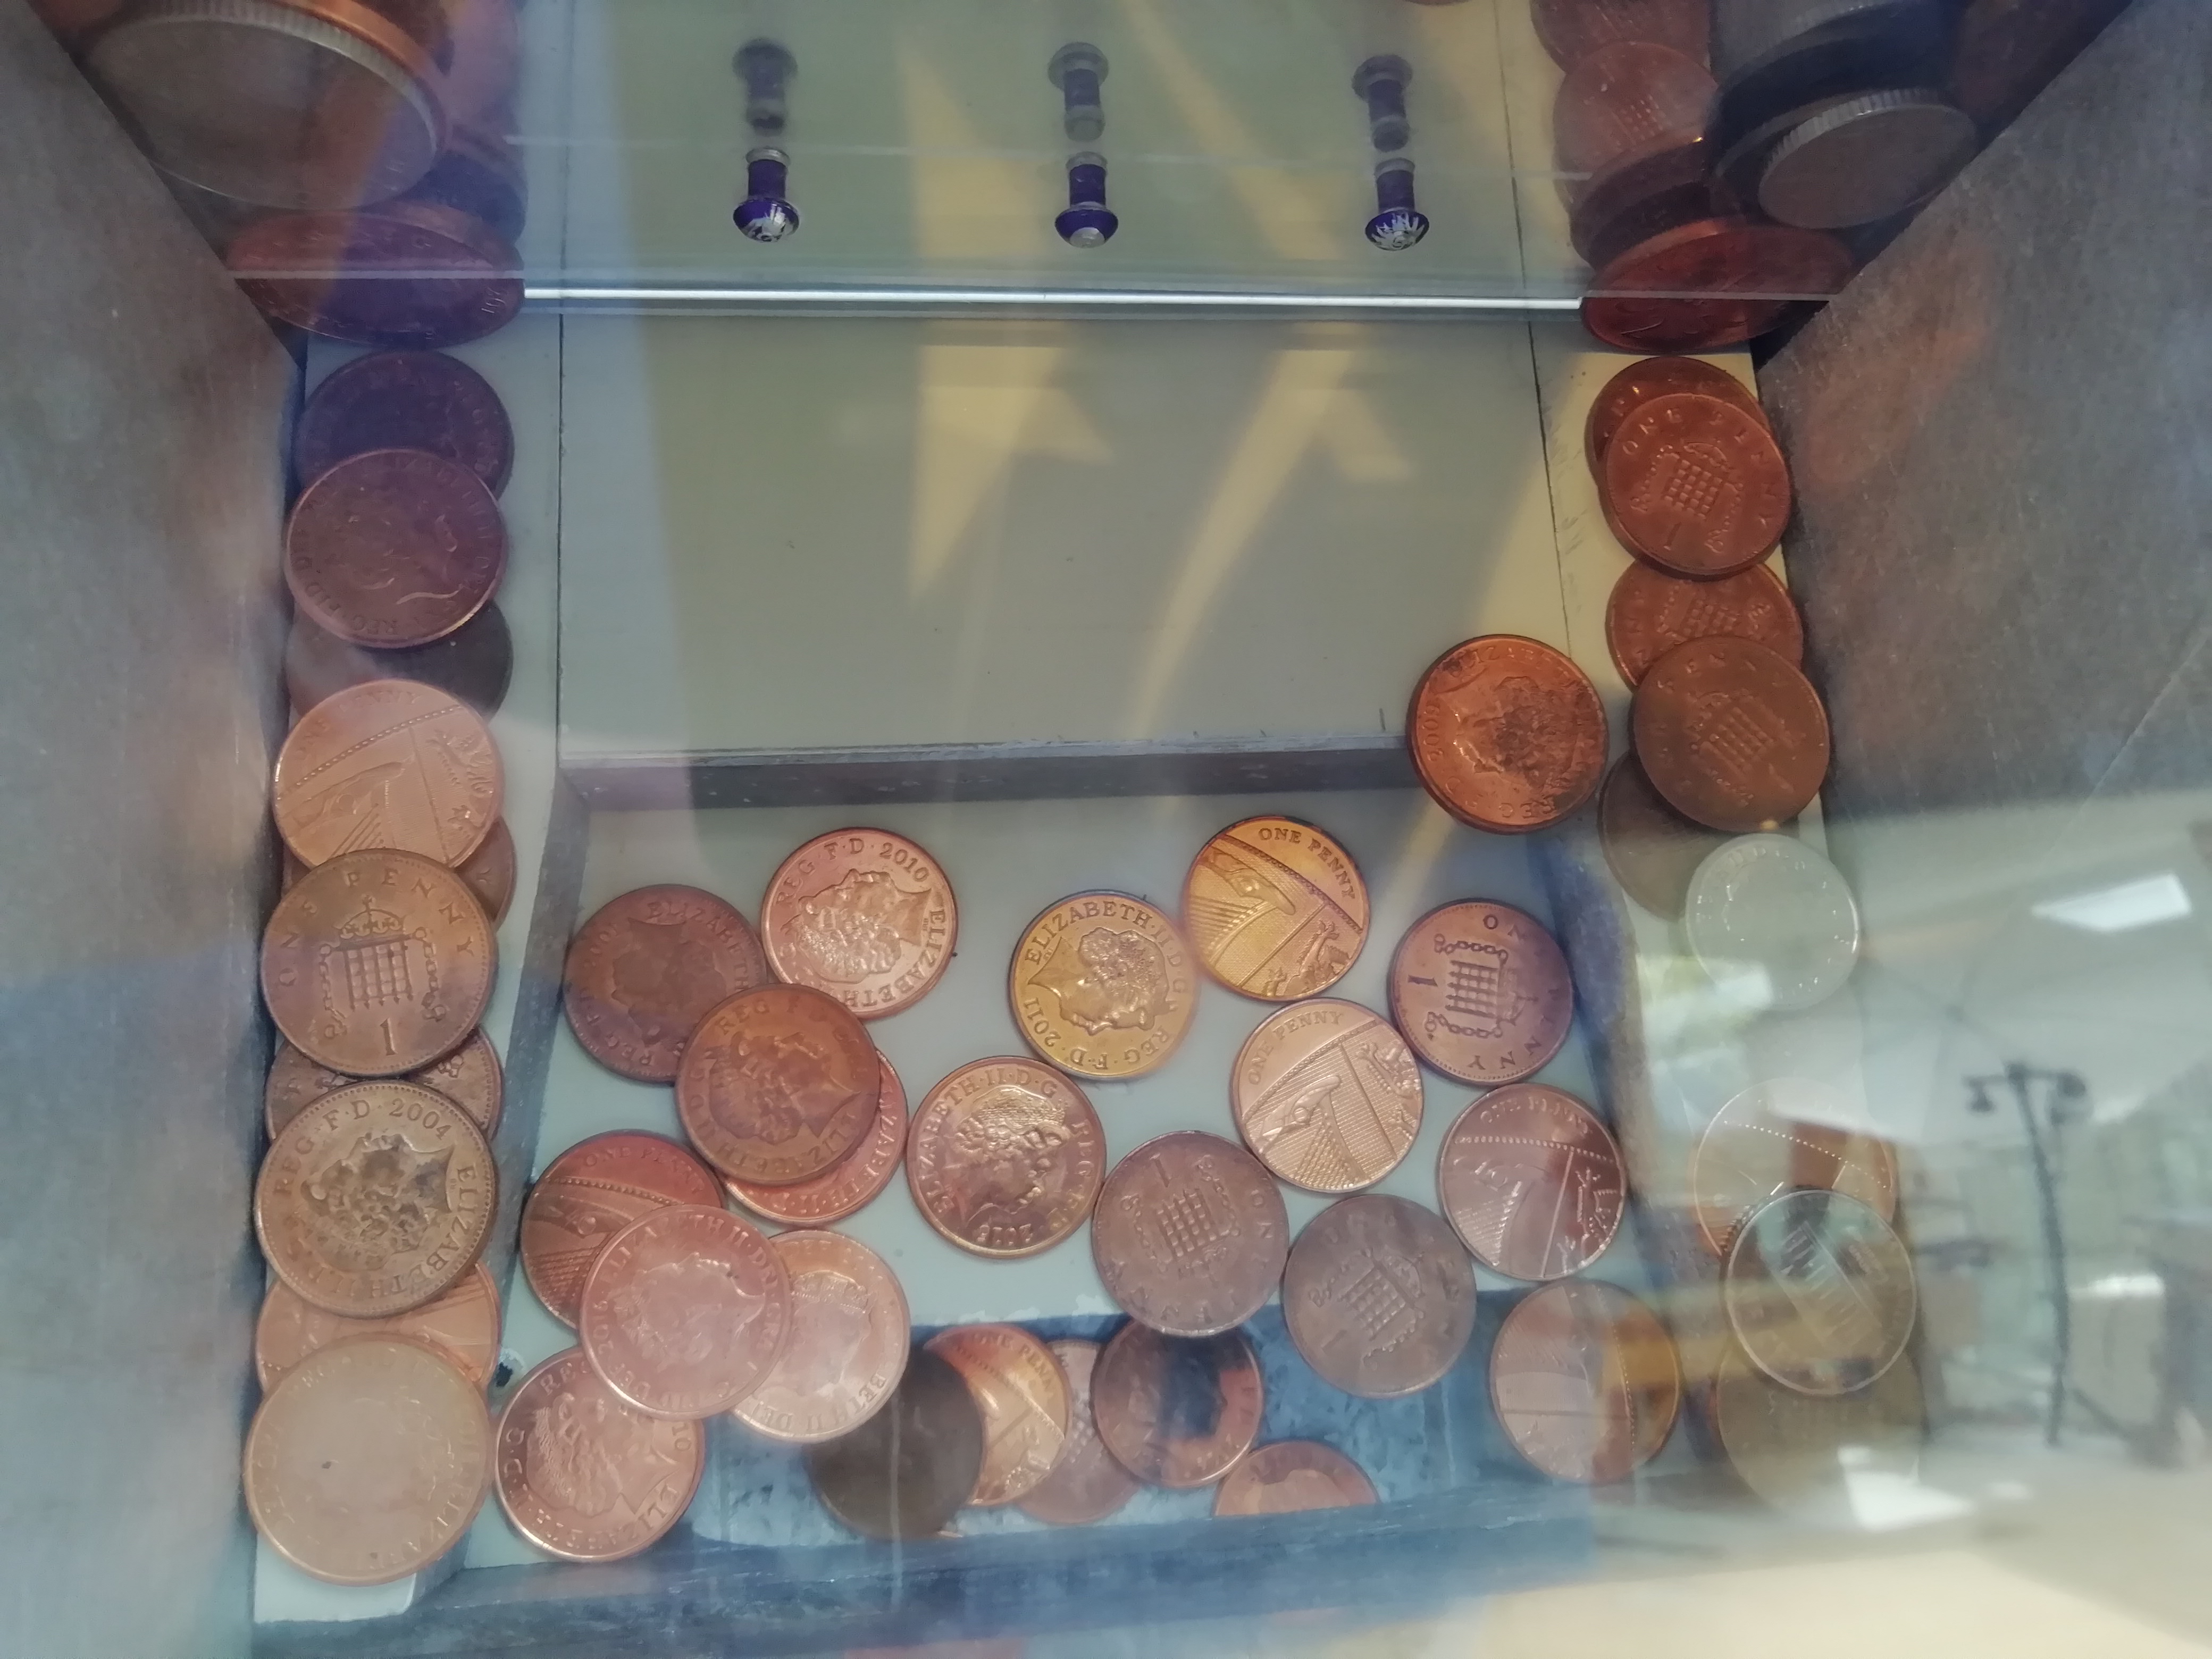
Classic Penny Drop machine, from the arcades of my youth, made in miniature for use as an executive toy.
Unlike the arcade models, no pennies drop into an operator’s profit box, and the machine can be up-ended to empty it out.
120 minutes
Understand what all the parts are, and make adjustments to accommodate variations of materials, gearing ratio, etc. and obviously size of coins to be used.
I used:
18mm melamine coated chipboard for the machine’s base and slider,
6mm MDF for the sides, top, frieze, and front panels (you might like to add a back panel, but I left that out to have easy access from behind),
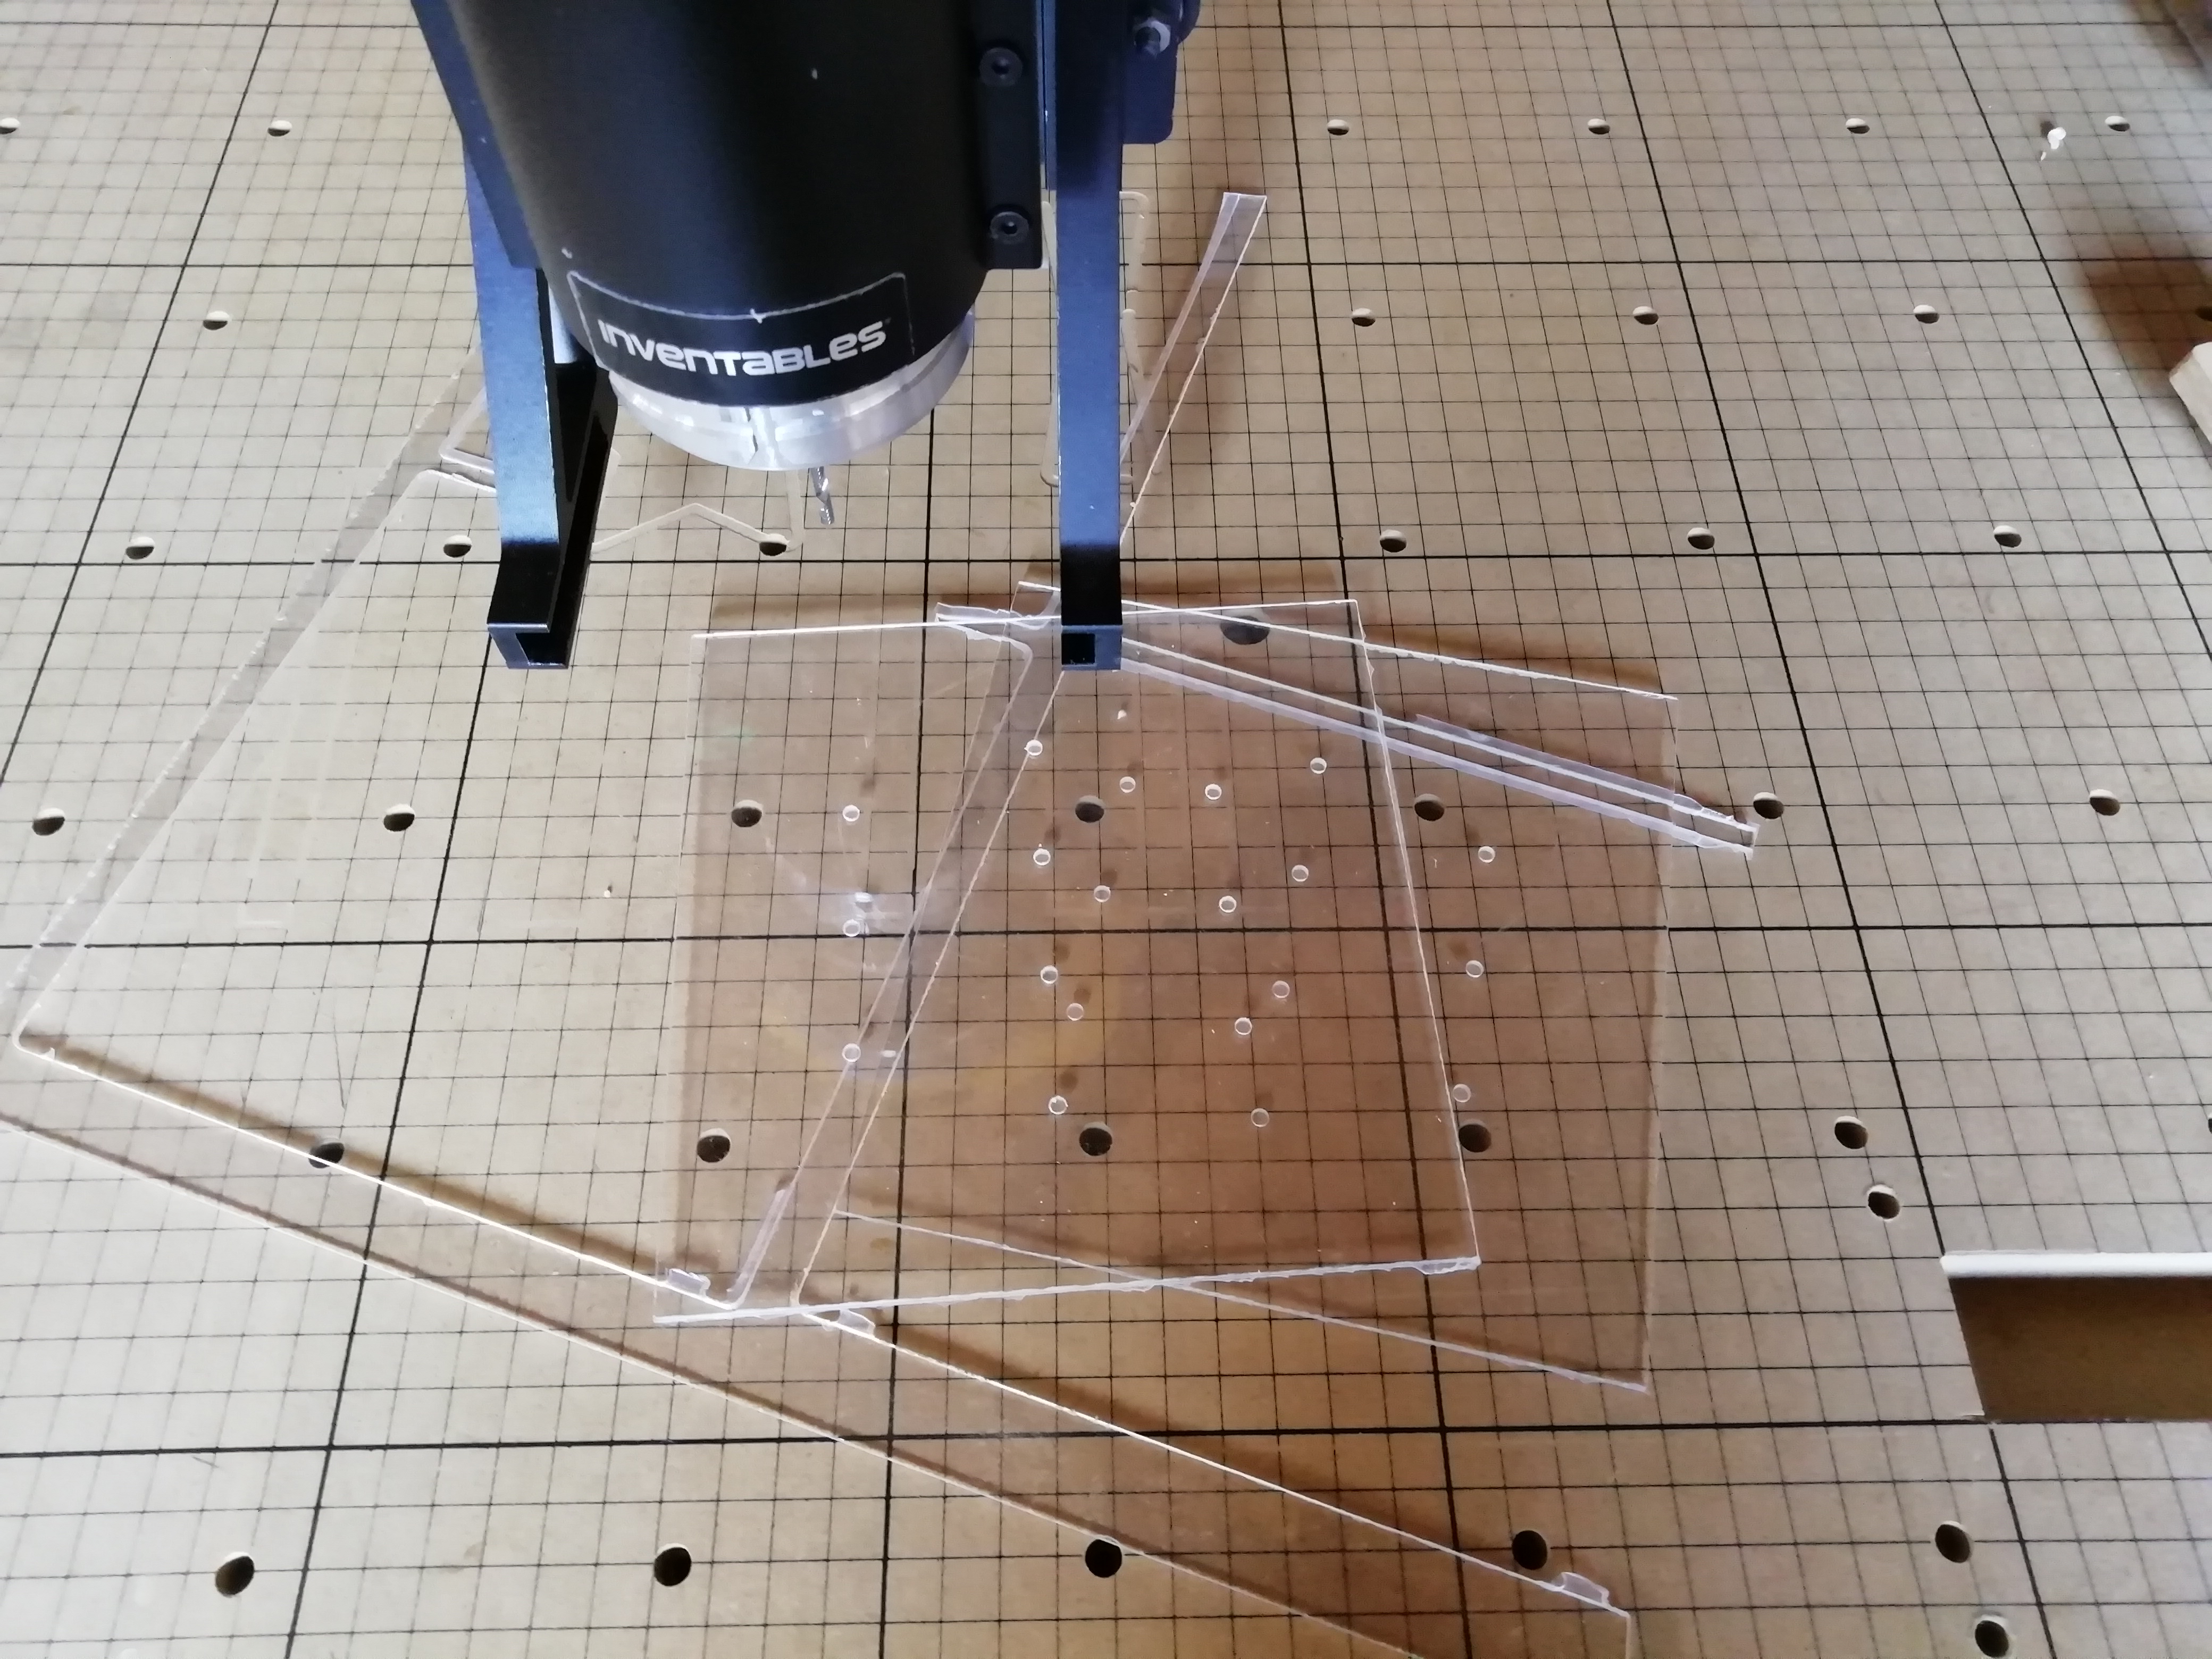
2mm clear acrylic for the drop screens (the Easel project contains three pieces, but I replaced the plain third piece with a mirror),
0.5mm clear acrylic for the front cover screen,
10mm HDPE (from a chopping board) for the gears,
3mm diameter aluminum rivets for the ‘bounce’ bars,
Universal synchronous motor by Corgi controls (6W 5rpm 230Vac),
15mm Skate bearing to pivot large gear,
and, of course, made it to fit new British pennies.
Tip – Watching the video might help with understanding throughout.
240 minutes
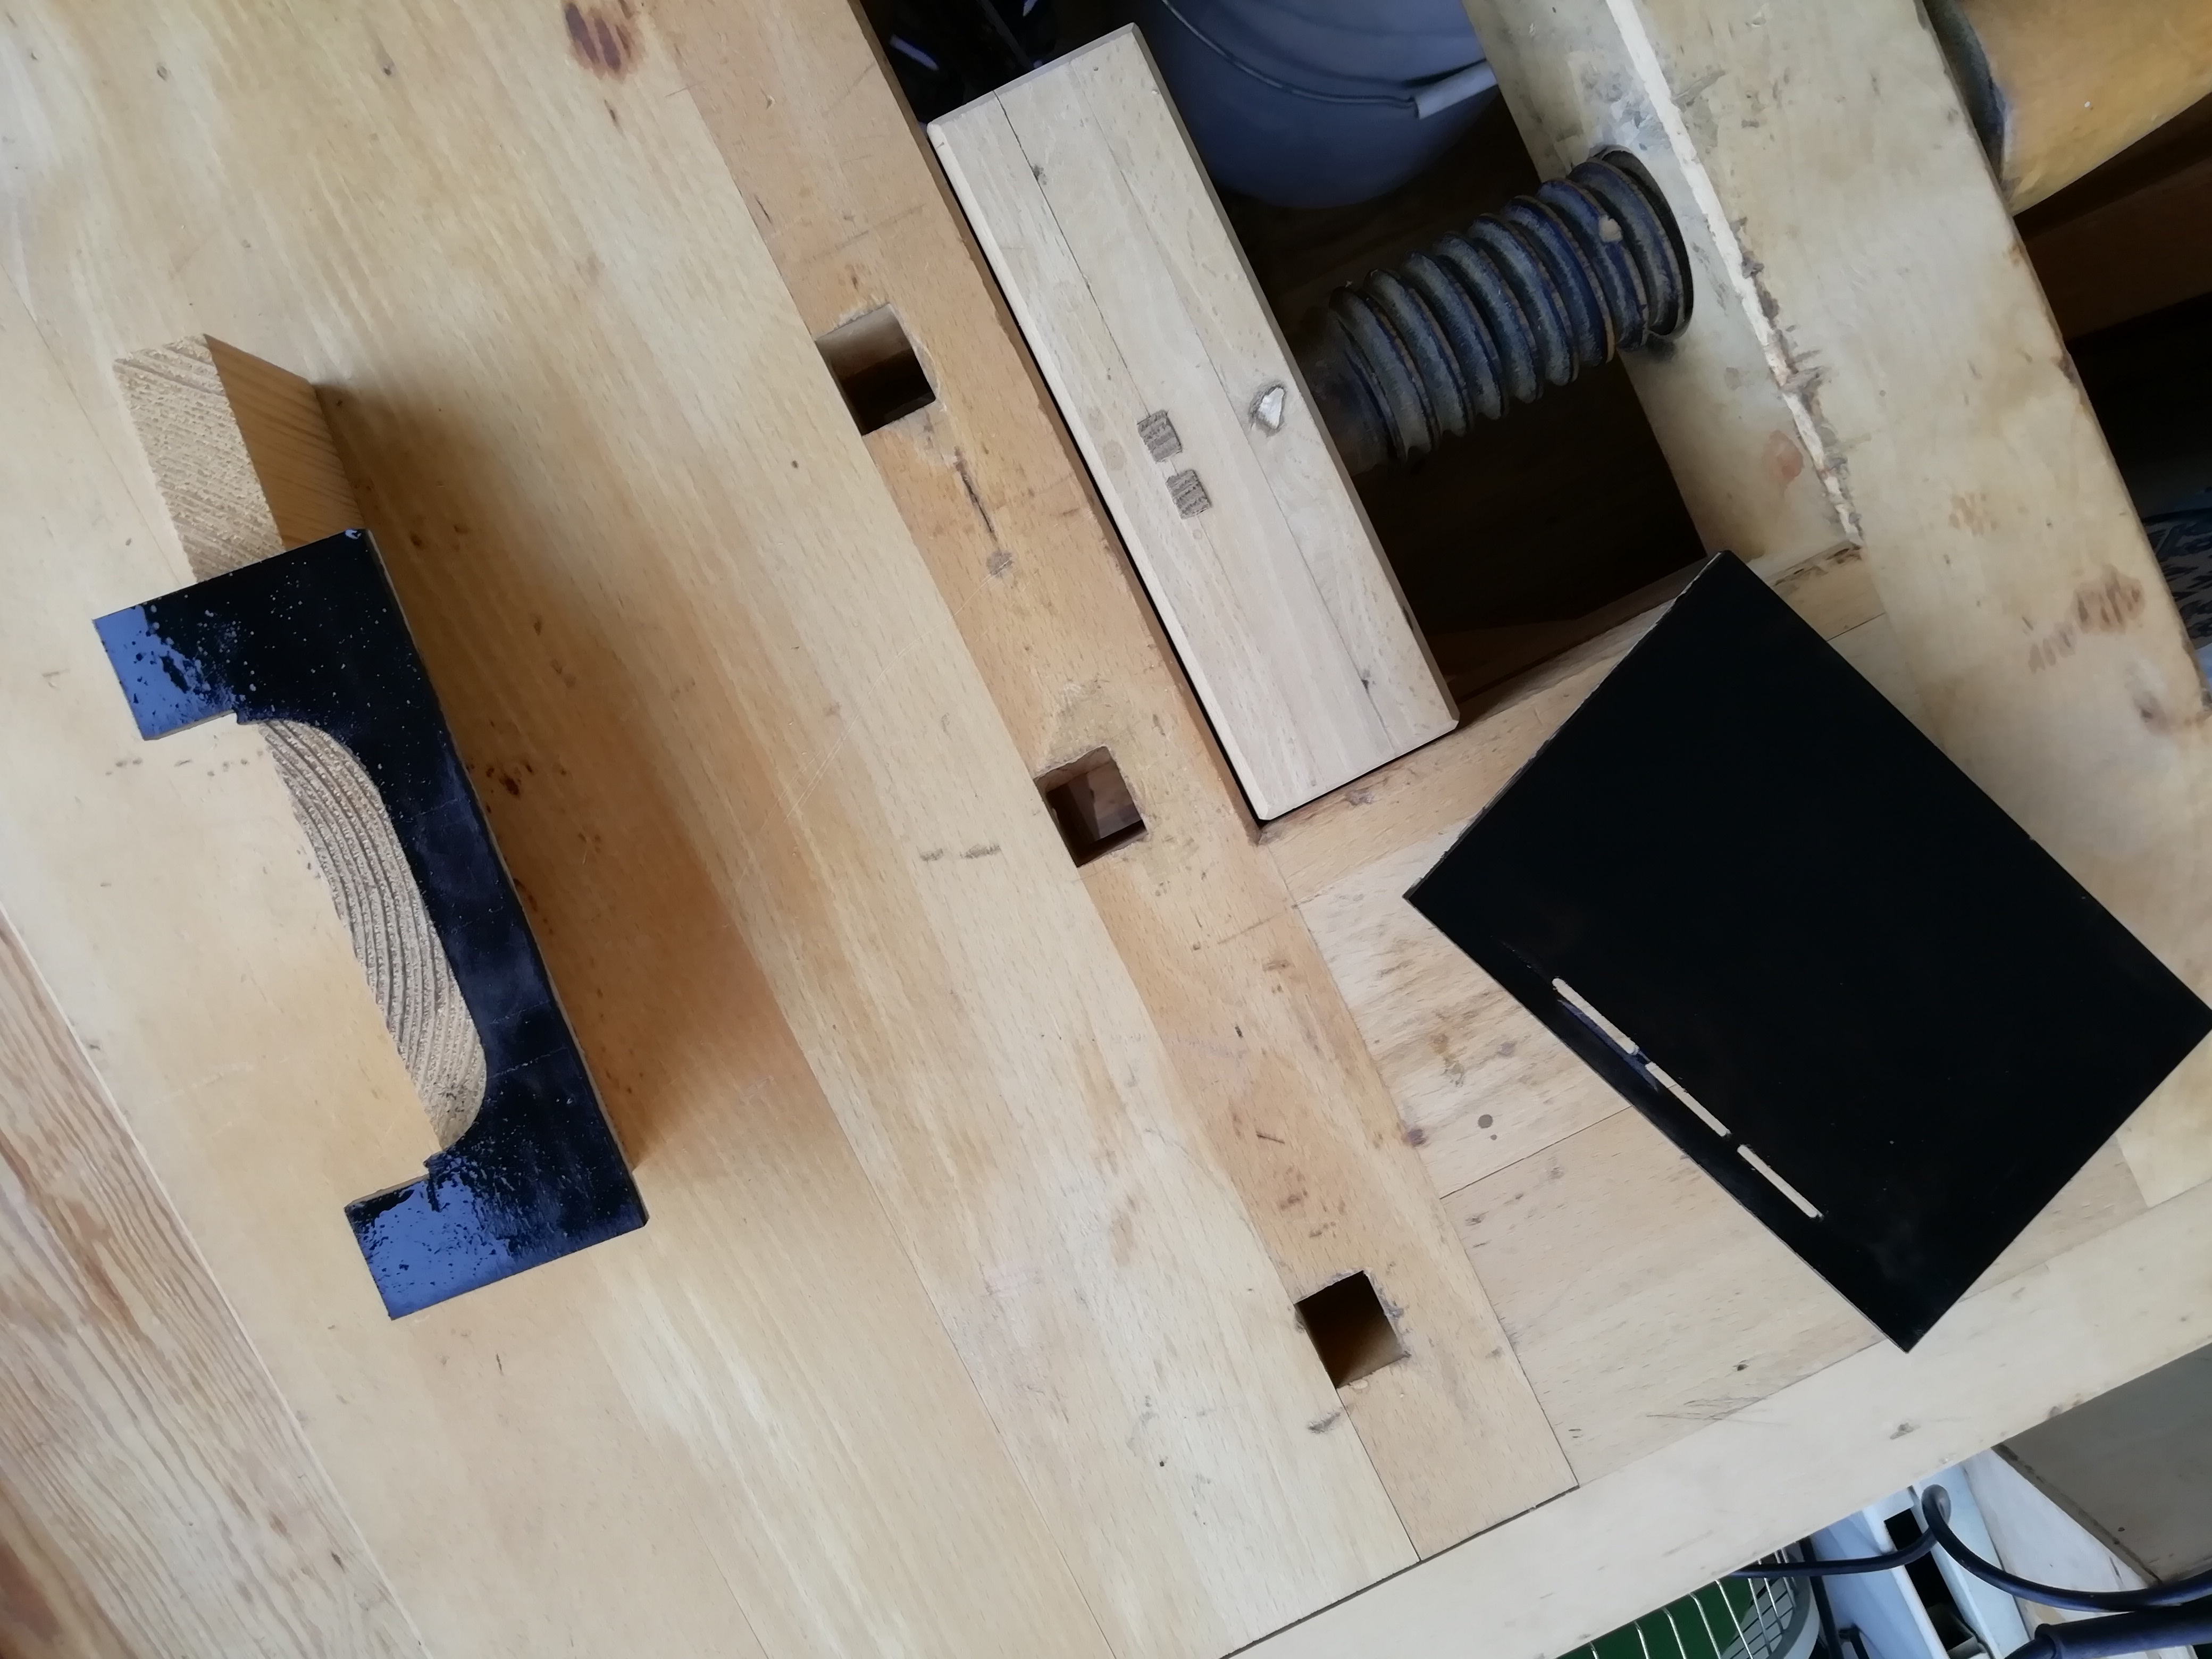
Carve all the parts out on the XCarve
Many cuts are through the material, and so there are tabs left, to prevent the pieces moving, which need to be cut through after carving to free the pieces. Doing this while the other parts are carving is a good use of time.
Warning – MDF especially produces potentially harmful dust, so use dust extraction and wear a mask, in addition to the hearing and eye protection you should always use around the working carver.

240 minutes
Carry out the following to complete the machine
Drive Gear
Bore out the centre of the small gear to make a friction fit onto the motor’s drive gear.
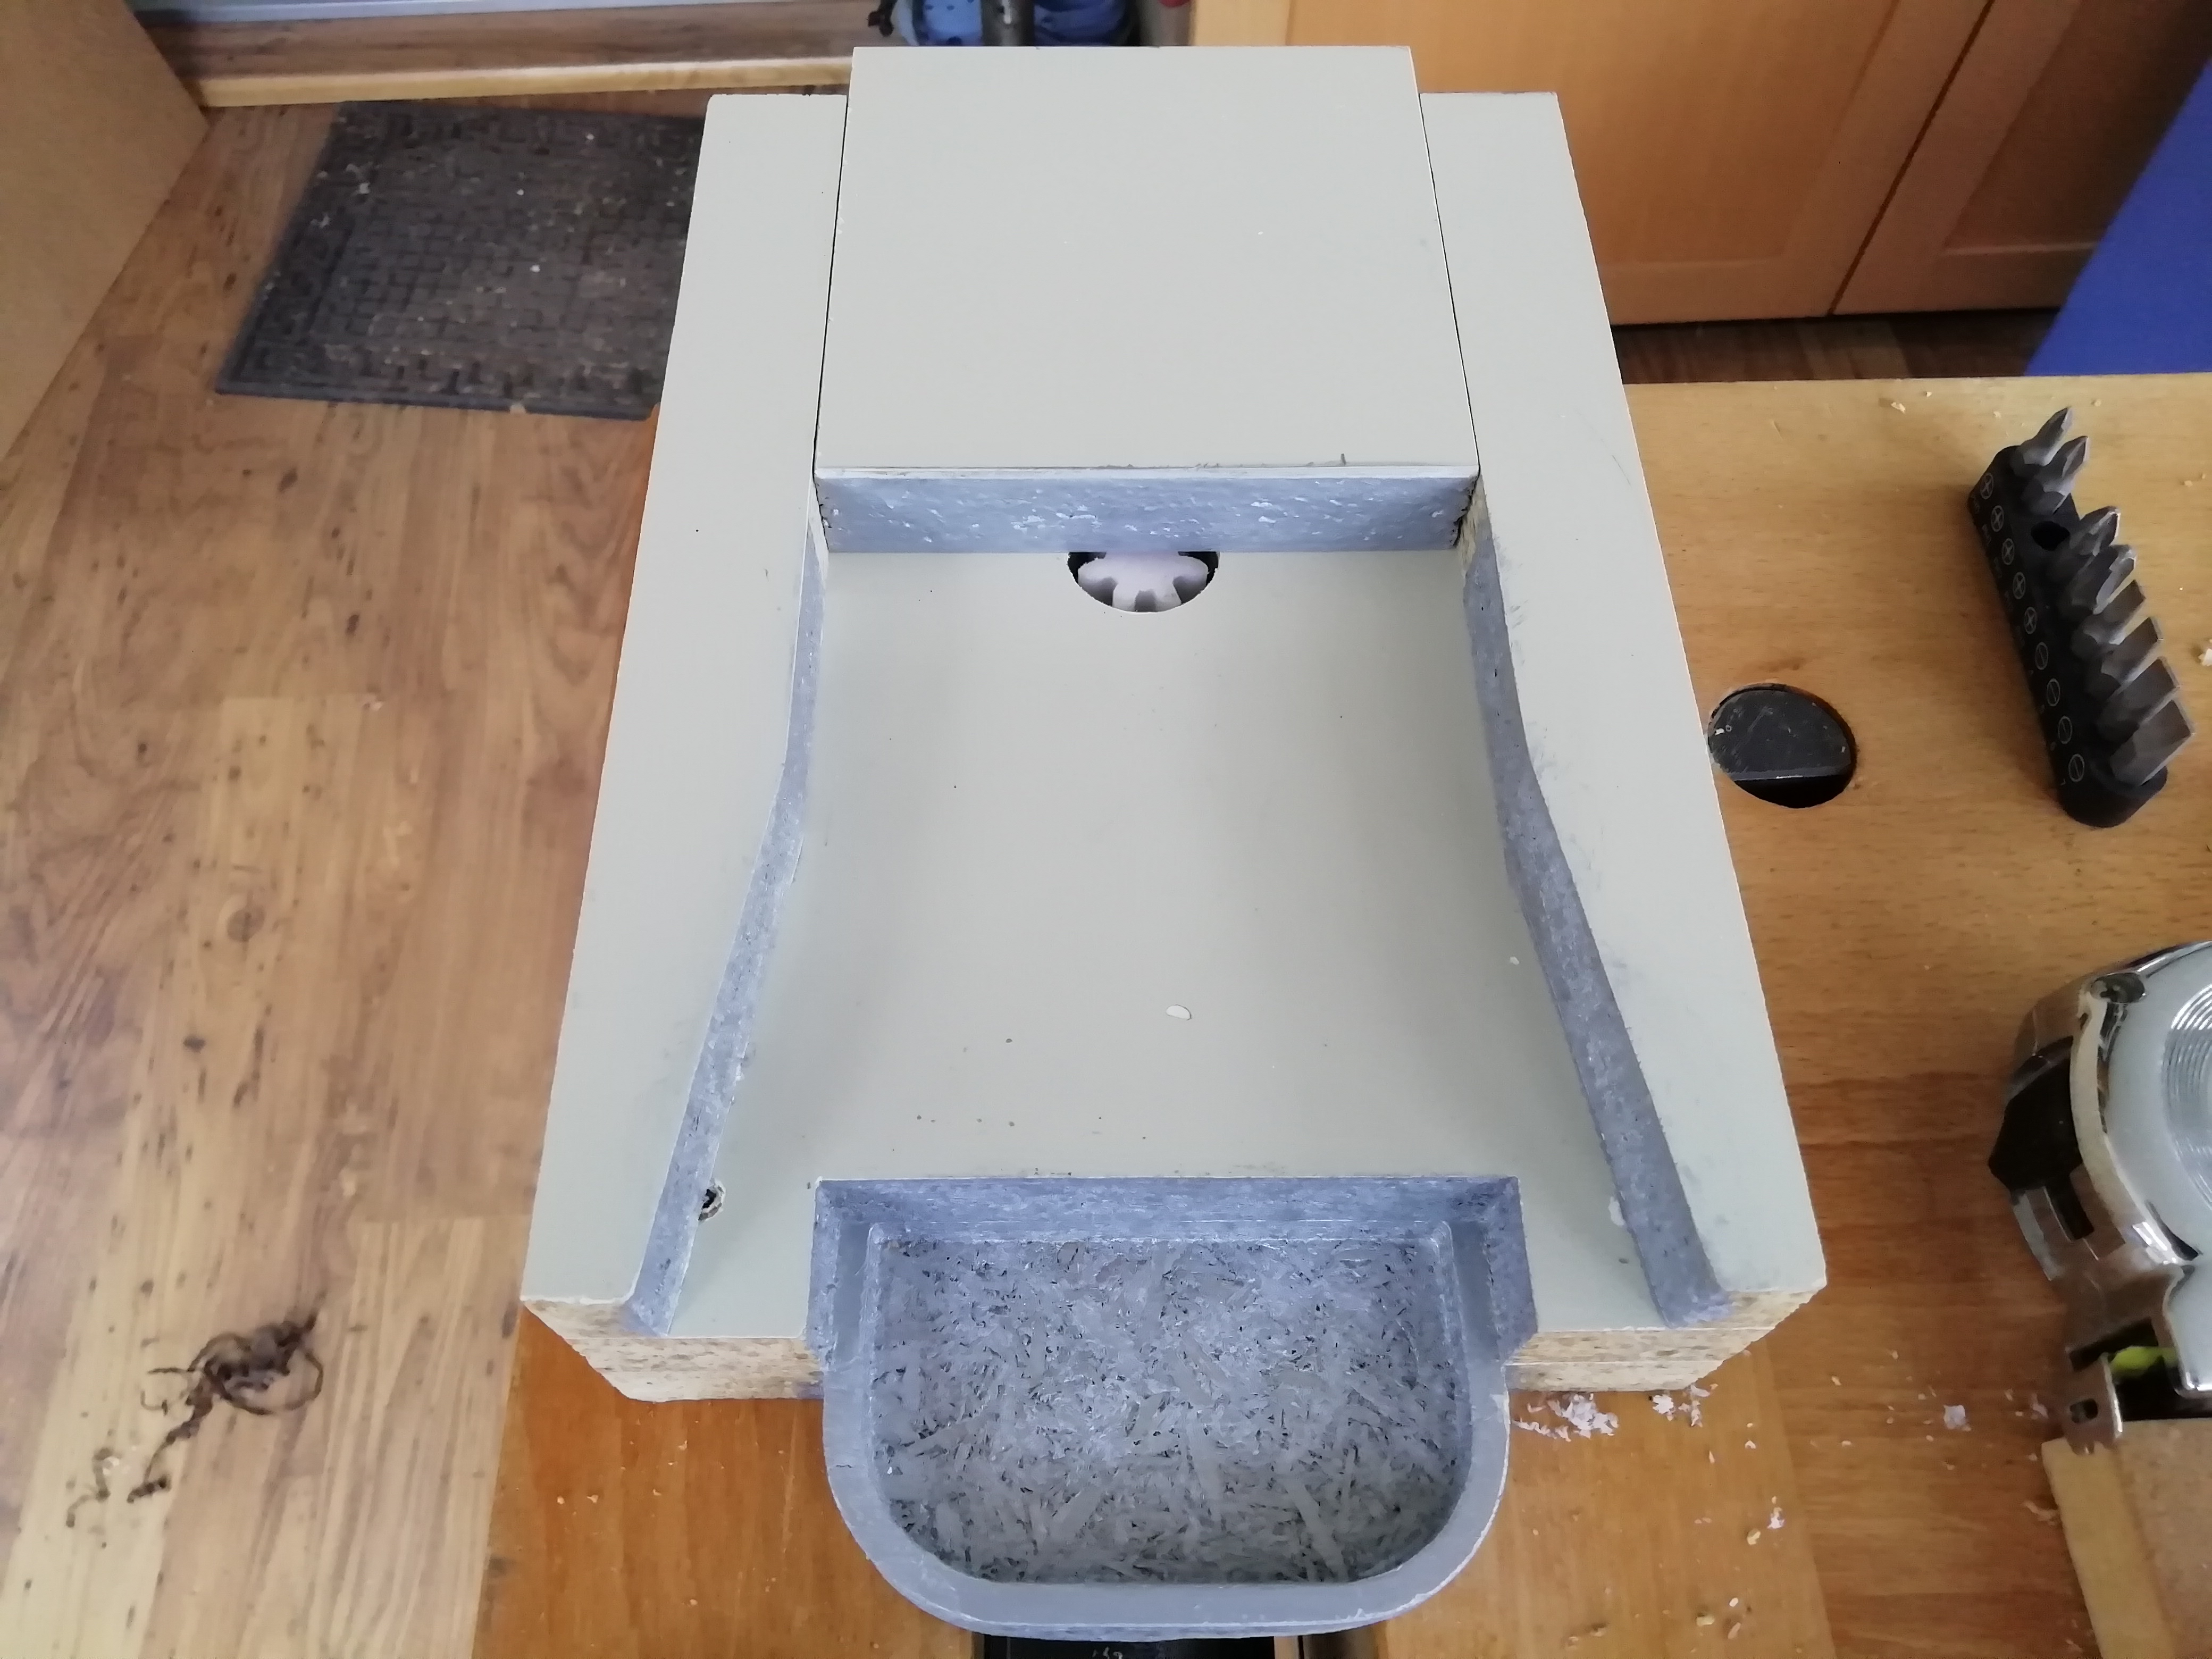
Driven Gear
Recess the underside centre of the large driven gear to take a 15mm skate bearing (or similar). The carved centre hole will align the appropriate forstner bit.
The bearing should also fit the carved housing in the base (adjust before carving if necessary), and it is worth additionally seating it on a small washer, half recessed, to allow the bearing to rotate freely.
Motor
Recess the back of the gear housing board to accept the motor drive, so that the gears all mesh freely, and fix the motor in place.
Recess the top of the coin output board to accept the motor body and cabling.
My motor extends right through, into a recess in the hardwood base, bored with a forstner bit.
The mains cable should be securely fastened within the machine body, and any substituted metal parts in the build should be earthed.
Coin Entry
The three coin slots should be checked for ease of entry of coins, and adjusted if necessary.
Coin Drop Screen
Glue the aluminium rivets into the drop screen panels, making sure to leave a thick enough gap for your coins to drop through.
Front Cover Screen
Cut a thin slot in the front of the case top, and the top of the case front, to accept the ends of the acrylic front cover.
Dry assemble the machine, and measure for the cover. I found it best to cut the cover material with a craft knife, scoring it deeply and folding it to break the waste off.
Final Fastenings
Whilst dry assembled, bore for fixing screws. You could glue it together, but that would preclude any maintenance that might be needed.
Decoration
Paint all the parts as you desire.
Glue on some coins, both in the sides of the drop screen, and along the shelves.
Assemble for the final time, sliding in the front screen as you go (a tricky job), and install screws.
Tip – TEST THROUGHOUT to ensure any problems are dealt with as soon as possible.


chris mullen
Stuart G