
This entry display sign post is designed to hang different signs for the different seasons. I carved the corbel, brackets, letter and sign using the x-carve and built the rest with scrap lumber I had laying around. I turned the knob at the top with my wood lathe. Enjoy!
Materials:
1 – 8’ – 4×4 post (um, for the post)
1 – 8’ – 1×4 pine (for the base and top rail)
1 – 4’ – 1×6 pine (for the brackets and corbel)
1 – Some 1/2" or 7/16" plywood for the sign at least 14″ × 16″
Tools, Hardware and Supplies:
Miter Saw (or a hand saw and miter box if you’re cool like that)
Hammer & Finish Nails (1.5" and 1")
Tape Measure, Pencil & Square
Wood Glue & Paint
Wood Stain (optional)
Sander & Sandpaper
Drill and drill bits (for the hanging hardware)
Table Saw or Circular Saw
Wood Lathe (optional)
X-Carve with 1/8" milling bits (of course this is required, duh)
Drop cloth (really, don’t paint your sidewalk with overspray, okay?)
You’ll also need:
Something to hang your sign. I used two eye screws and hooks that I bought at the local hardware store. I just eyeballed the size and didn’t write it down, sorry.
No really, don’t skip this step. Review these drawings and post questions here if you’d like. I’d be happy to answer any questions but only if you’ve at least looked at the drawings. Cool?
60 minutes
Okay, so I didn’t do a great job of taking pictures of every step, but I did take a few extra pics of the finished product and you are more than welcome to message me if you have questions. Enough of that, what are we waiting for?
Cut some parts out:
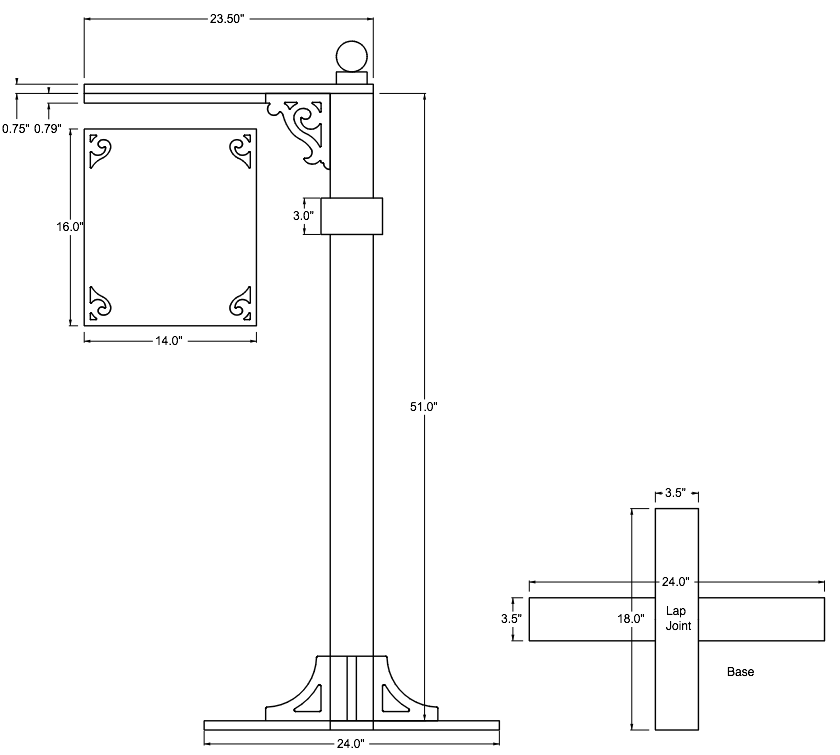
Take your 8’ – 1×4 pine and cut the parts for the base and top rail. One at 18", one at 24" and one at 23.5" (for the top rail). With the remainder you will need to rip a 0.79" wide piece the length of the board that will be used for the top rail support and and the remaining ~2.71" wide piece will be used for the decorative border just below the corbel. I’ll explain more on this later.
Next take your 4×4 post and cut a 51" length. Set the remainder aside, you will used this for the decorative top piece which I will also explain in a later step.
Now take your 1×6 pine and cut two 24" lengths. These will be used for the bottom brackets and the corbel that are cut out with your x-carve in the next step.
60 minutes
Time to carve the brackets and corbel. I’ve included the SVG files for this as well as the Easel project. Start by securely fastening the two 24" 1×6 pine pieces you cut in the previous step to your wasteboard. I fastened the pieces side by side as shown in the picture. Since you will be carving to the very edge of the wood, take extra care to fasten properly. I went so far as to brace each side of the work pieces with scrap 1-by material (as you can see in the picture) to give the edges extra support. However you do it, make sure it’s fastened well, can’t stress that enough!
Of course this is intended to use a 1/8" bit so once that is installed and everything is secure, find your home position and get carving! When carving is complete clean up the edges of the finished pieces and remove the tabs with your sander as needed.

45 minutes
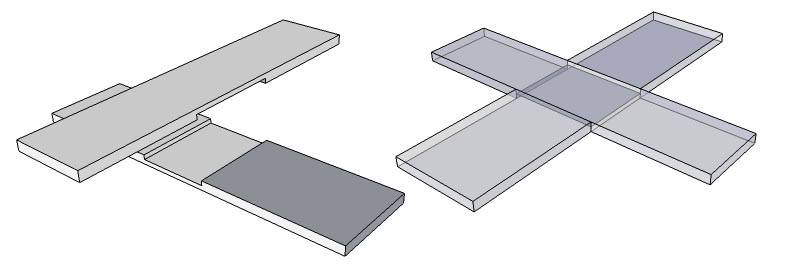
For this step you will need the 18" and 24" pieces of the 1×4 you cut previously. Mark the centers and make a crossed half lap joint as illustrated by the picture. I used a dado blade on my table saw for this but you could certainly setup and use your x-carve to cut these recesses as well. Once the cuts are made and you dry fit the pieces to make sure they fit properly, glue, clamp and allow wood glue to set.
30 minutes
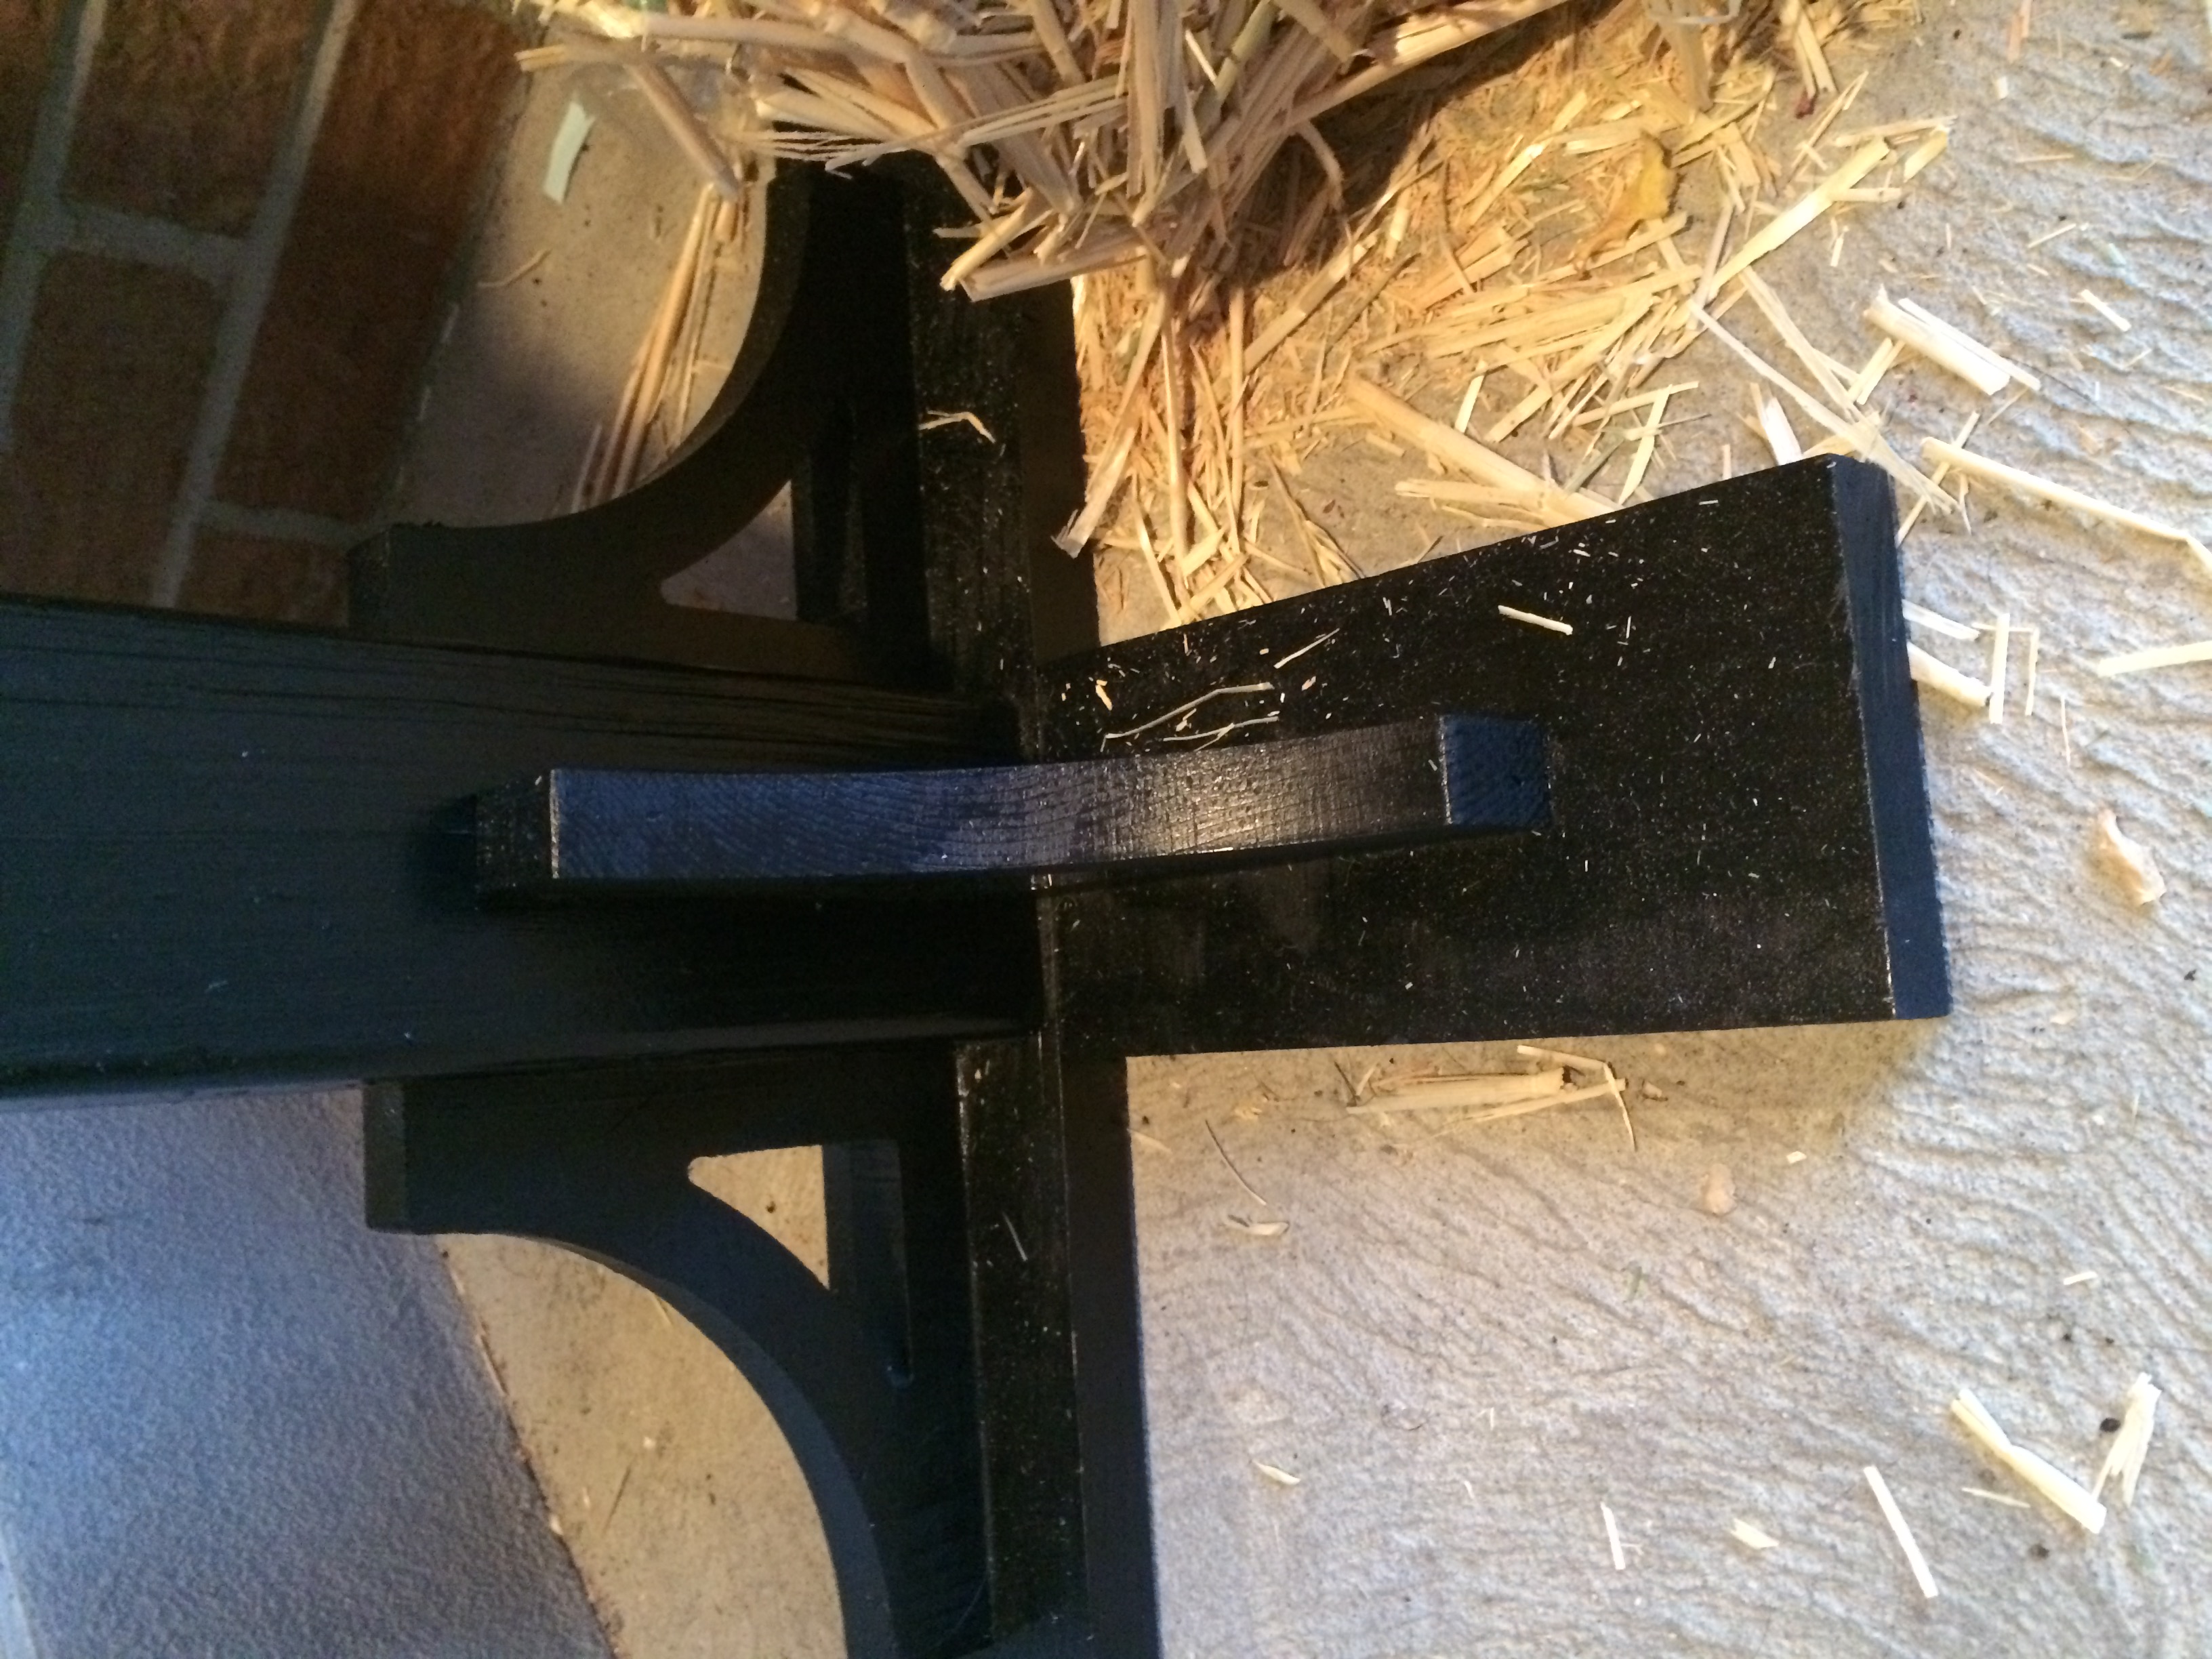
Once the glue is dry on the base, glue and fasten it to the bottom of the 51" post using 1.5" finish nails. Install the 4 brackets by gluing and nailing them to the center of each corner as shown in the picture. I used a finish nailer for these steps which definitely makes life easier, but you can also nail by hand if you don’t have a nailer.
30 minutes
Now take the 23.5" 1×4 and glue and fasten it to the top of the post using finish nails. Make sure the end is flush with the side of the post and the rail is running parallel with the 24" base piece (not the 18" base piece). The extra base length gives extra support for the weight of the sign.
Next glue and fasten the corbel making sure to center it with the top rail and the post. Once installed you can measure the distance between the end of the corbel and the end of the top rail and cut the 0.79" piece you ripped in step 3 to that length. Glue and nail this to the top rail using the shorter finish nails. Make sure that it is also centered with the top rail and aligned with the corbel.
Note: This step may be difficult to follow and I don’t have good pictures of the process so study plans carefully and feel free to contact me if you have any questions.
30 minutes
Now you’re ready to decorate the top of the post and add the decorative border just below the corbel. For the knob at the top I took the remainder of the 4×4 post, chucked in up on centers on my lathe and turned it. You could also buy pre-made knobs or a newel post cap from the local home improvement store if you don’t have a lathe. Feel free to get creative here!
You can also use the remaining ~2.71" piece of 1×4 material from above to add a decorative border around the post just below the corbel. Cut the pieces at 45 degrees on each end and 3.5" inside dimensions. Glue and nail them to the post.

30 minutes
I used black satin spray paint but you can choose whatever color you’d like. Be sure to prime it first as the soft wood will likely absorb a lot of paint.
60 minutes
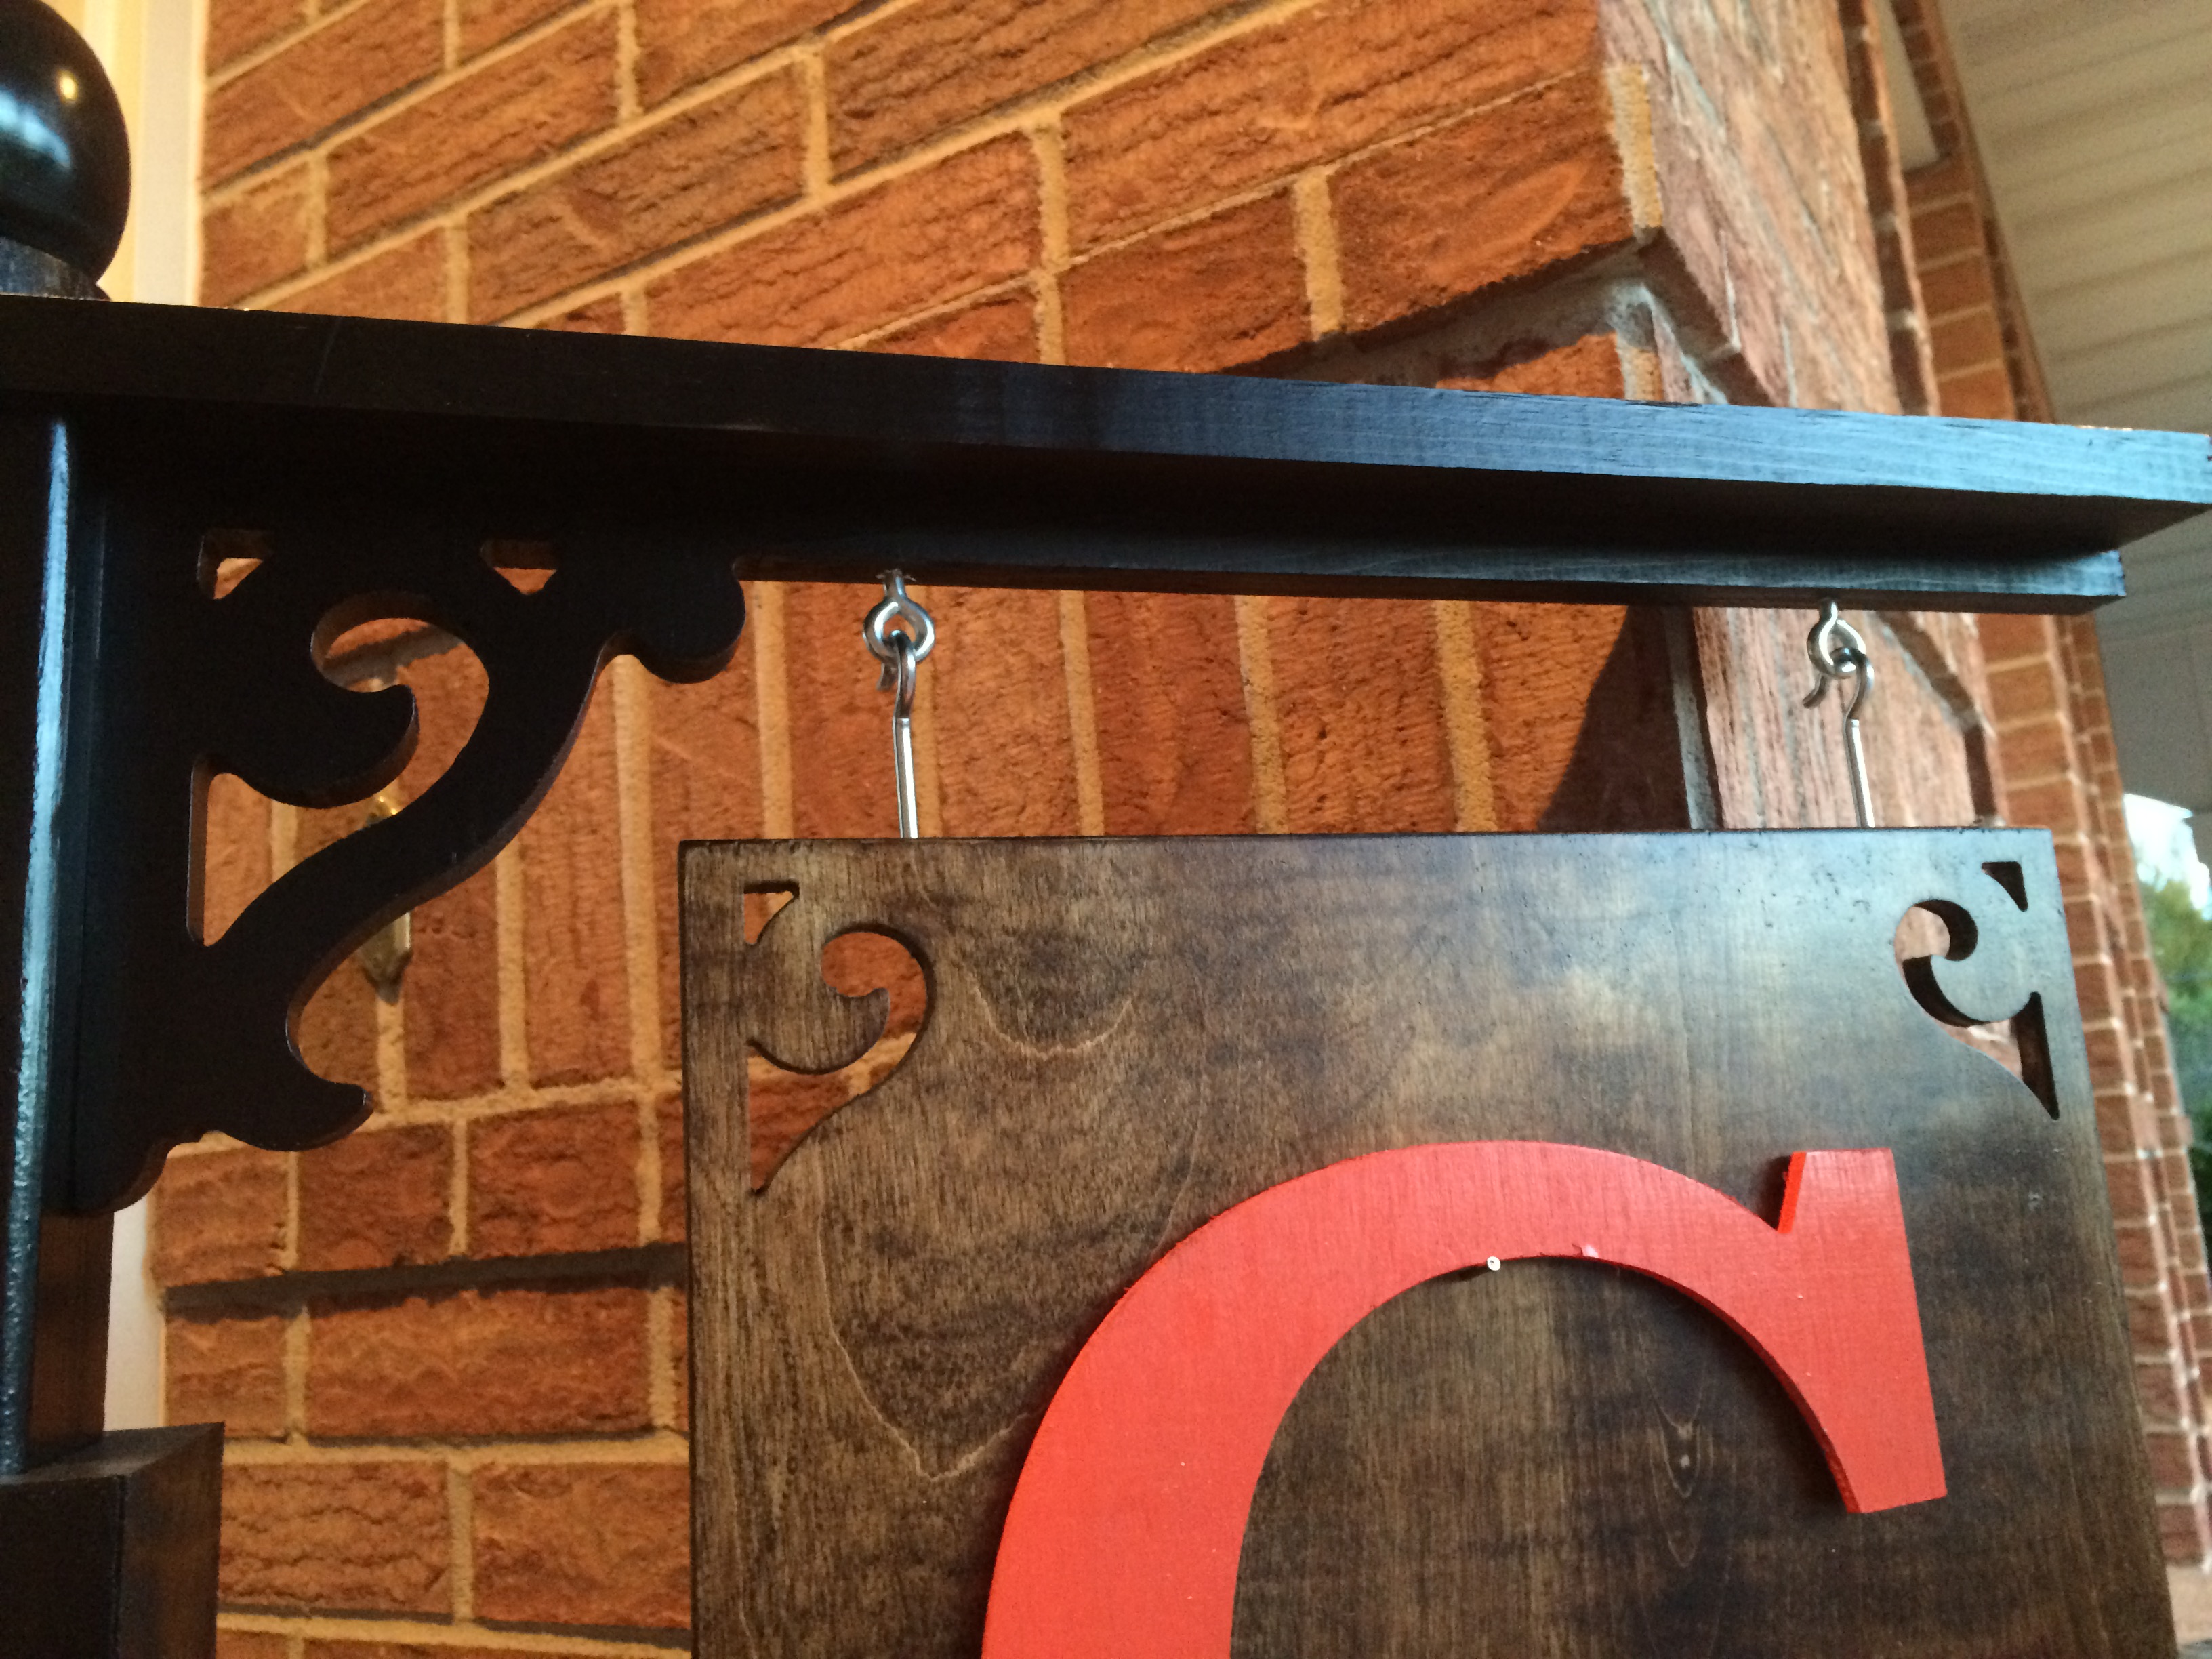
While the paint is drying on your stand you can cut out the sign. I also included the SVG’s for this. I used 7/16" birch plywood because that’s what I had. I also stained it using dark walnut stain and finished with some satin lacquer. Again, get creative here. That’s what this project is for, to display decorations that suit you, your home and your family best. I also cut out the letter from 1/4" hobby plywood using the x-carve. I painted it orange and hung it from a nail in the sign. It’s not a permanent fixture, my wife plans on changing out the sign decorations from time to time.

15 minutes
Once all paint, stain and lacquer are dried, you can add the hardware to hang the sign and set it out to display for the world to admire. Be sure measure carefully and pre-drill holes to install your hangers. Again I used eye screws and hooks that I got at the local hardware store so that I could easily remove or swap the sign.
Now I know you’re the talk of the town with your new hand crafted front porch display, but before you get too caught up in your newfound fame and fortune, please post your remake. I’d love to see what creative ideas you came up with. Feedback is also welcome.
Enjoy!!


Garin Gardiner
John Gifford
John Gifford
John Ryan