
A PCB milling project based on https://github.com/loansindi/ps1_noise
There are three different Easel files for this project.
This PCB requires three bits:
Clamp the PCB copper side up securely, as in the photo.
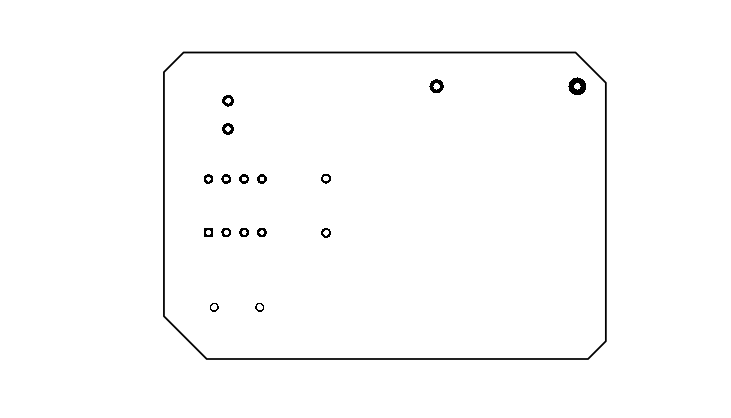
There are three Easel files, the first one is for drilling the small holes, so use the 0.024" PCB drill:
Small holes
The next step is cutting the traces, so you’ll want to switch to the small V-style PCB mill:
Traces
The final step will be switching to the 1/16" fishtail mill and cutting the large hole for the battery holder and cutting the outline of the board out:
Big hole and outline
Once you’ve run all three of these jobs, you should have a completed PCB, ready to solder. You’ll want to inspect the pads and traces – make sure there’s no accidental connections due to leftover copper, and that all the pads are intact and still connected to the traces.

If you’re building the starter kit that came with your Kickstarter order, you can skip this step – the microcontroller is pre-programmed.
Before we put it all together, we need to get the code onto the microcontroller, so it can do its thing. I usually use an Arduino Uno with the ArduinoISP sketch for this. You can find detailed instructions here for setting up your Arduino IDE to do this.
The code you need to upload is in this file in the repository.
I recommend building the circuit on your breadboard so you can confirm everything’s working before you start soldering.
Now that the board is carved out, you can place the components and solder them.
The first photo below shows how the components should go in the board. It doesn’t really matter what order you solder them in, so long as you get them all soldered.
You’ll want to be very careful – since this PCB is routed out, there’s copper just on the other side of the pads that is pretty easy to bridge to. Before you power it up, you’ll want to look carefully at every spot you soldered and make sure there’s no solder bridging the gap.


Now that you’ve made a PCB, you may want to design your own. I’ll detail the process I used in the following steps.
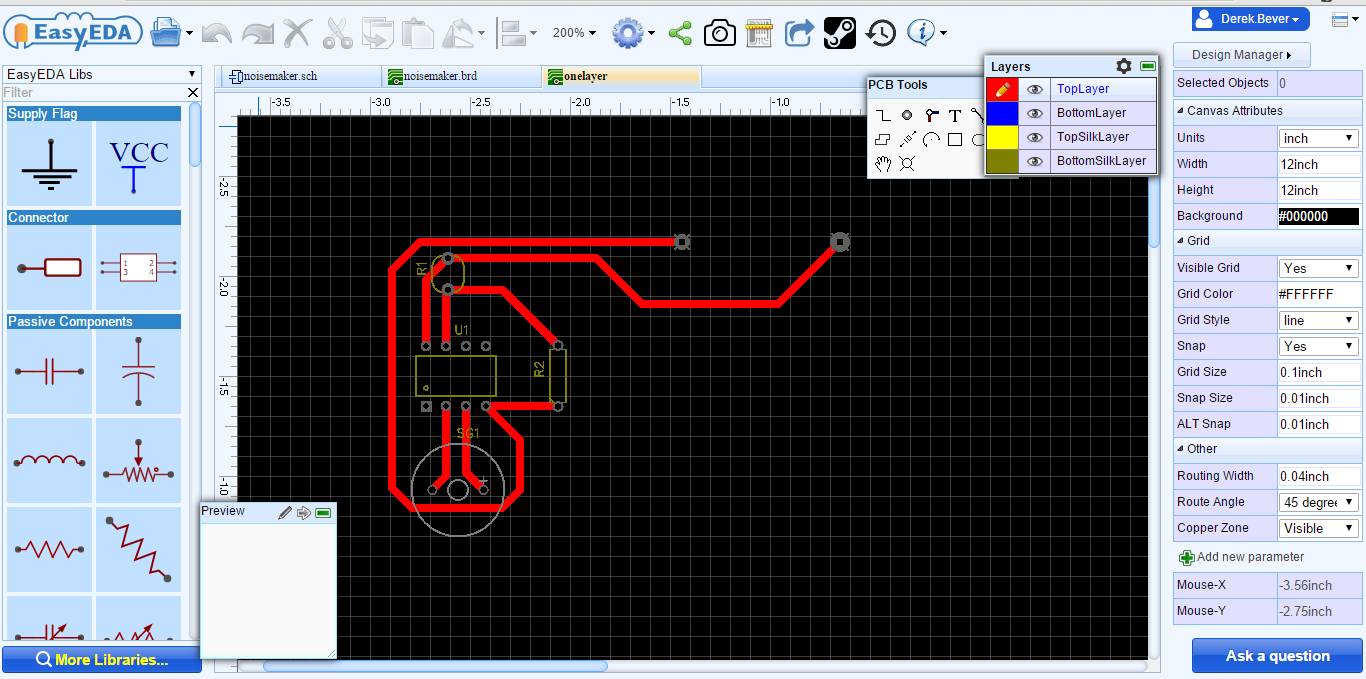
I’ve been using EasyEDA for creating PCBs lately – a tutorial in its use is beyond the scope of this project, but I was able to figure it out pretty well in an hour or two without much prior experience making PCBs.
When you’re done, you should have a single-layer PCB design, like the one in the photo. This project is open source and available for modification or download.
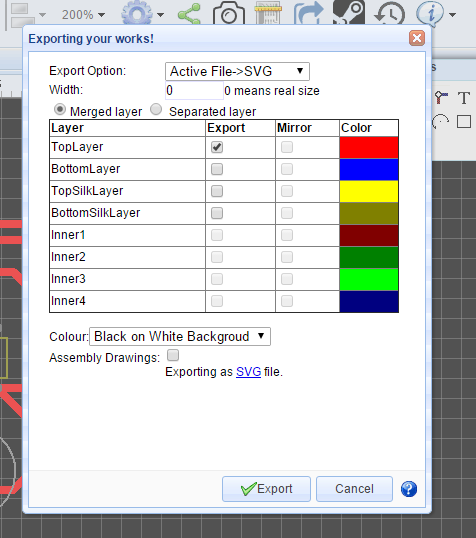
We’re ultimately going to put an SVG into Easel, but there are some intermediary steps. We’ll start by exporting an SVG from EasyEDA – the two photos in this step show the export option, and how the export screen should look. It’s important to select ‘SVG’ in the dropdown, and to export only the tracks and pads – so make sure to deselect the silkscreen layers.

Okay, so now we need to get the traces ready. The easiest way I’ve found to merge the pads and traces is to convert the image to a bitmap (which effectively combines all the objects together) and then re-trace it into a vector format (so Easel can carve around the edges).
Go back to the first SVG you downloaded from EasyEDA. Select the whole shebang, and hit Edit > Make A Bitmap Copy. This will create a raster image on top of your vector image – drag it off, and delete the old vector objects, we don’t need them any more.
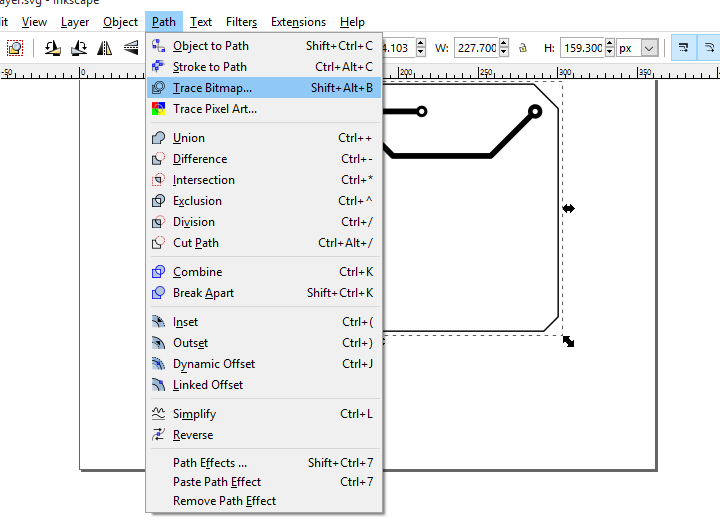
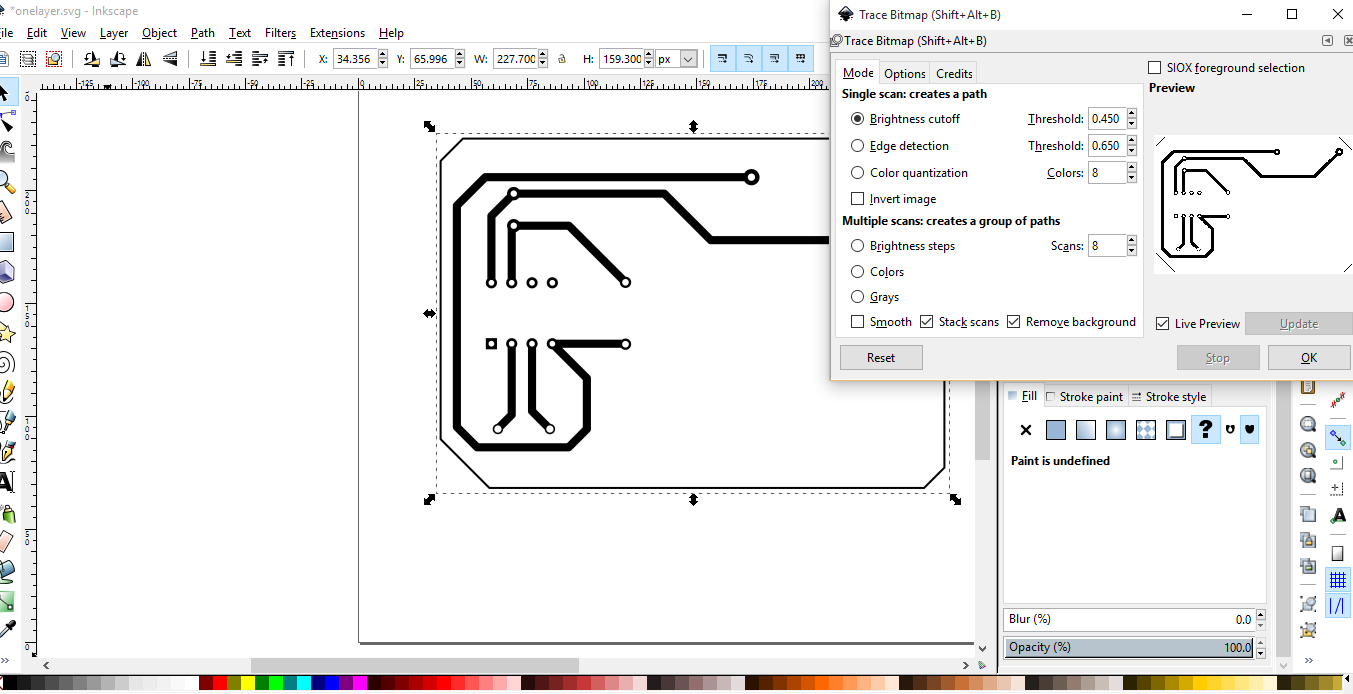
Now, we can select the bitmap and trace it to create a new, more useful vector. Path > Trace Bitmap will bring up the menu we want. Select ‘Brightness Cutoff’ and make sure the preview looks okay, then give it a shot. This will create a new vector image on top of the bitmap. Drag it off to the side, delete the bitmap that was underneath, and save your vector image with a filename you’ll recognize later (project_traces maybe).


Open up your SVG in Inkscape (You can probably use any vector graphics program, a lot of the steps will probably be very similar).
We’re going to do a few different things:
When you bring the SVG into Inkscape, it’s going to be a single grouped object. To start, select that object and ungroup it (either use Object > Ungroup or hit ctrl-shift-G). We’ll want to select our holes and the board outline, copy them and paste them into a new document to save them in their own SVG.
Inkspace provides a handy tool to select objects with the same fill and stroke – use this to select all the holes, shift-click the border, and copy everything. Paste it into a new document and save as project_drills.svg for later. You should end up with something that just has the pads and outline, as in the photo here.


Frank Ramirez
Derek Bever
Pierce Mooney
Derek Bever
Faisal Mal