
Learn how to use 123D Make to slice a 3D model into interlocking 2D shapes you can carve on a mill.
The model I’m using came from this project on Thingiverse: http://www.thingiverse.com/thing:49812 by user MatthewOwen. I used the STL file which he made to generate my own custom sized slices using 123D Make.

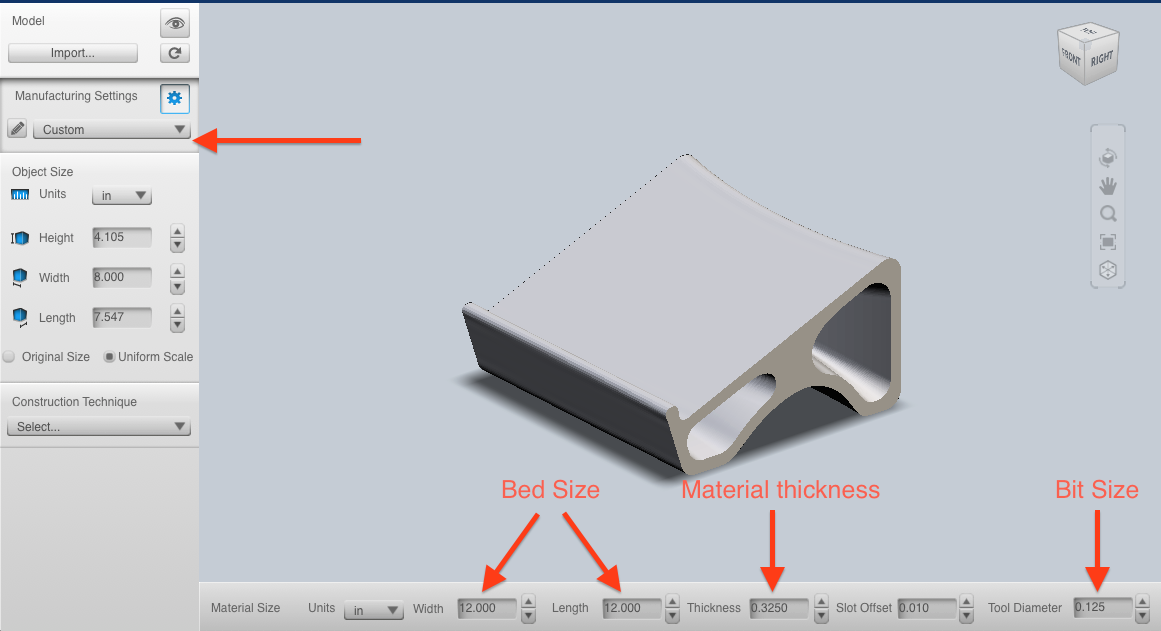
The default settings are for laser cutters, but we can easily adjust them for the Shapeoko or other CNC mills. Just enter the bed size as the width and height, enter the material thickness (measure with calipers first!) and enter the bit size you’ll be cutting with.
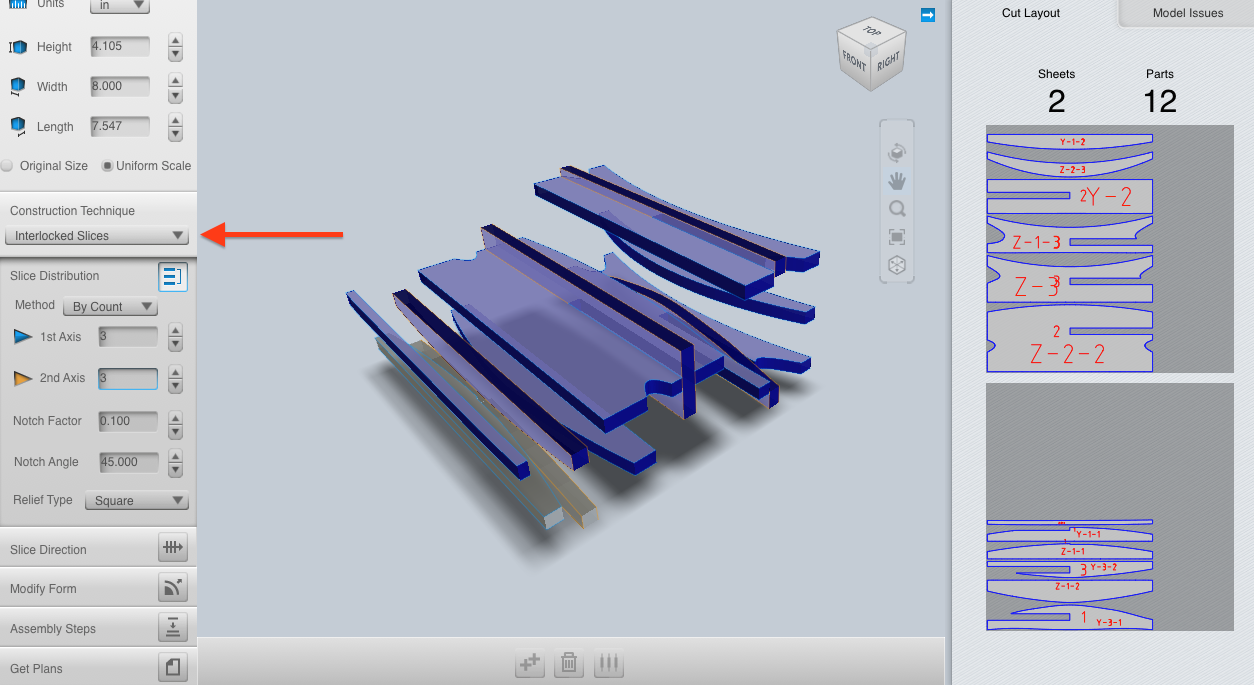
There are many options under the “Construction Technique” dropdown. They refer to different ways to slice up the 3D model into 2D panels. The one that works best for this model is “Interlocking Slices”, but play around with the others too!
Because I’m using a 0.125" bit to cut out the design, I have to make sure that the inside corners of the interlocking slots are “dogboned” to make sure the pieces can fully slot together. Luckily, 123D Make had a built in option for this!

Now the sliced model still looks a little crazy (and physically impossible), so lets wrangle that by adjusting the slice number and slice axes. The slice axes can be adjusted using the blue and orange handles. It is a bit hard to manipulate them at first, but the trick is to use the subtle snapping that happens at the 90 degree points. With a quick flip of the axes, the model looked like I wanted it to (and became physically possible to stand up).

I planned on using VCarve to create the toolpaths so I exported the design as a DXF.

I imported the DXF file into VCarve and adjusted their positions to make it easy as possible to cut the parts. I made two separate plates using the “Layers” functionality in VCarve. I set the paths to all be outside profiles, with a depth equal to the material thickness and set the bit size I was using (0.125"). Then I exported the g-code


Abdurakhman Smazov
Paul Kaplan
Kurtis Saiyo
Kurtis Saiyo
Paul Kaplan