
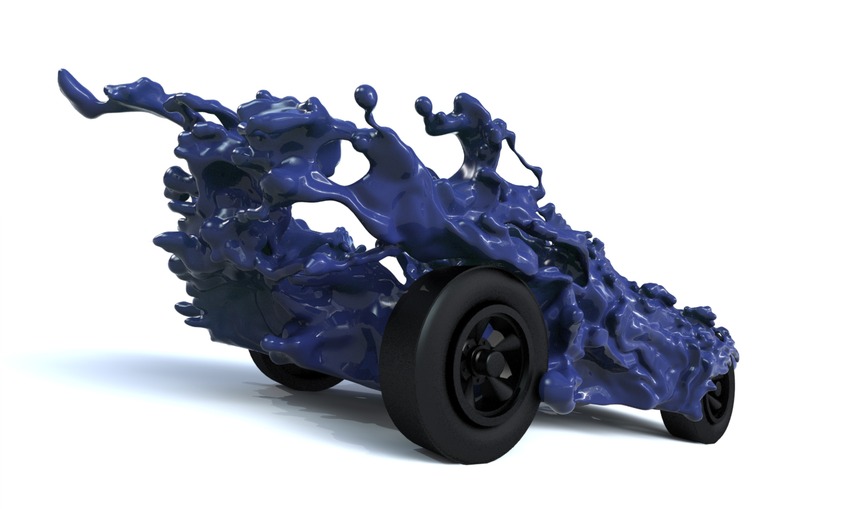
3D Printable pinewood derby concept car, designed for the 2013 IDSA’s Launch Day challenge.
Model is created to work with Pinewood Derby Wheels.
Liquid Pinewood Derby file can be found here: https://www.turbosquid.com/FullPreview/Index.cfm/ID/764289
| Material | Description | Price | ||
|---|---|---|---|---|

|
Light Blue PLA 3D Printer Filament |
|||
This is just an overview of how I created the car using Zbrush and Modo for concept to final design.
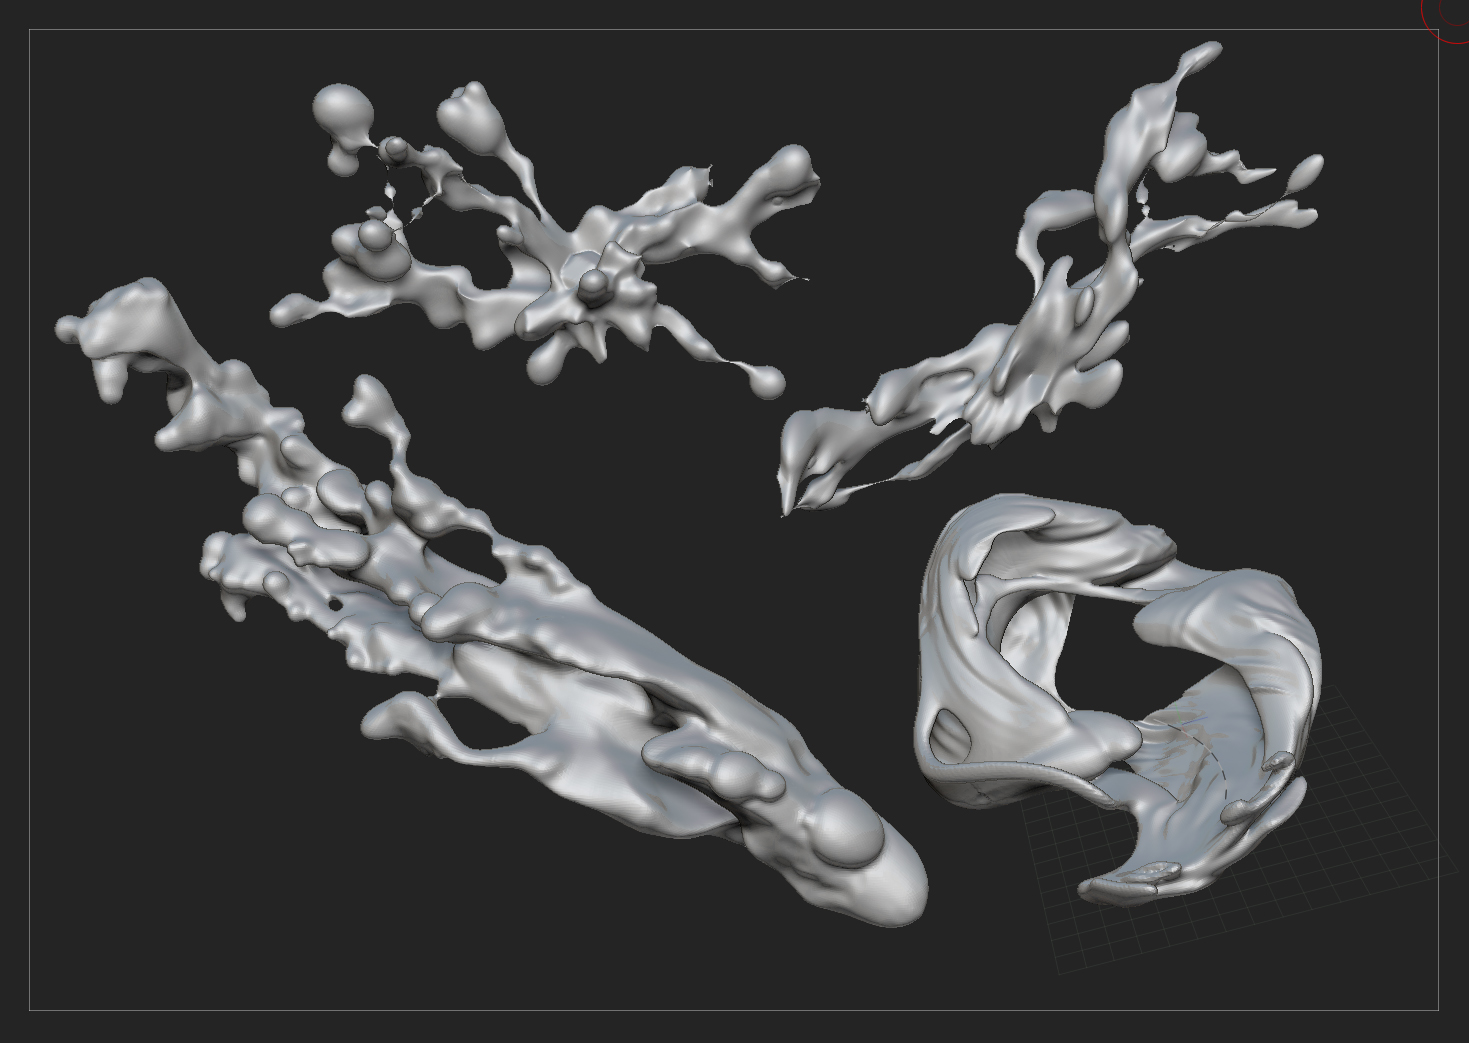
I started by playing with shapes and trying some different design ideas. Using ZBrush I tried to get an idea of the volumes that I wanted and the style. The pictures below are of some ideas that I started with before actually starting on my final liquid design. The last image was going to be a separate submission to the contest, but I was not able to finish it in time :)


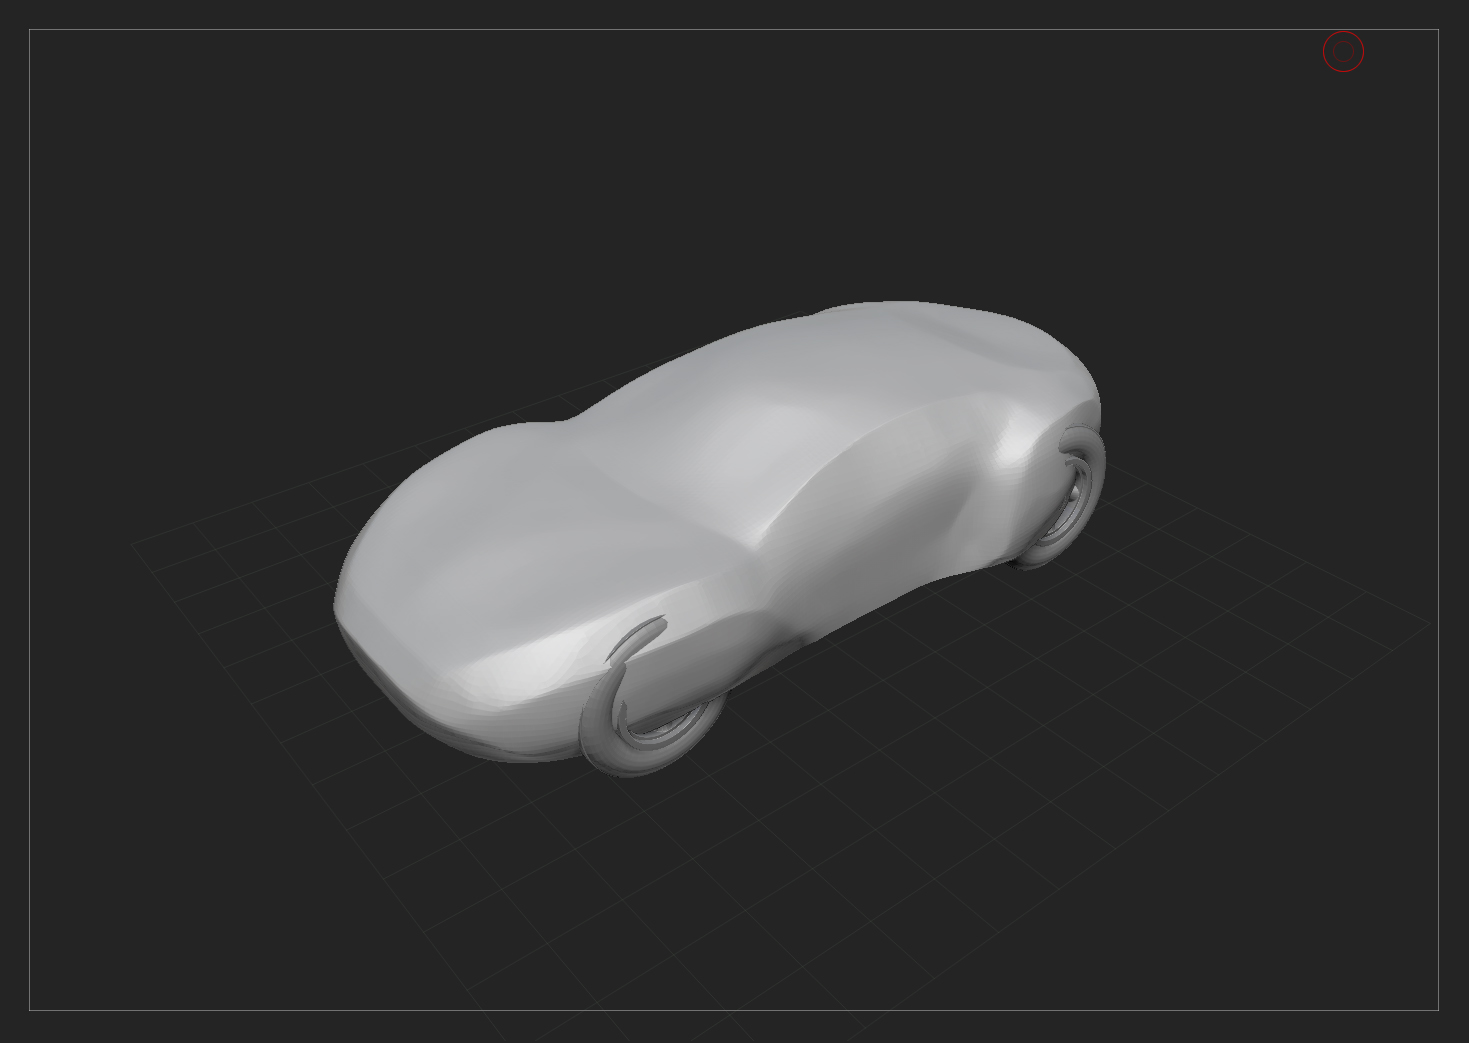
For the liquid car, I started with a base shape of a car that I modeled out in zbrush. I primarily used the move brush, clay build up brush, Hard Polish Brush and the standard brush with the brush modifier set to 100%. I also used the slash bush to accentuate sharp edges and creases in the sculpt.
I didn’t really worry too much at this point about the functionality of the car, because I knew I could very quickly come back later and carve those portions in. The wheels were roughly placed to give me a better idea of where the main shapes should be placed.
Zbrush has an amazing feature called Dynamesh. It allows the artist to pull and push out the geometry beyond its resolution, and then recalculates the meshes shape and coats the mesh with evenly spaced polygons. It really freed me up to not have to worry about topology or the mesh getting out of control. You can see below how once I stretch out the mesh on the sphere, the polygons get stretched and difficult to work with. Then I run the Dynamesh function and it tries its best to recalculate an even spaced geometry so that I can then continue adding detail.

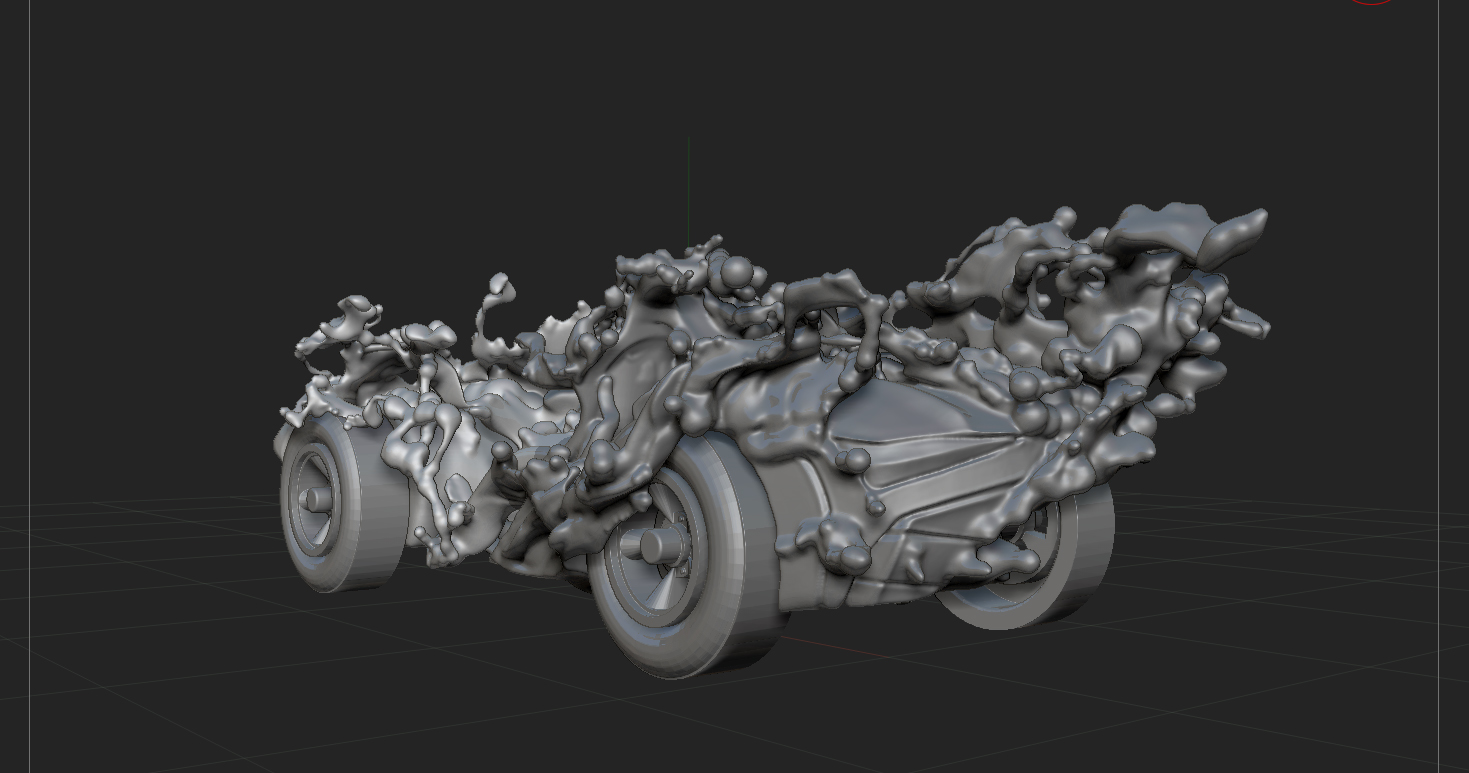
I used the Dynamesh feature along with the insert geometry brush to clip away areas of the car that I thought would create an interesting shape and still have a nice flow. In the same way, I used the insert geometry brush to add to the volume of the geometry in order to create the water effect. I was able to join some separate splash type sculptures that I had previously created into the main car file and build off of those, manually adding hundreds of little spheres to the car then meshing them all together to create the overall liquid effect. I also used this method with the driver and the seats.


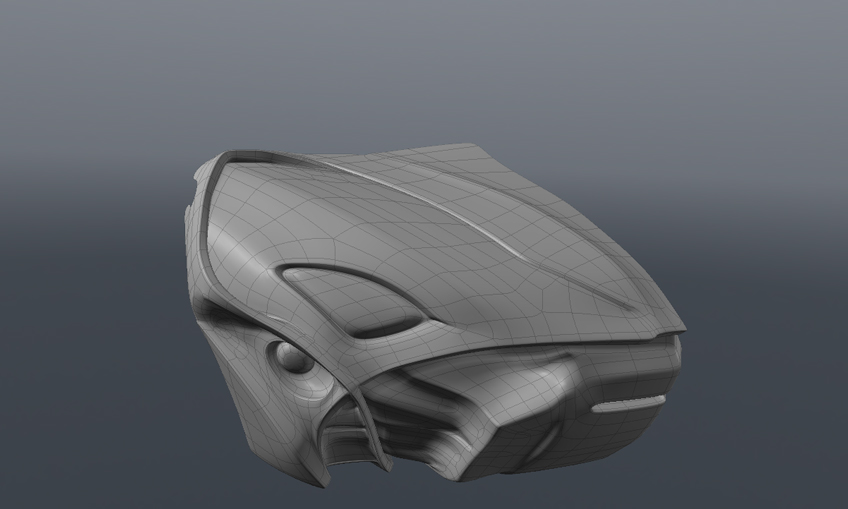
I then turned my attention to the front of the car. I knew I wanted the front of the car to have hard machined edges to directly contrast with the organic flow of the water, but I also wanted it to look like one unified piece. As if it was moving forward and being formed at the same time. The details on the sides allude to gills on a fish and large mouth like intake in the front. I wanted to create a piece that reflected what I see in the maker community and 3d printers. 3d printing technology is developing so quickly it’s like a concept car that you jump in and drive before its even finished being designed!
For the front of the car I blocked out the overall shapes in zbrush but then exported it out to Modo to utilize its retopology tools and sub-d surface modeling tools.After defining the shapes I brought the front back into Zbrush to unify both meshes again using Dynamesh.


After unifying the two meshes I re-checked the position of the wheels and added the slots that the axle would slide into so that the pinewood derby wheels could be added once it was printed out.
It was a matter of touching up the geometry and then adding a couple more details to the mesh in order to complete the project and make sure it was printable. That part actually consumed a lot of time.
Please leave your questions and comments at the bottom of the page. If there is something that you would like me to go into more detail with, I would be happy to continue the conversation!


Check out my youtube channel.
http://www.youtube.com/user/3doftom/videos


Matt Lyle
Thomas Davis
Matt Lyle
Thomas Davis
Paul Kaplan
Thomas Davis
Matt Lyle
Thomas Davis