
Steve Carmichael
MONROE, GA
These cool wooden stockings have monograms and holiday shapes cut out of the front with colorful LED lights that shine through.
| Material | Description | Price | ||
|---|---|---|---|---|

|
Baltic Birch Plywood |
18" × 24" × 1/8" Baltic Birch Plywood |
||
10 minutes
Watch my video of this project to get an idea of the basics, then follow these detailed steps to make some stockings of your own.
60 minutes
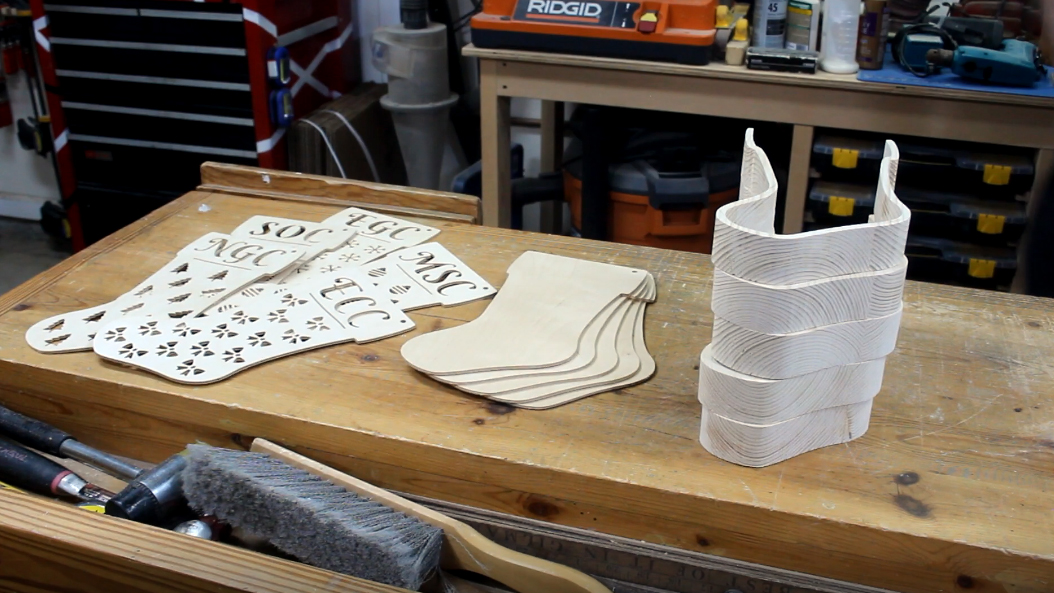
For one stocking, you will need a piece of 1/8" Baltic Birch that is 12″×16″ for the front and back pieces. I bought two 24″×30″ sheets from Rockler, which is enough for up to 6 stockings.
The side piece is cut from a standard whitewood 2×6. Cut off two 12" sections of the 2×6. Since a 2×6 is only 5.5" wide, you will need to rip a 2″×12″ strip from the extra piece and glue it onto the 5.5" wide piece to make a 7.5″×12″ blank. One 8-foot 2×6 is enough to make blanks for up to 5 stockings.

60 minutes
Delete the initials that are at the top of the stocking and add your own. Choose a font that can be cut with the the bit size that you are using. I used a 1/16" bit which allowed for more detail. Bold fonts are good for this project.
Since the letters will be cut out, watch for pieces of the letters that might be cut away accidentally, like the insides of O’s, A’s, and P’s. You will want to strategically place a rectangle shape on top of the letter and set it to 0 depth of cut to ‘attach’ these inside pieces to the main board so they don’t fall away.
Change the holiday shapes if you like. Solid shapes work best. Watch out for any shapes that will result in very thin pieces of wood to be cut. For example, the stripes on the Christmas ornaments are thick enough so they do not get torn away by the bit during carving.

60 minutes
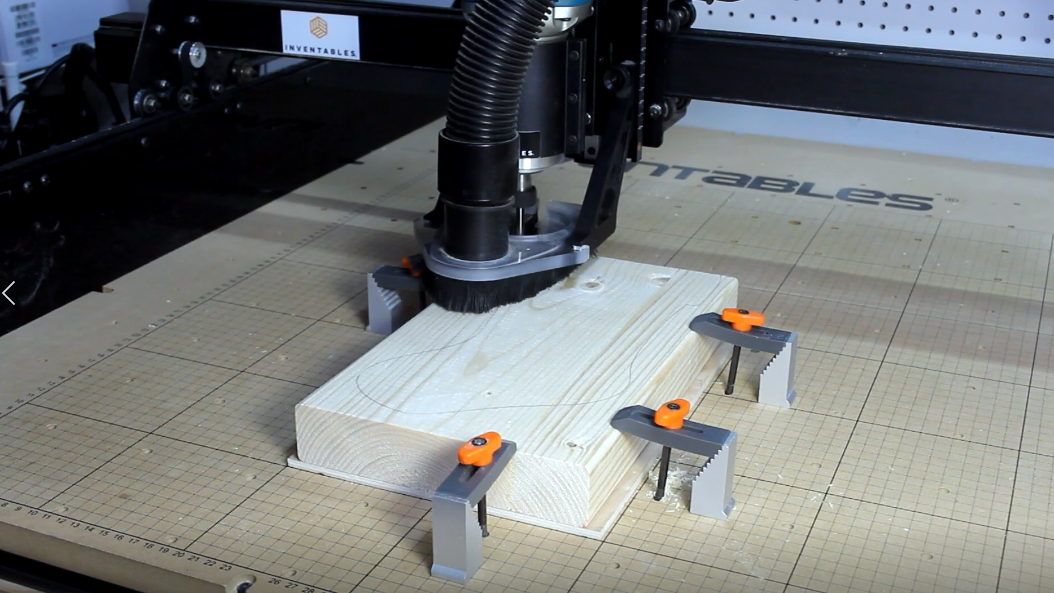
It takes about an hour to cut out the pieces for one stocking. I carved each stocking piece one at a time, but you can save setup time by ganging them together and carving multiple pieces at once from a larger blank.
I used a 1/16" spiral upcut bit for the 1/8" thick Baltic Birch. I used a 1/4" spiral upcut bit for the 2×6 material. (Note that for the side piece, I cut partially through with the CNC, then finished off the cut with the bandsaw because I thought the piece is so thin it might break away during carving.)
30 minutes
Sand all of the parts smooth. Since the front and back pieces need to match up with the outline of the side piece, be careful not to sand too much of the edges might not line up flush during assembly.

30 minutes
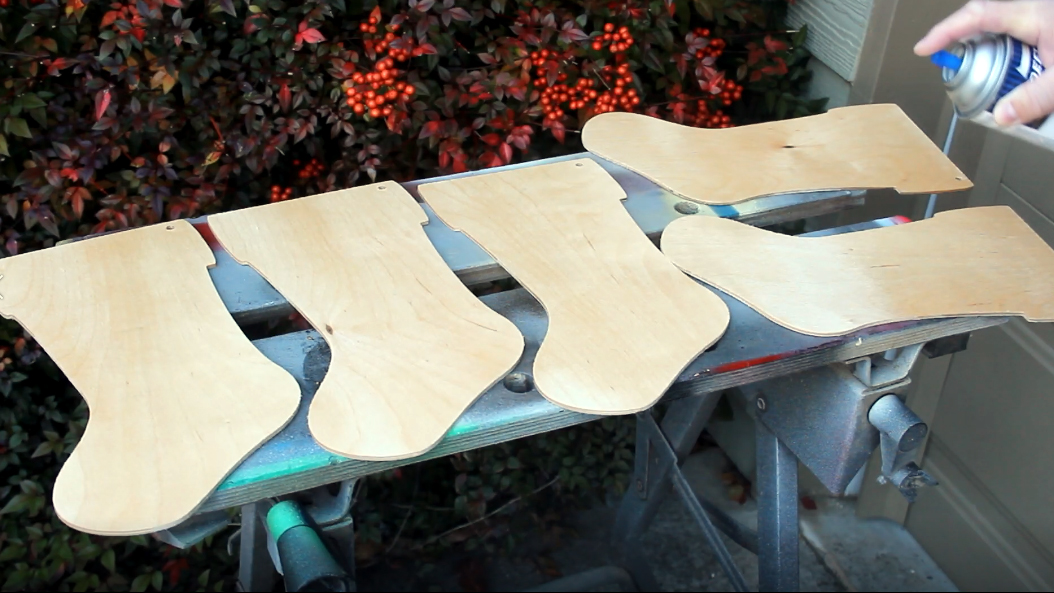
It’s easier to apply finish or paint before assembly. I simply sprayed my stockings with spray lacquer because I was going for a handmade natural wood look. Avoid getting finish on the edges that will be glued together so that the glue will bond well.
Assembly is really easy. This may be a good time to add the LED lights depending on the type of lights you are using. For example, if you want to glue a strip of LED lights around the inside of the side piece, you will be able to access it better before assembly.
I used a 5-pack of battery powered puck lights from Walmart, so I was able to wait until after assembly to insert them.
Glue the front and back pieces onto the side piece to create the stocking box. Make sure to line up the edges so they are flush. Clamp until dry.
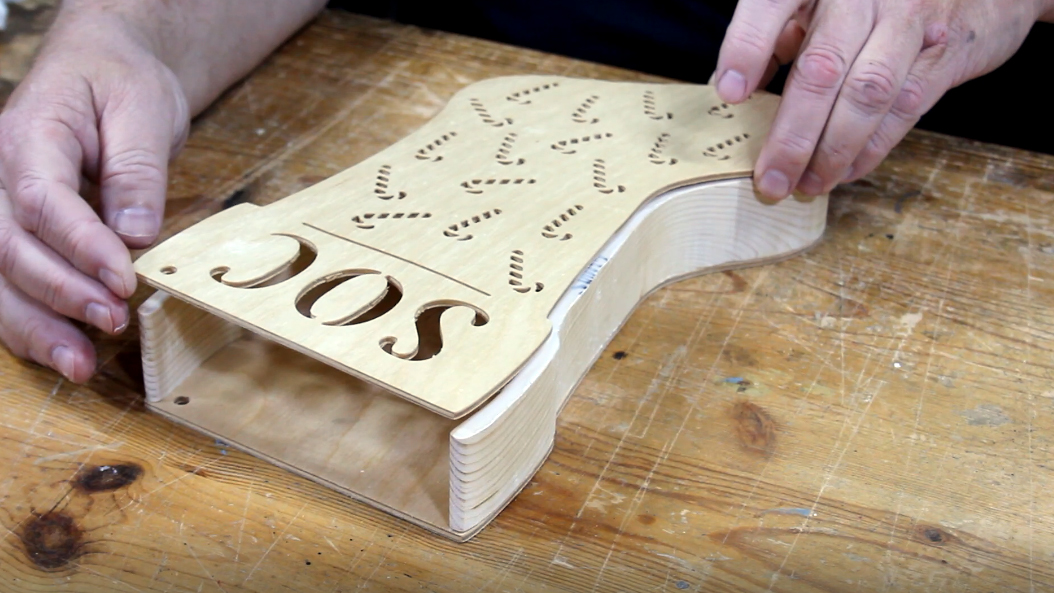

I tied twine through the corner holes that were carved in the front and back pieces for hanging. You could use ribbon, rope, or hooks to hang them as well. Hang up the stockings and enjoy!
Thanks for checking out my project!
For more projects, Click here to visit my YouTube Channel.
For free project plans, click here to visit my website.
Have a great day and happy carving! Steve….


edward a foster