
This is a reverse engineered dragonfly puzzle from the 1920’s that I’ve been lucky enough to find pictures of. From what I can tell, the design is originally from the Yamanaka Kumiki Works. I’ve heard that “kumiki” roughly translates to “wood weaving”. This is a two sided cnc project.
Background:
Kumiki puzzles are a based on traditional Japanese joinery. After running across some awesome puzzle sites, I found that one of my favorite puzzles as a kid, the kumiki wooden cube, had more cousins than just the sphere, and barrel. I found pictures of this dragonfly puzzle and since I love both puzzles and dragonflies, I had to build one.
Here’s a link to a vintage one.
https://www.worthpoint.com/worthopedia/vintage-japanese-kumiki-puzzle-18-1800736441
This CNC project is a two sided project with 1/4 inch alignment dowels. After adding some alignment holes to your sacrifice board, you’ll be making some amazing 2 sided projects. Trust me on this one.
NOTE: I’ve cleared all the feeds and speeds to default automatic settings. If you’re unsure what your machine Speeds & Feeds are with cedar (or whatever wood you choose), I recommend default settings or using something like GWizard (which is what I do).
I made a simpler version of the puzzle that is single sided. I still recommend drilling the alignment holes to eliminate lateral motion. Here’s the link: https://easel.inventables.com/projects/w2_fOlJKCbgfSiW1RcYjCg
Materials:
Two 1/4 inch wood dowels between 3/8" and under 1/2"
6mm router/mill bit
6 inch x 5/8" cedar fence picket, but you really only need 12 inches or so. And the thickness isn’t exact. you’ll be trimming it down on the CNC
Use 1_align_holes for this.
- Since this is a two sided project, mill out the alignment holes in the scratch board.
- Clamp the work piece above the alignment holes and mill out the matching holes in the work piece.
- Insert the dowels in the alignment holes on the scratch board.
- Flip work piece over and mate dowels to alignment holes
- Machine holes in top of work piece.
You now have alignment holes for both side of the board. This makes it so you can flip the board, AND it gives you lateral clamping to prevent work piece slippage with lateral cuts (which is basically all of the CNC cuts, right?)
No Photo yet, but I promise to add one after I make another dragonfly puzzle.
Use 2_Side1_faceoff_parts for this.
This step will face off a small section of the board AND add grooves for the front side of the dragonfly wings.
- Securely camp the part to the scratch board.
- Align tool zero to the surface of the board.
- Cut the part.
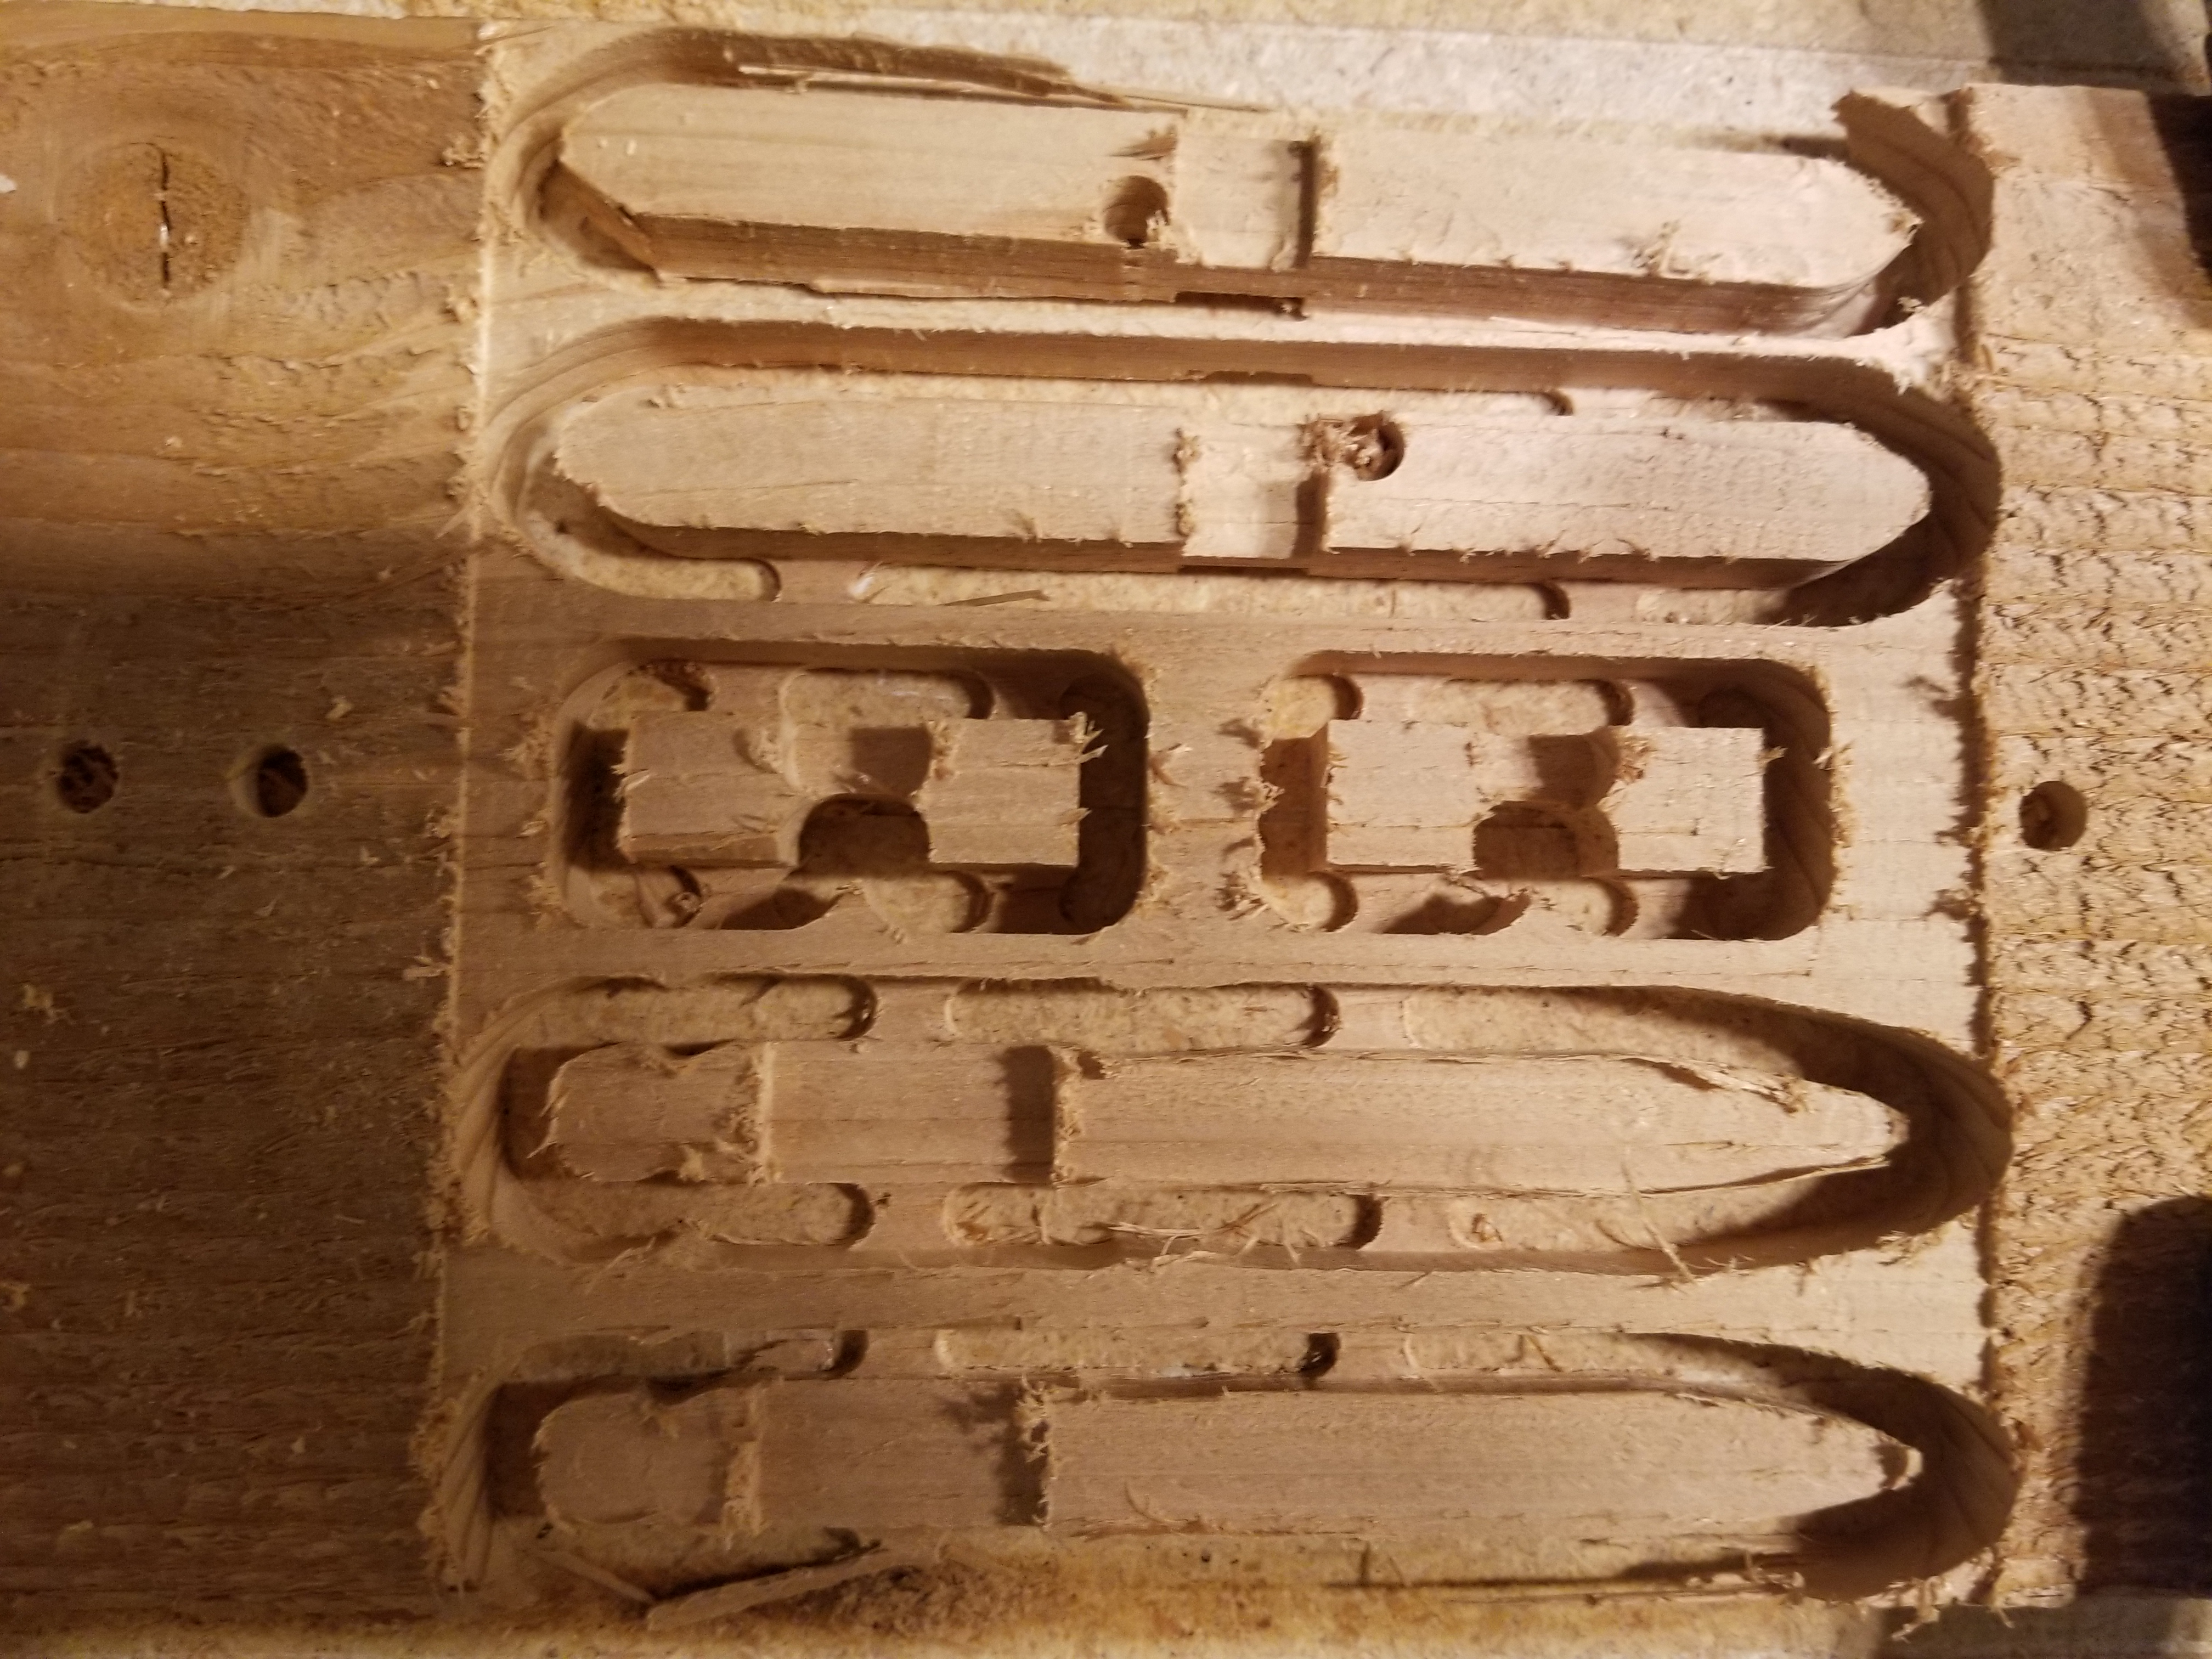
Use 3_Side2_cutout_parts
This step is all the heavy cutting and will take the board thickness down to 0.5 inches.
WARNING: if you’re using a board that is MUCH thicker than 5/8, you need to first cut the board thickness down to 1/2" or risk breaking your cutter.
- with the uncut side up (yeah, there will be the alignment holes), align board to alignment holes.
- Securely clamp workpiece to sacrifice board.
- Cut part
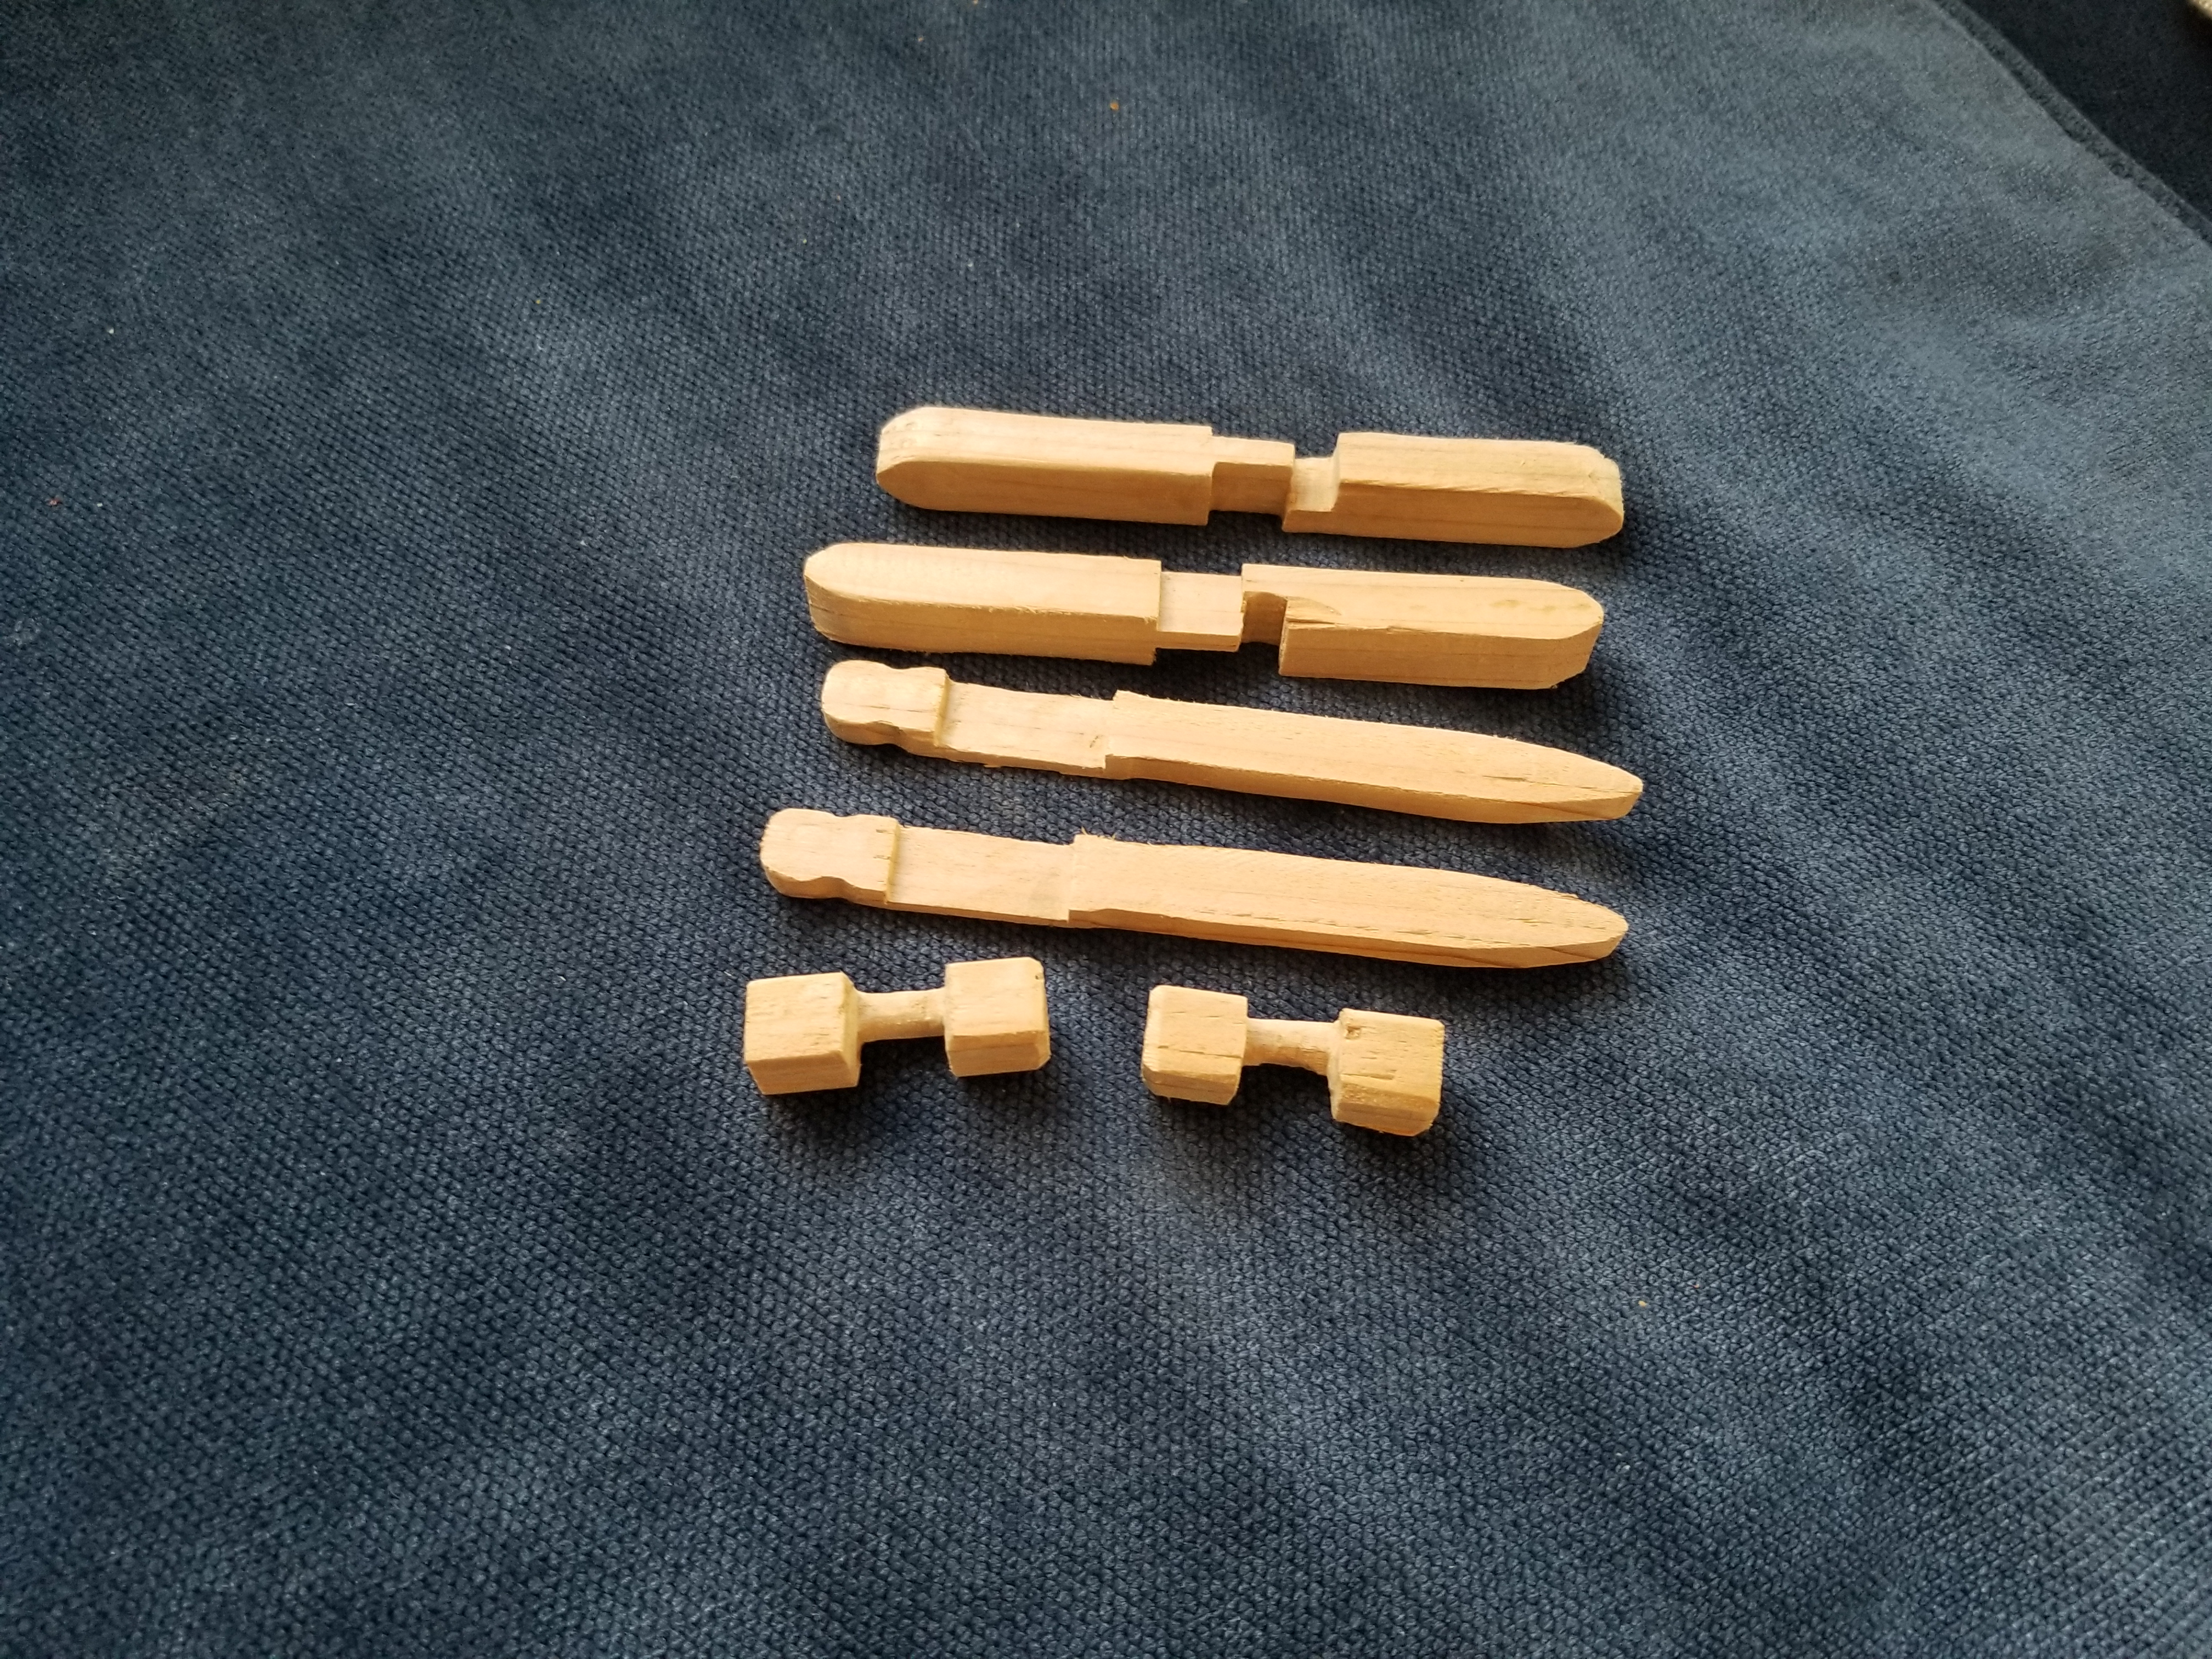
By now, you know the drill of cutting out the project from the tabs, taking a sharp saw or blade to the tabs and sanding off the unwanted bits.
In addition to the standard stuff, you need to insure the fit. Use sand paper and files. Don’t over sand or it will make for a loose puzzle.
- Make sure locks (the little barbell looking pieces) are rounded on the shaft so it looks like a little dowel between two cubes.
- Fit the locks in the notches of the wings and make sure that the lock can turn.
- With the locks out, slip the wing into the body. Check for fit and sand/file if needed.
With wood puzzles, you typically don’t apply a hard finish. I use mineral oil, mineral oil with bees wax, cutting board oil or some non-drying oil finish.
Again, not enough pictures were taken and I’ll add to this later.
- Select one half of the body slot up.
- Put one wing of the dragonfly into the slot so that the notch will be facing the other wing.
- Insert the lock into the first wing
- Rotate the lock so you can put in the second wing.
- with the second lock in the second wing, fit the second wing into the body slot.
NOTE: The locks must be on opposite sides of the body or they won’t work.
- Fit the top half of the body over the wings and other body half.
- Rotate the locks to lock the wings in place.


