
Steve Carmichael
MONROE, GA
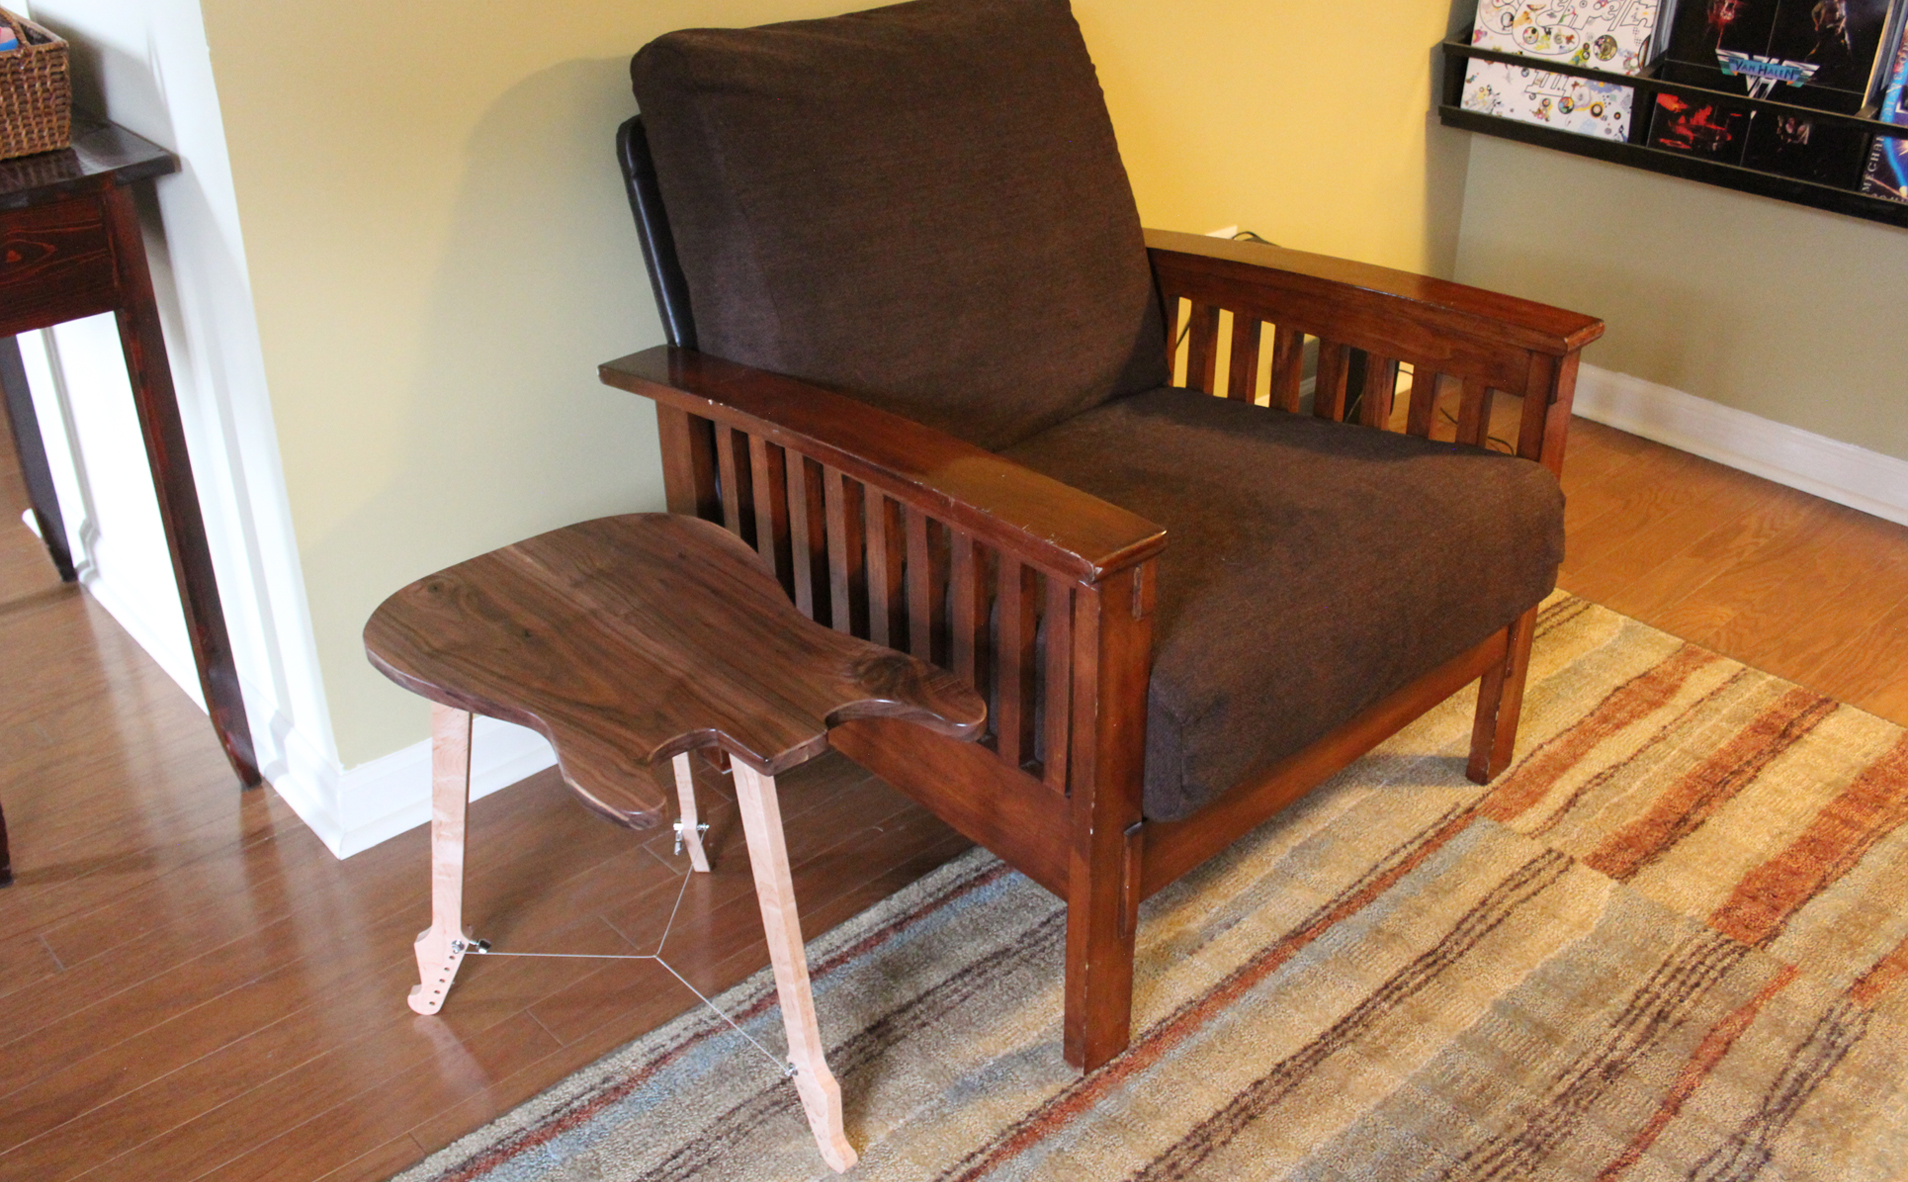
I needed a table next to my favorite chair in my office/music room, so I made a Guitar Shaped Side Table.
| Material | Description | Price | ||
|---|---|---|---|---|

|
Soft Maple - Hardwood Type |
|||

|
Walnut (×2) |
|||
6 minutes
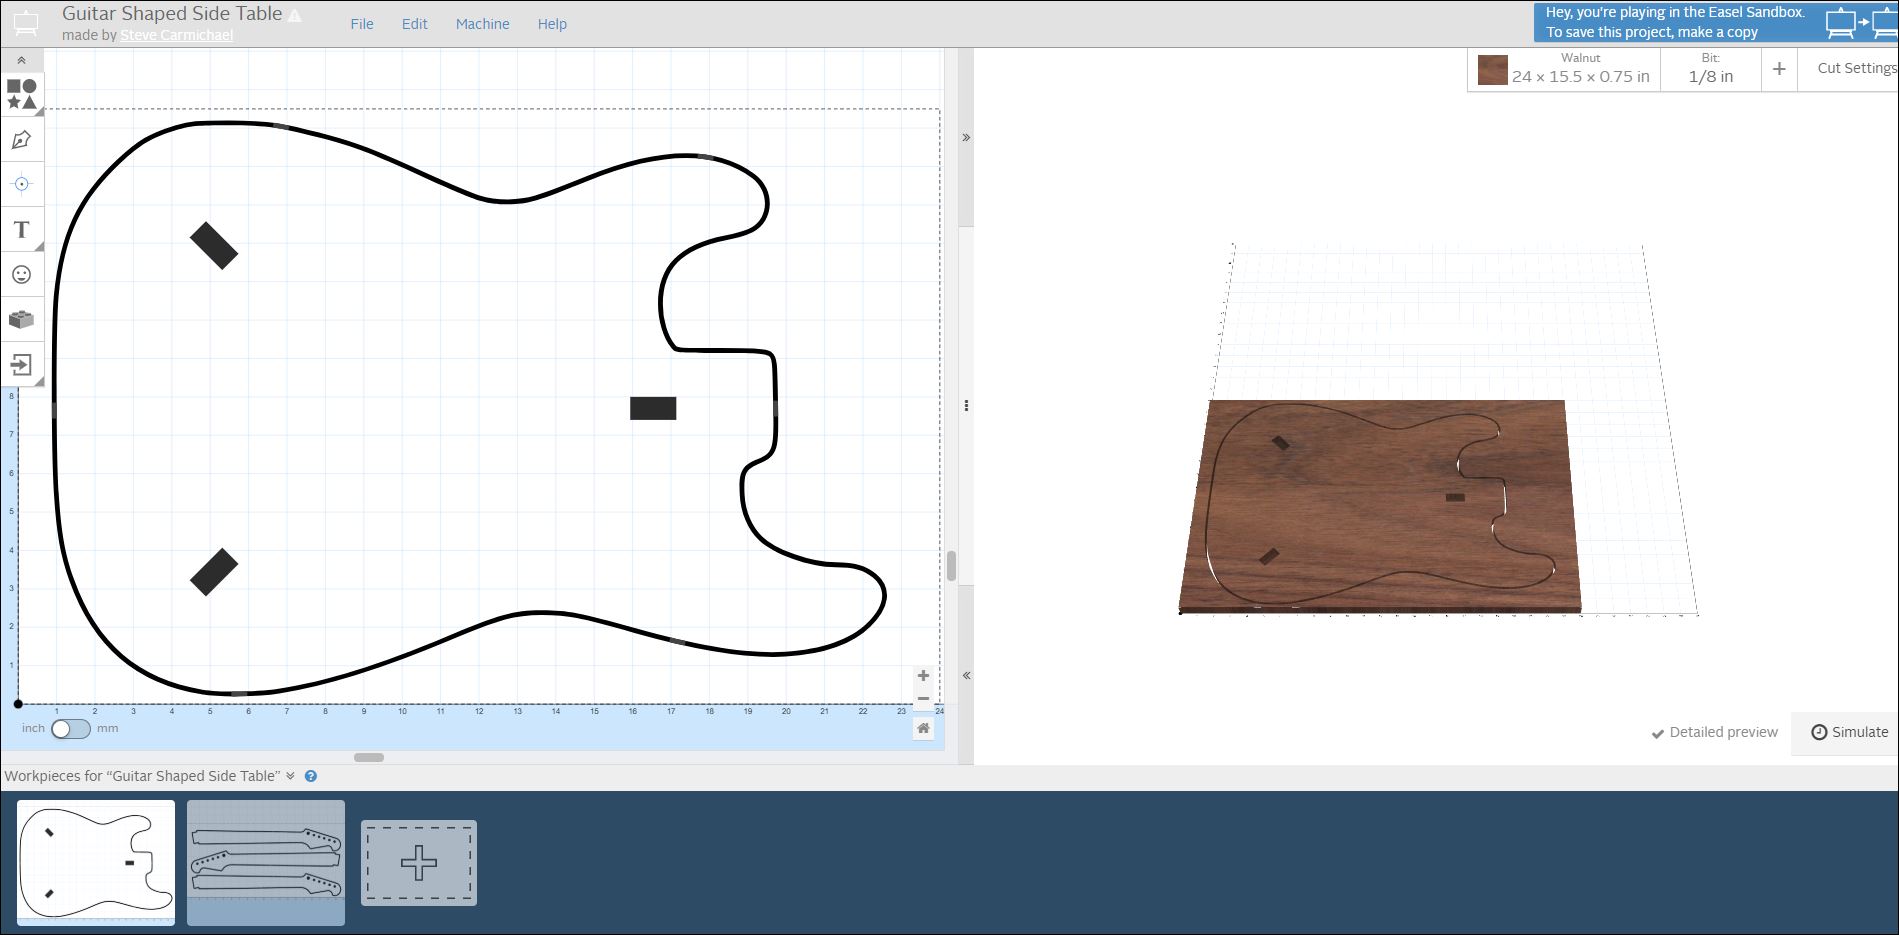
Watch my video of this project, then follow these basic instructions to make one yourself! Click the blue button at the top-right of this page to open a copy of this EASEL project. Make sure to adjust the dimensions to fit the dimensions of your material and parts.
30 minutes
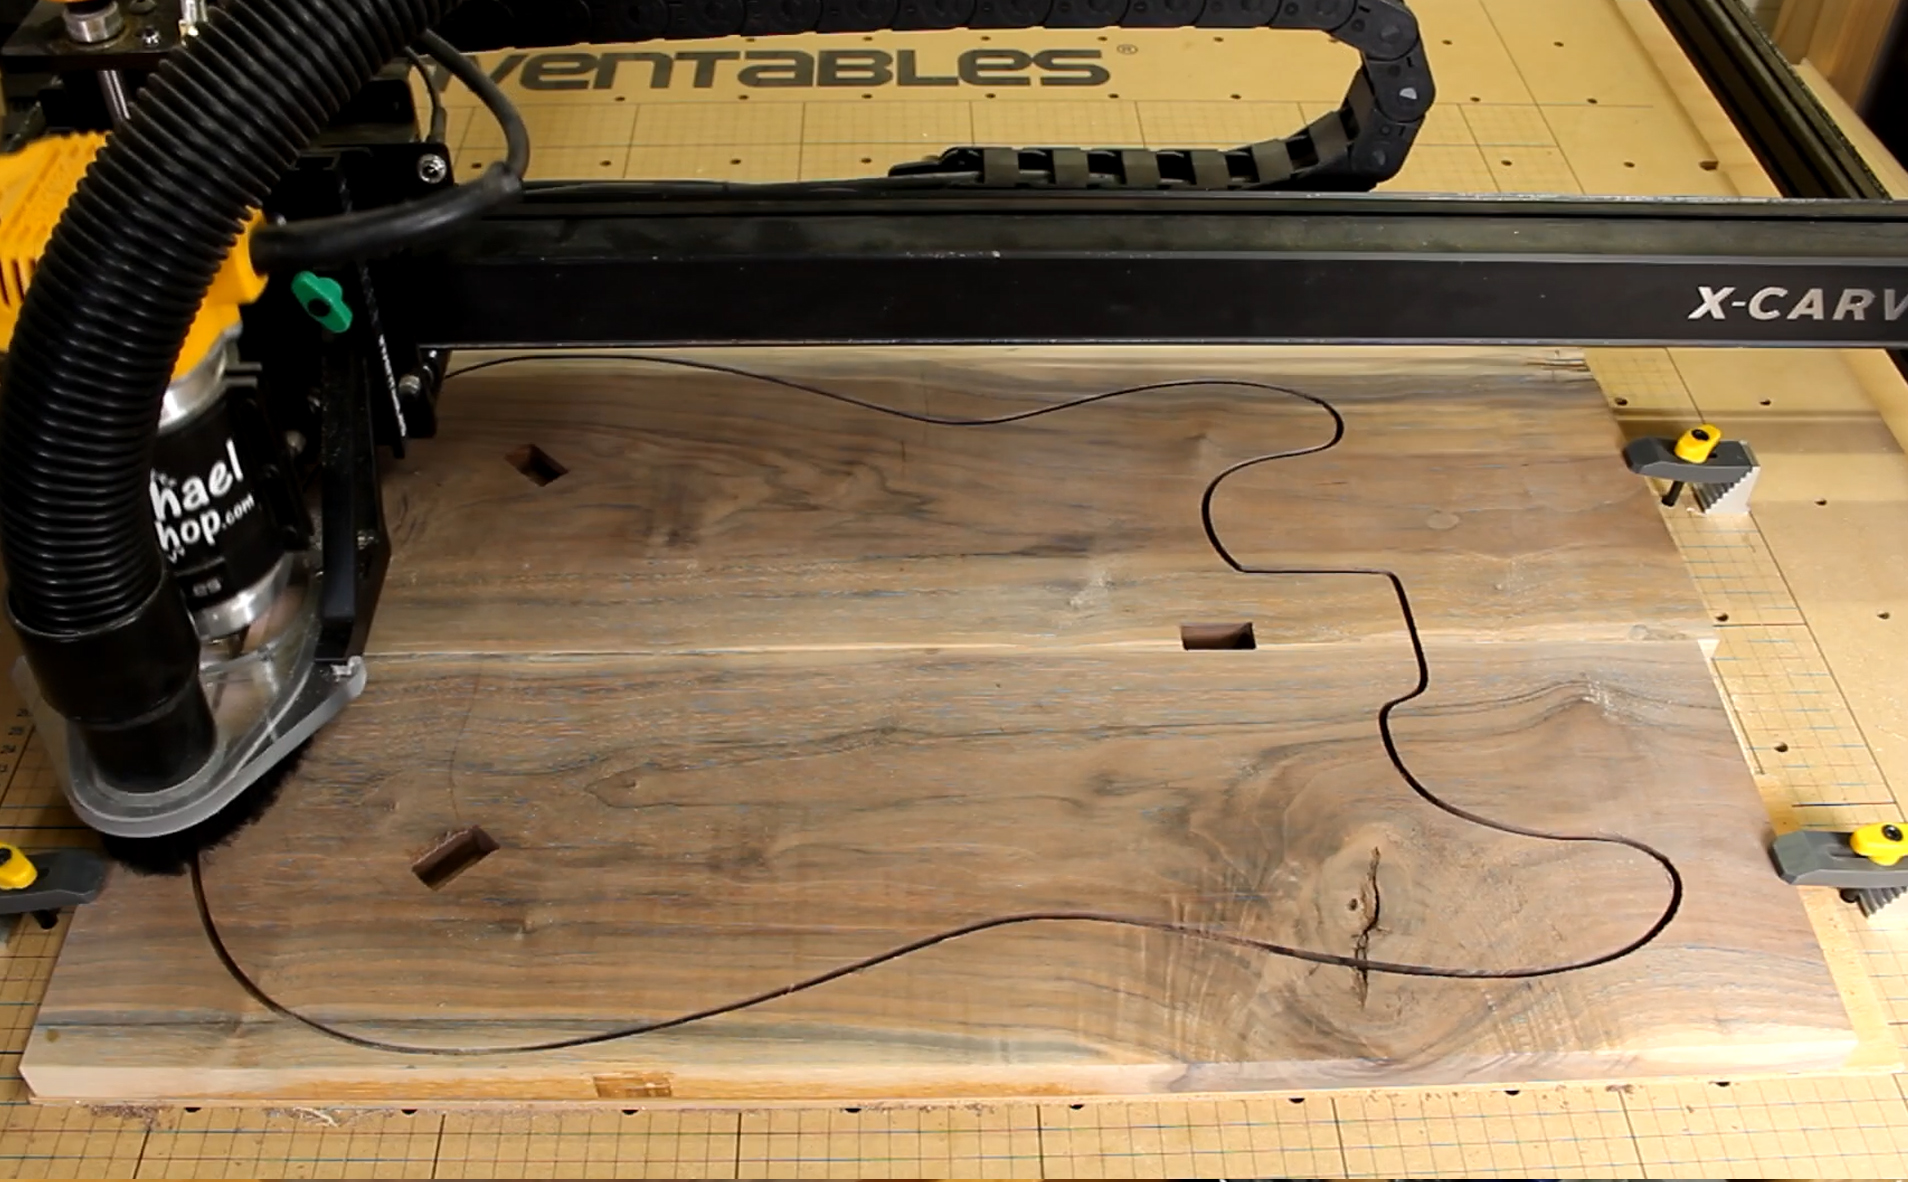
I glued up a panel of 3/4" thick walnut that was 16″×24″ for the table top.
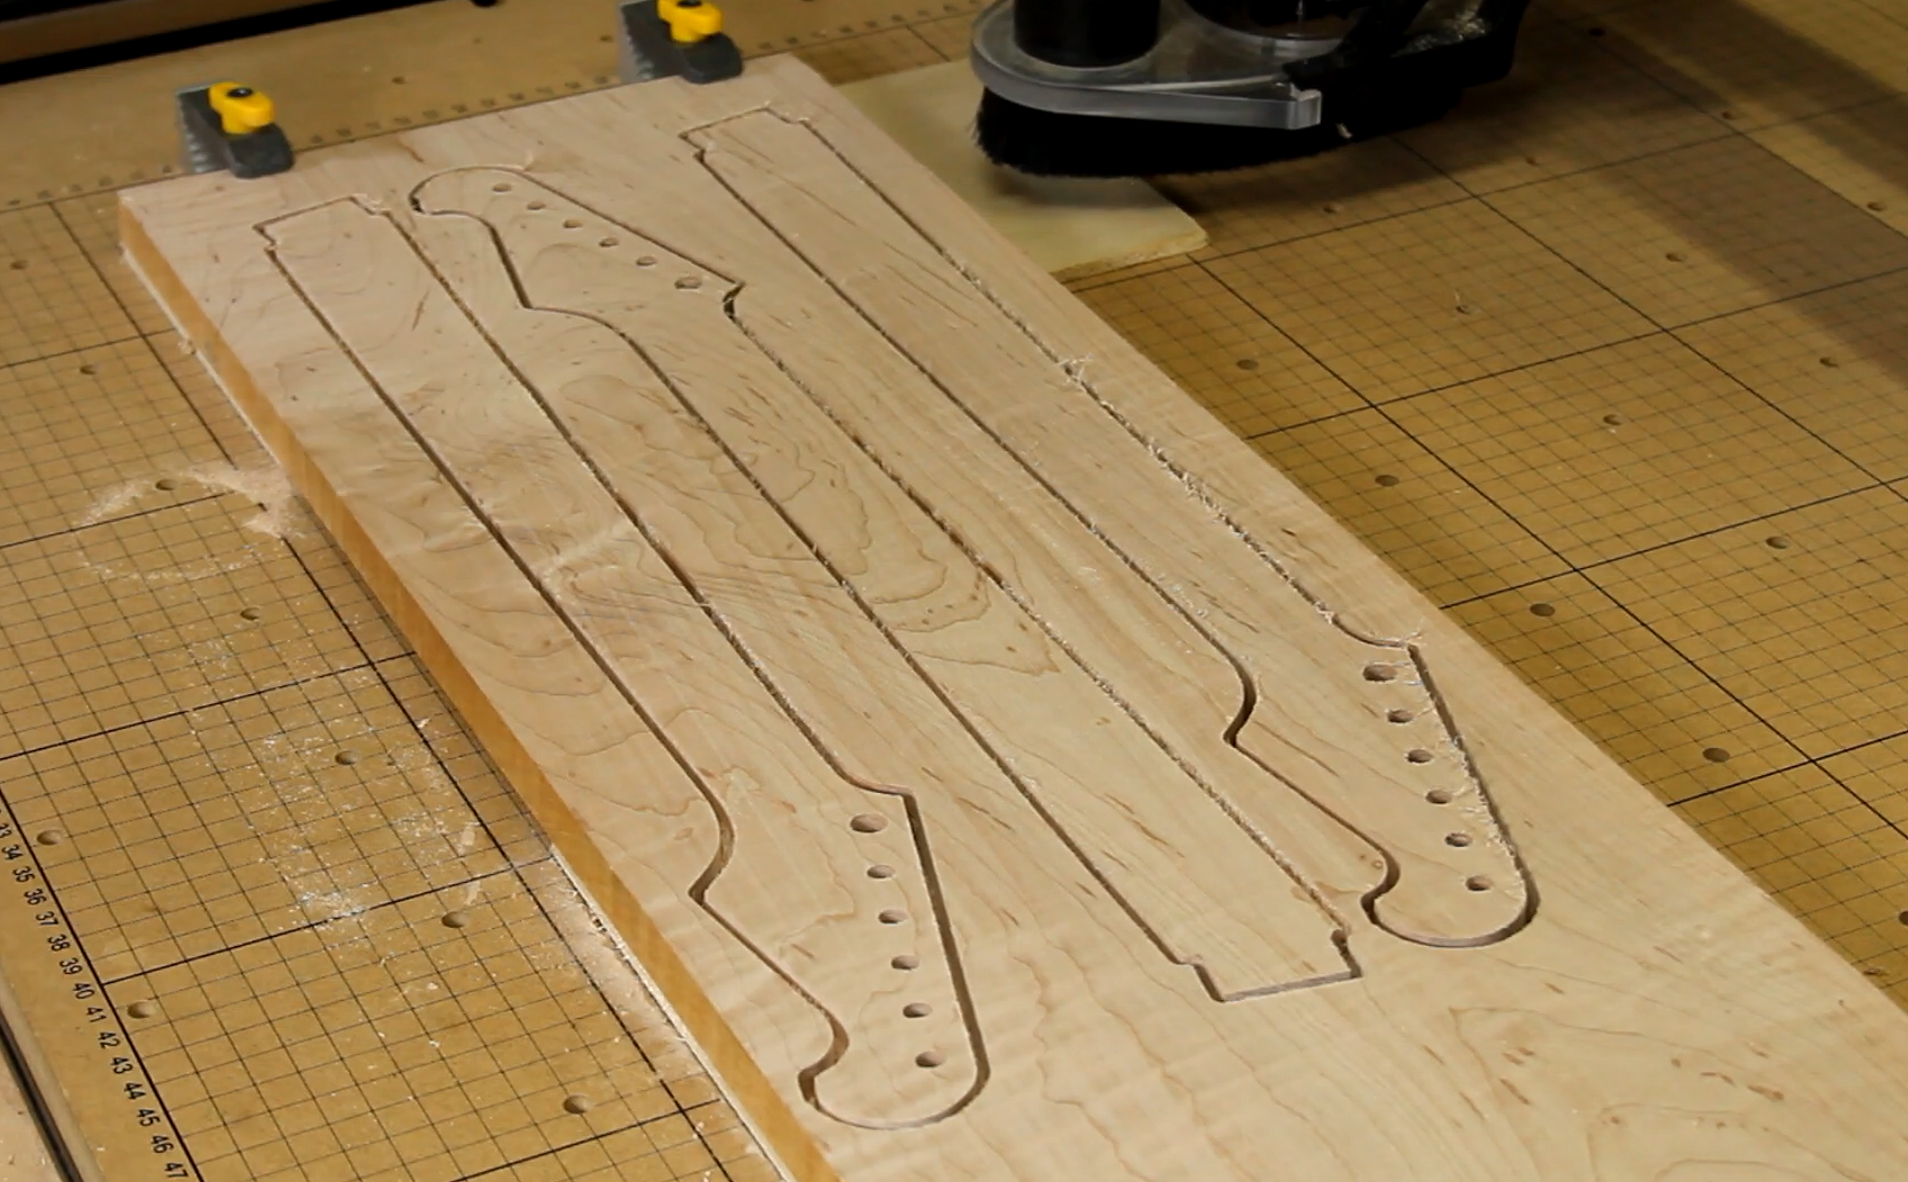
I cut a section of 9/16" maple that was 9″×20″ for the legs.
Note: I used my planer to plane the maple board down from 3/4" to 9/16" thick so that the guitar tuners would fit. I adjusted the mortises on the underside of the top to fit this 9/16" width as well.


90 minutes
The EASEL project consists of two jobs.
The first job is to cut the table top. Mount the blank on the X-Carve with the bottom side up for cutting the mortises.
The second job is to cut the legs (necks).
120 minutes
Sand all parts smooth.
I used a trim router to put an 1/8" roundover on the edges of the table top.
Test the fit of the legs into the table top mortises, then glue them in.
I sprayed the table with satin Deft Clear Wood Finish Spray Lacquer.
Mount the guitar tuners. (Click here for an inexpensive set of tuners.)
Measure a section of guitar string to form a V shape between the back two legs and cut it to length. Thread the cut string through the ring on the other piece of guitar string. Wind the string onto the tuners to form a Y between the legs.
FINISHED!
Thanks for checking out my project! Check out my other projects on my website and YouTube channel at the links below, and please follow me on Facebook, Twitter and Instagram to keep up with what’s happening in The Carmichael Workshop!
Click Here to visit my website!
Click Here to watch my YouTube channel!


francois giroux
Steve Carmichael
francois giroux
Steve Carmichael
Florian Zigan
Steve Carmichael