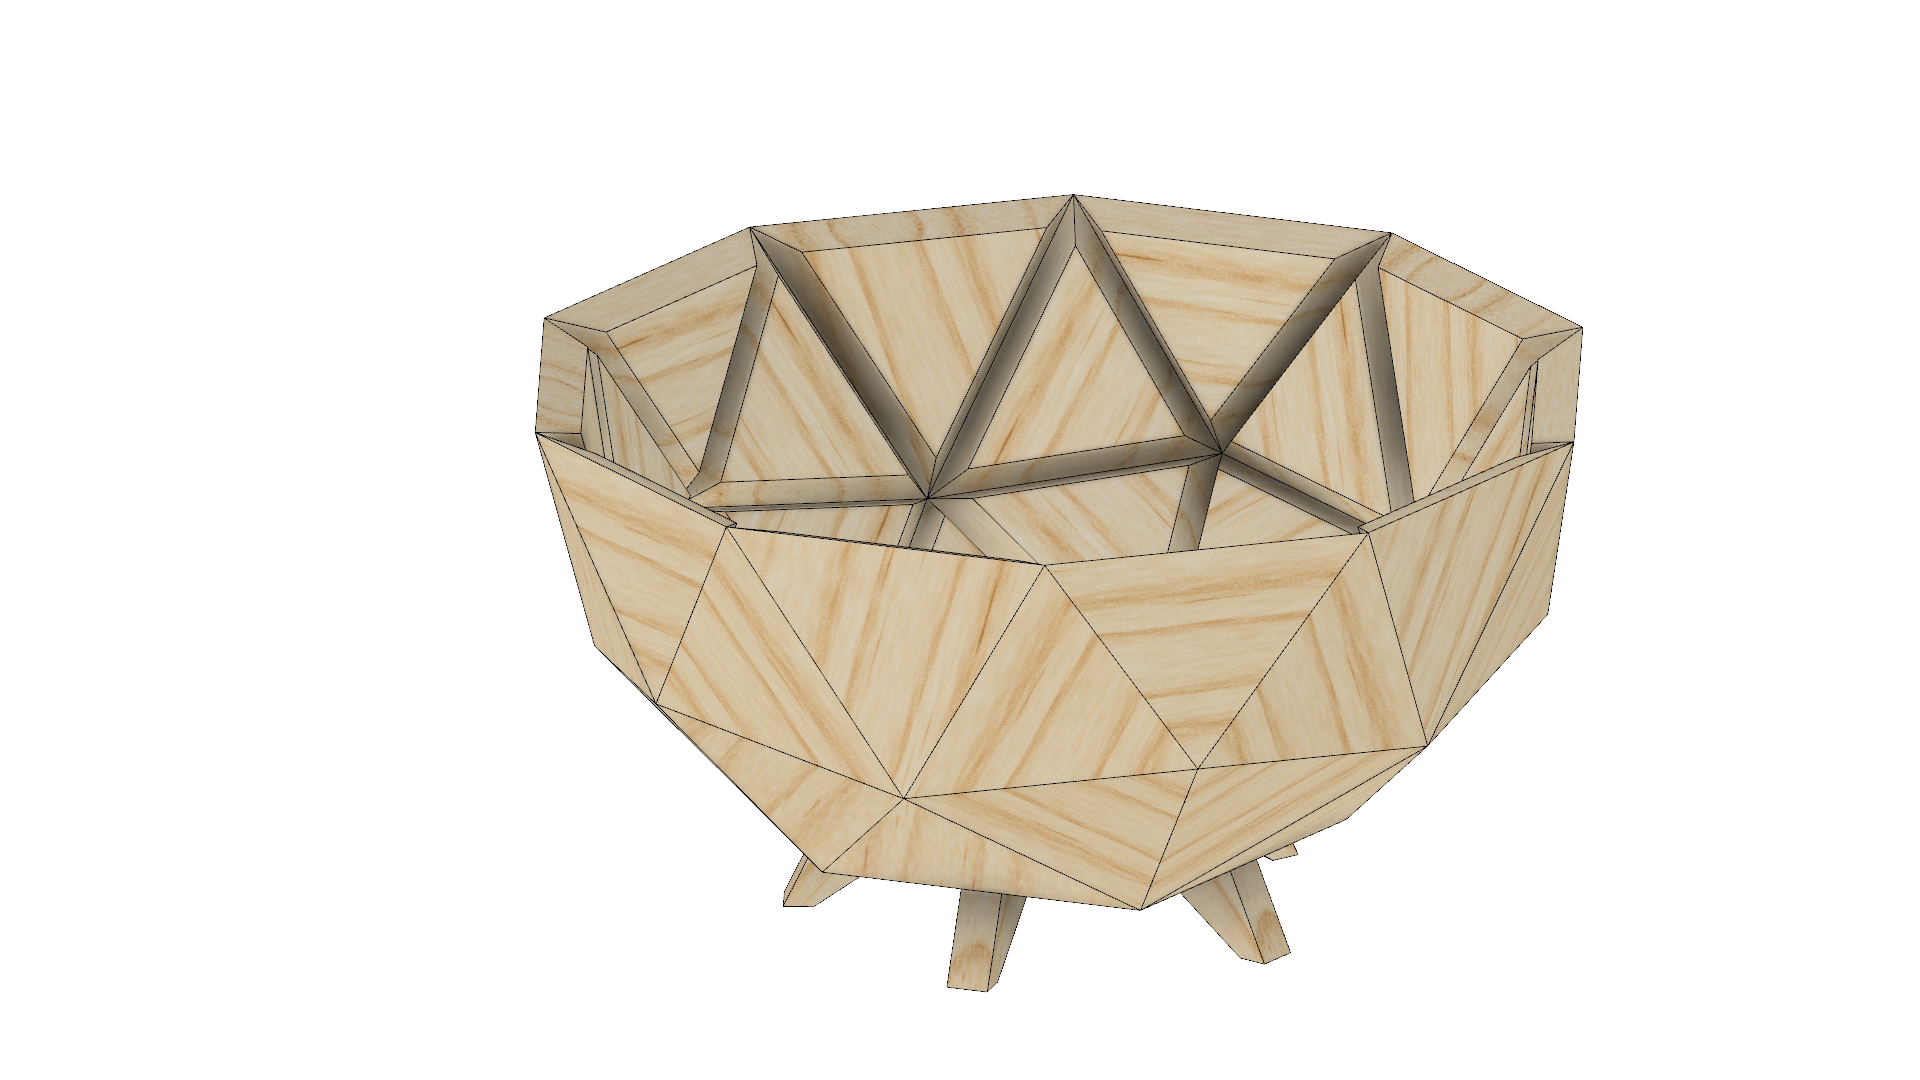
For the Easel Power Hour Challenge I designed a small wooden bowl that is made from many smaller triangles using the X-Carve.
| Material | Description | Price | ||
|---|---|---|---|---|

|
Bamboo Plywood |
Dimensions: 12 in × 24 in., Thickness: 1/4 in, Plies: 3 |
$33.99 |
|
| Add to Cart |
$33.99 |
|||
60 minutes
Use a geodesic dome calculator to generate the dimensions for the triangles to match the diameter you are aiming for. I chose a “2v”-style geodesic dome as it consists of only 2 different triangle sizes and has a flat base. My Easel cuts are for a 16 cm diameter bowl, but it could be scaled to match your needs.


60 minutes
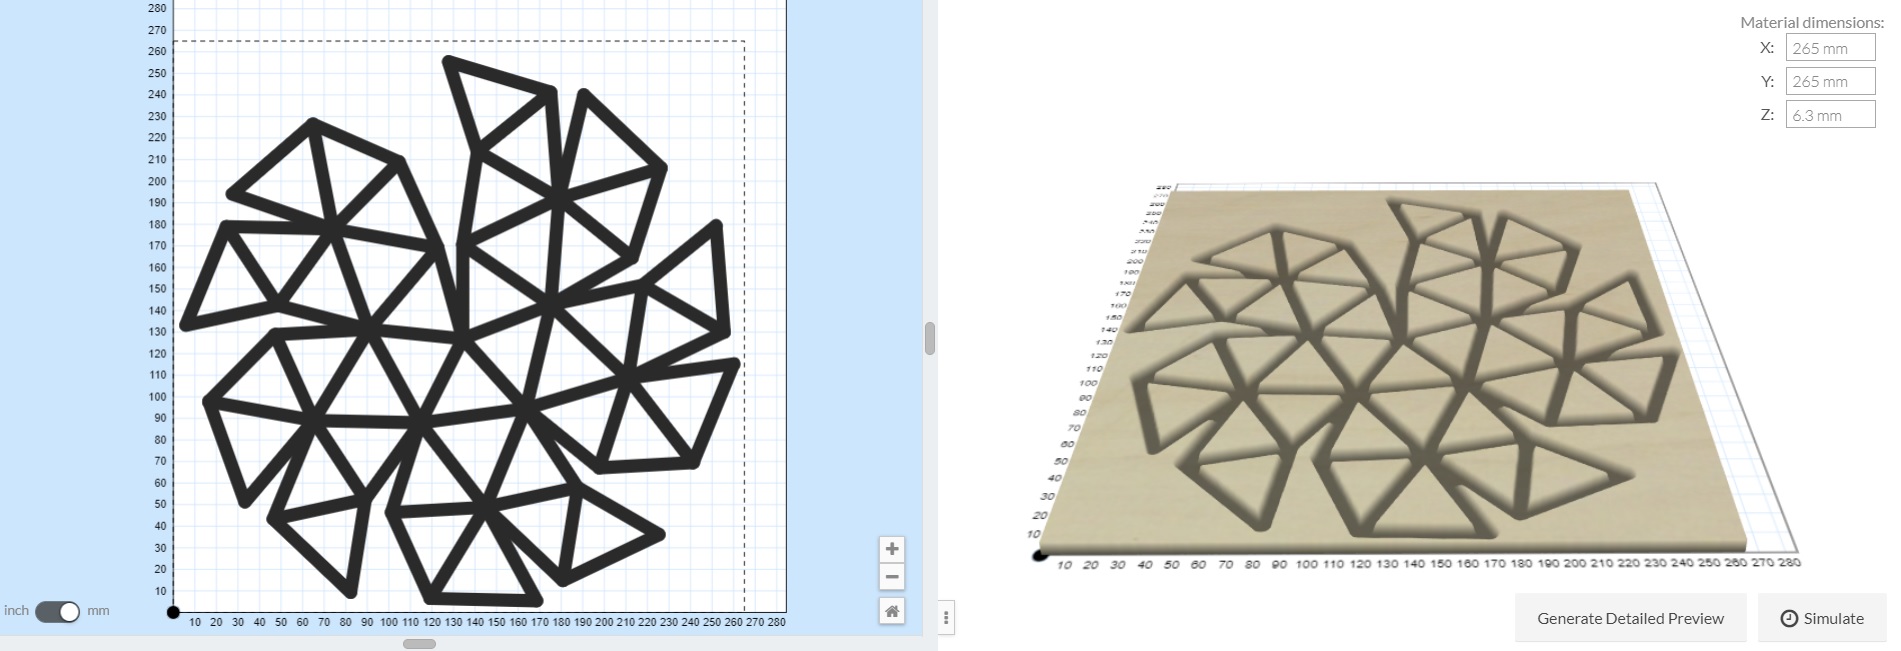
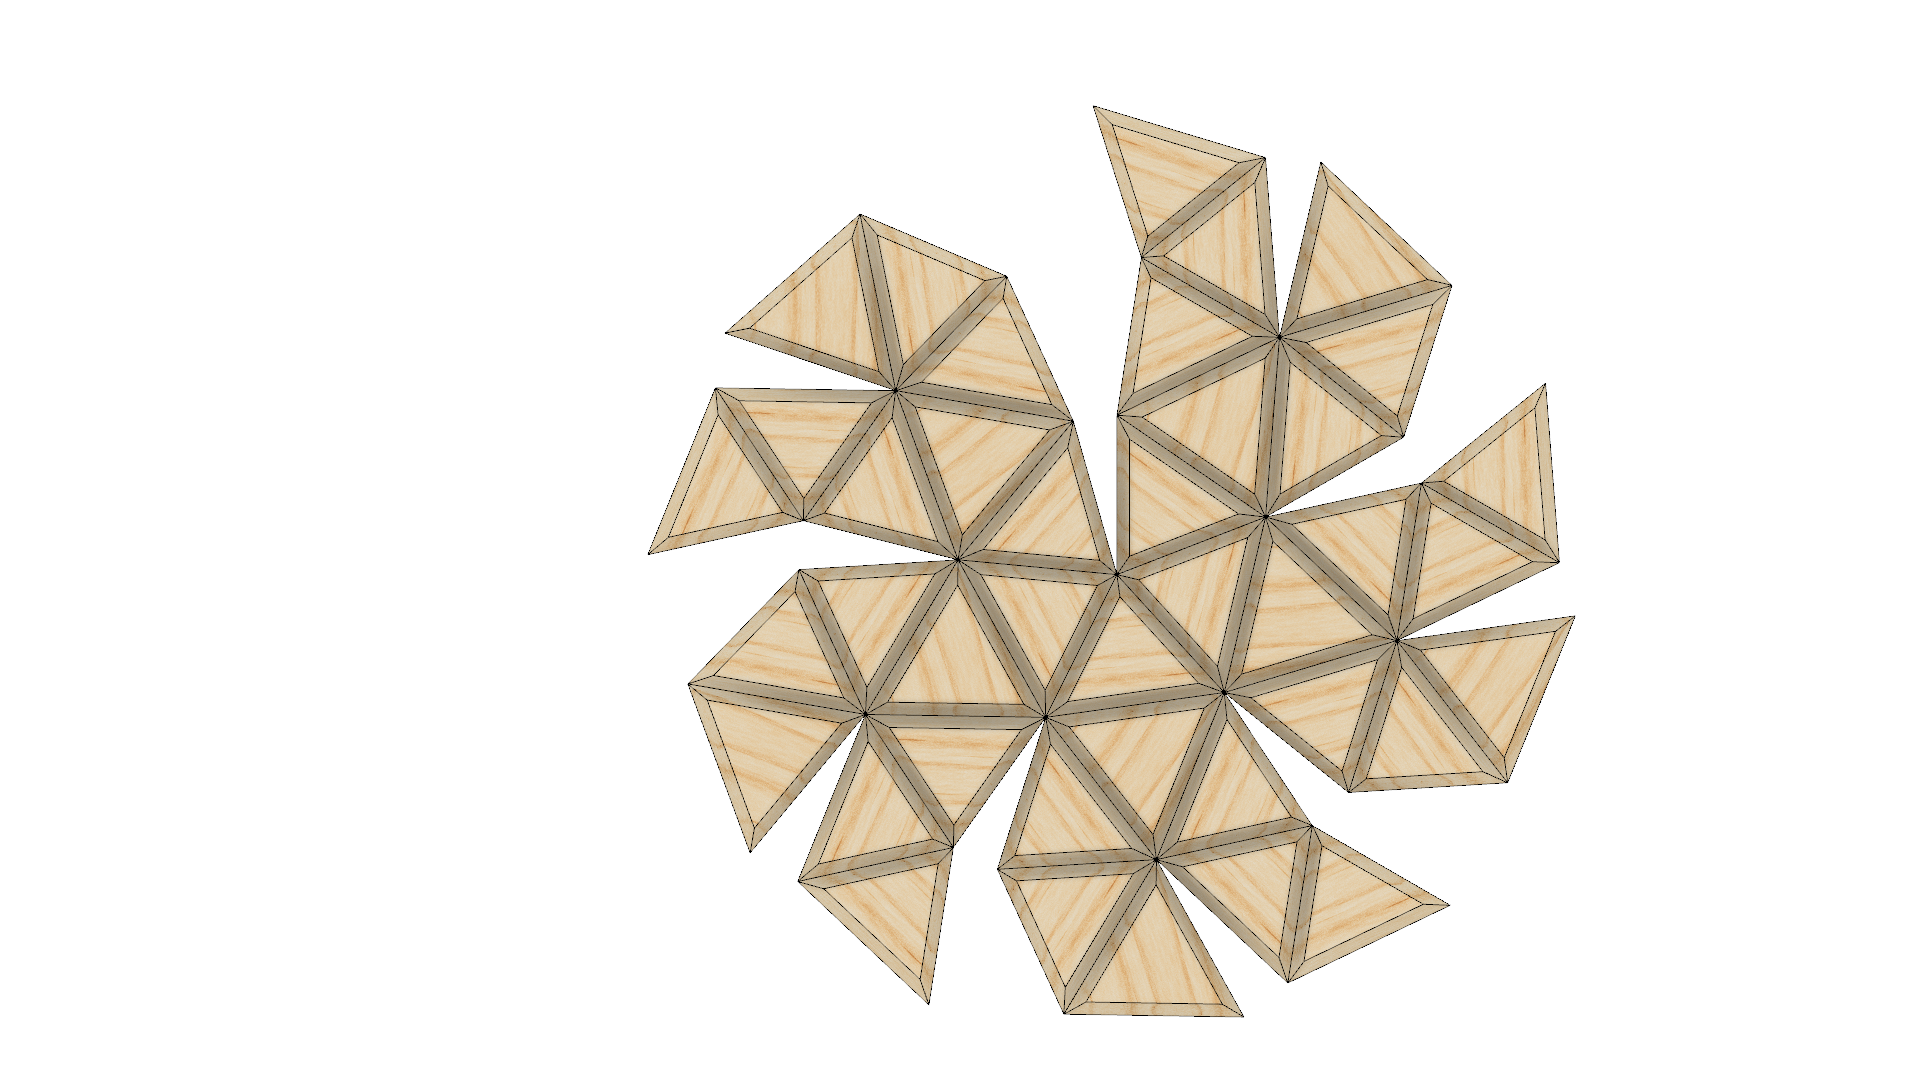
Using the pieces from the previous step, put together a flattened carving layout for the X-Carve. There will be many gaps that would require gluing after the carving, but it’s unavoidable with any mitered 3D object. Using any 1/4" thick plywood, leave about 1 mm of material uncut so that the piece stays together and require less gluing. Select the 60 degree V-groove bit for the cut.
At 16 cm diameter, the bowl cutout should fit within a 27 cm x 27 cm piece of plywood, but you could use a slightly larger piece for additional cuts in the next steps.
30 minutes
Using the X-Carve, cut out the bowl. The simulation predicts it should take approximately 28 minutes.
After the cutting is done, use a band saw, scroll saw, or hand saw to remove the piece, and clean up the edges with files or sandpaper.

15 minutes
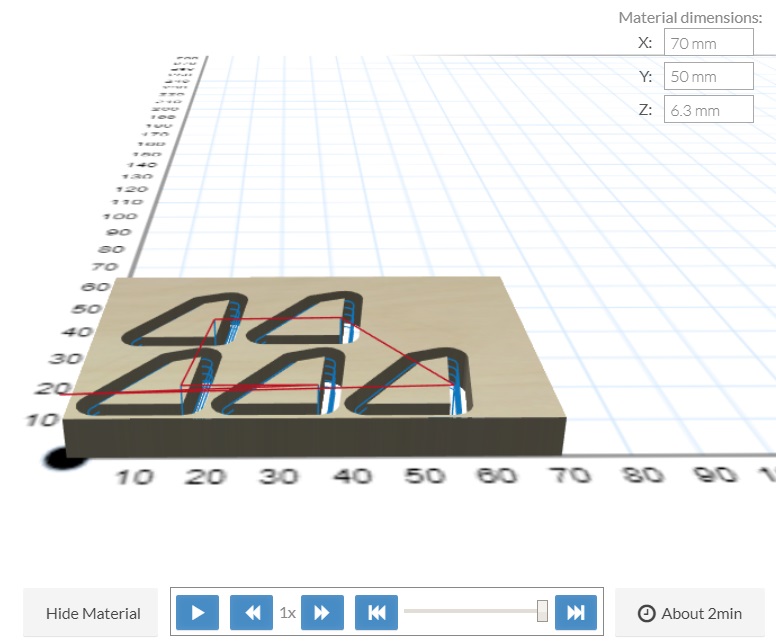
The bottom of the bowl is not flat, so it’s a good idea to add feet to keep it stable and upright. As the bottom segment of the bowl has five symmetrical sides, I decided to create five small feet.
Start by designing one foot and copying the shape four times. They will be cut out of the same 1/4" plywood material using a straight bit of any size, cutting to full depth with tabs to keep them in place.
The bowl feet I designed are estimated to take 2 minutes to cut. This brings the total carving time for this project to 30 minutes.
After the cutting is done, use a band saw, scroll saw, or hand saw to remove the piece, and clean up the edges with files or sandpaper.

60 minutes
Now that the bowl is cut out, it’s time to glue together any non-joined edges. This can be done using wood glue or other adhesives, with clamps and tape to keep the pieces together while the glue dries.
This part may be difficult, so splitting it into multiple gluing operations may help ensure proper alignment of the pieces. It is recommended to glue it from the center outwards.
When all the gluing is complete, sand or scrape off any excess glue.

15 minutes
Lastly, the feet need to be glued on. This can be done using wood glue or other adhesives, with clamps and tape to keep the pieces together while the glue dries. This can be done one foot at a time or all at once.
When all the gluing is complete, sand or scrape off any excess glue. If the feet are not completely flat, remove material until the bowl sits flat.

10 minutes
If desired, finish the bowl with your product of choice, or leave it unfinished! If the bowl is to be used to hold fruit or other food, be sure to use a food-safe finish for the bowl.