
Pam Daniels & Brandon Williams
Chicago, USA
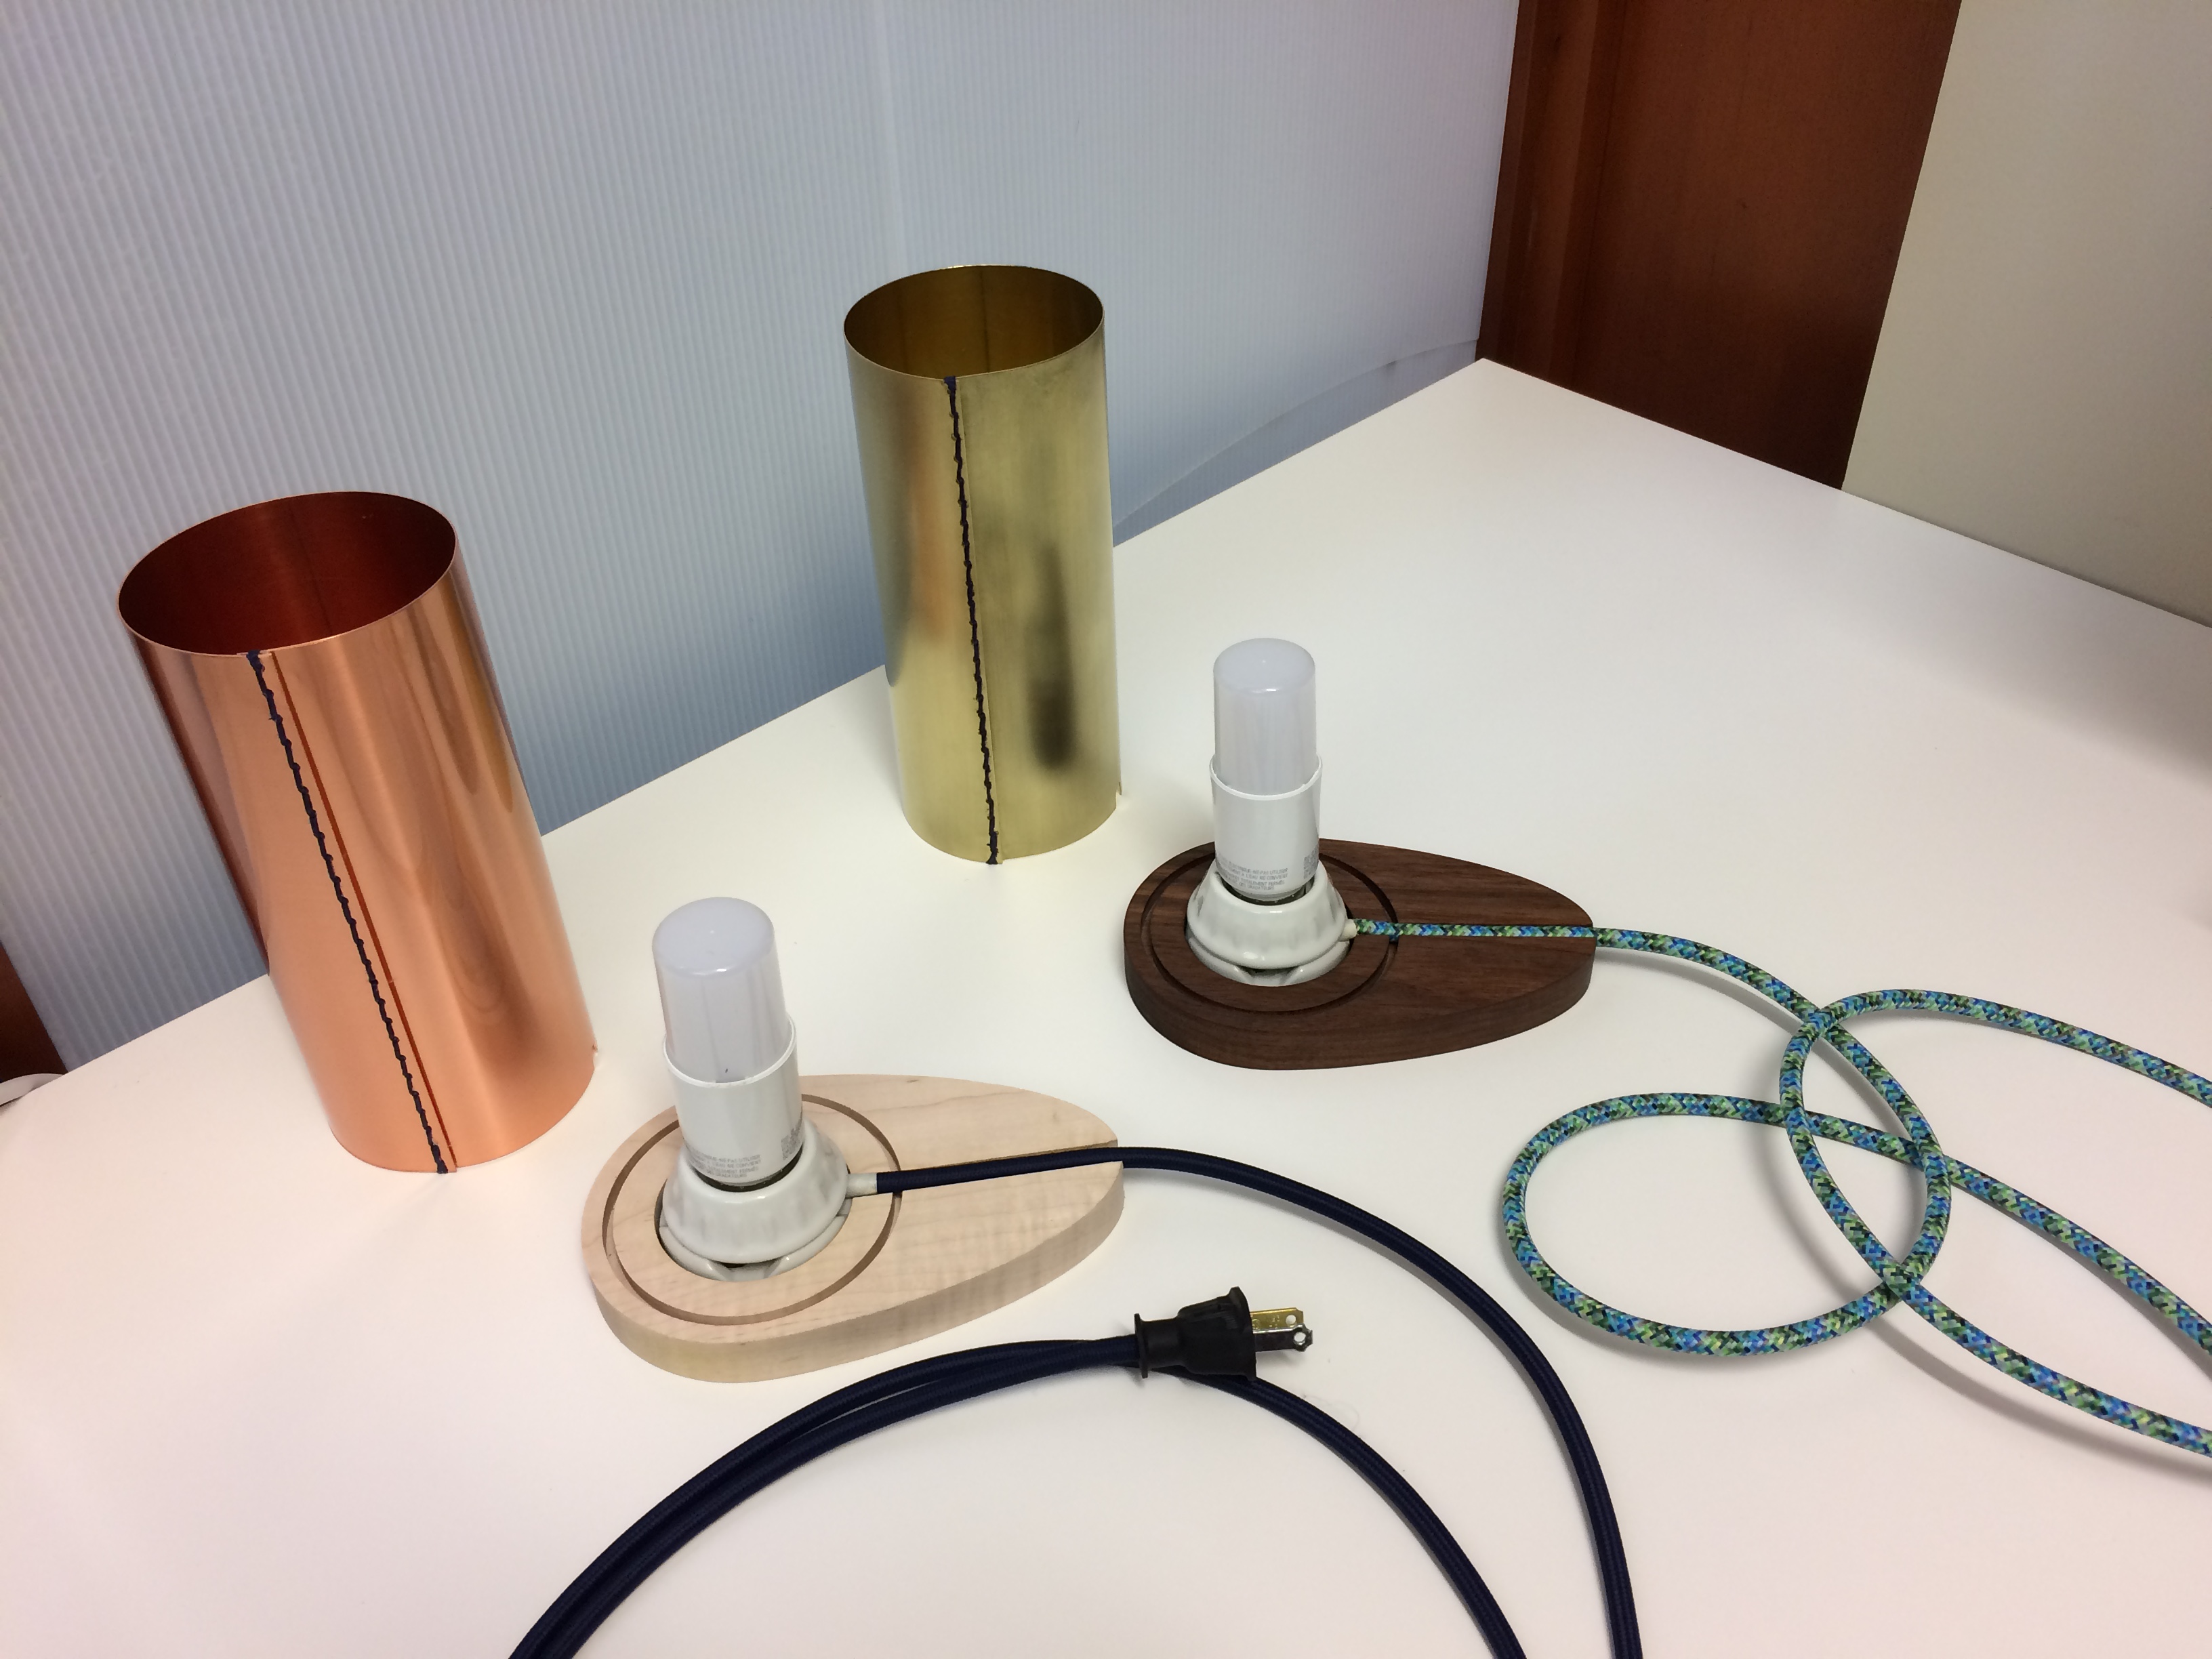
Reflected light takes on the cast of the metal shade. A colorful cloth cord extends through a channel showcasing the wood base. Made with Carvey.
| Material | Description | Price | ||
|---|---|---|---|---|
")
|
Tiger Maple (Flame Maple) |
6" × 12" × 3/4" Tiger Maple |
||

|
Walnut |
6" × 12" × 3/4" Walnut |
$11.43 |
|
| This project's Bill of Materials is not complete. Add to Cart |
$11.43 |
|||
15 minutes
Gather or purchase all needed materials.
> 6×12x¾ wood—we used flame maple and walnut from Inventables
> metal sheet in copper, brass, or aluminum. We used 0.025in thick 260 brass and lacquered copper, trimmed to 7 7/8x 11.25in
> cloth electrical cord, six foot length, from Color Cord Company
> rubber plug end, from Color Cord Company
> porcelain medium base surface socket by Leviton, from Ace Hardware
> waxed linen cord, available in a wide range of colors at The Main Thread
> mineral oil (to bring out dark color of walnut)
> end mills: 1/4in flat end, 1/4in ball nose, 1/16in fishtail (flat)
> leather needle for stitching, or other with a blunt end and large eye
> wire stripper
Note: Lacquered metal 0.025 in thick with a protective plastic coating will likely give best results. Trim the metal sheet down to 11 1/4 by 7 7/8 inches. We used a hydraulic metal shear, but you could also cut it manually and then clean it up on Carvey or another CNC.
If you select walnut, you may want to rub it with mineral oil to bring out the finish once you’ve carved it.

25 minutes
Clamp the 7 7/8 × 11 ¼ inch metal sheet into Carvey. Put the “good” side up— plastic side up if your piece has a coating and protective plastic film. We found it helpful to use double stick tape to adhere the material to the bed, along with using the clamps. Run the job using the Easel file called Cylindrical Shade First Pass http://easel.inventables.com/projects/97C6JvHMt3Uq0Nxcp5ujbQ . Then flip the material over so the cord channel you have cut out is now in the upper left. Clamp. Run the file called Cylindrical Shade Second Pass http://easel.inventables.com/projects/b1SPnmHuUcpN3tkye-pPaQ using Easel to cut the second set of holes. Remove from Carvey. Deburr the metal once the job has run. Form the metal into a cylinder with a slip roller or form it by hand around a cylindrical shape such a roll of tape or PVC pipe.

45 minutes
To make the wood base, you’ll do it in a series of sequenced steps with differing files and varied end mills. Clamp a piece of 12 × 6 x ¾in wood into into Carvey. The wood can remain in place for the entire milling process covered below. Do NOT unclamp it during this step or your paths will likely not align perfectly. Make sure the upper left clamp is well out of the way and angled to the left to avoid the cutting path.
Substep One. Begin with a 1/16th inch fishtail (flat) bit. Open Easel and carve the file Teardrop Lamp Shade Channel http://easel.inventables.com/projects/WaXY9FsTrhLOksFmZsN_OA to create the circular channel for the shade.
Substep Two. Leave the material in place. Vacuum the sawdust to clear the piece for the next stage of milling. Next, change the bit to a 1/4in ball nose mill. Run the Easel file Teardrop Cord Channel http://easel.inventables.com/projects/a8aJGTsaJWjHeZlJPm3KAQ. This will create the channel for the cord.
Substep Three. Leave the material in place. Vacuum the sawdust to clear the piece for the next stage of milling. Change the end mill to a 1/4in flat end. Run the Teardrop Base Center Pocket file http://easel.inventables.com/projects/g06MapLnttyg6WEKCcOlaQ . This will create the center pocket for the porcelain electrical socket.
Substep Four. Leave the material in place. Vacuum the sawdust to clear the piece for the next stage of milling. You do not need to change the bit. Make sure the upper left clamp is well out of the way. Run the Teardrop Base Perimeter file at http://easel.inventables.com/projects/8QlyTSrDCD6ir0PZer0E5A file. This will create the perimeter cut.
Unclamp your wood and remove it from Carvey. Break off the tabs with a utility knife or chisel. Sand to smooth.

Wire the socket and plug end. Instructions are available at The Color Cord Company. If you don’t know how to do this, consider finding a person who can help or get your work looked at to ensure it’s safe.

Stitch the cylindrical shade together with waxed linen thread. Use a blunt-ended leather needle if you have it. The stitch used in our design is called a saddle stitch. You can find out more about how to do it on YouTube.

2 minutes
Set the porcelain base and cloth cord into the wooden base. Screw in bulb (we like the GE LED light stick, shown). Fit the metal cylinder into the wooden channel with the cord cutout aligned to the right.
1 minute
Plug your lamp in and enjoy! If you’d like, you can add an on/off switch available from The Cord Company as well, though our design does not currently include one.


