
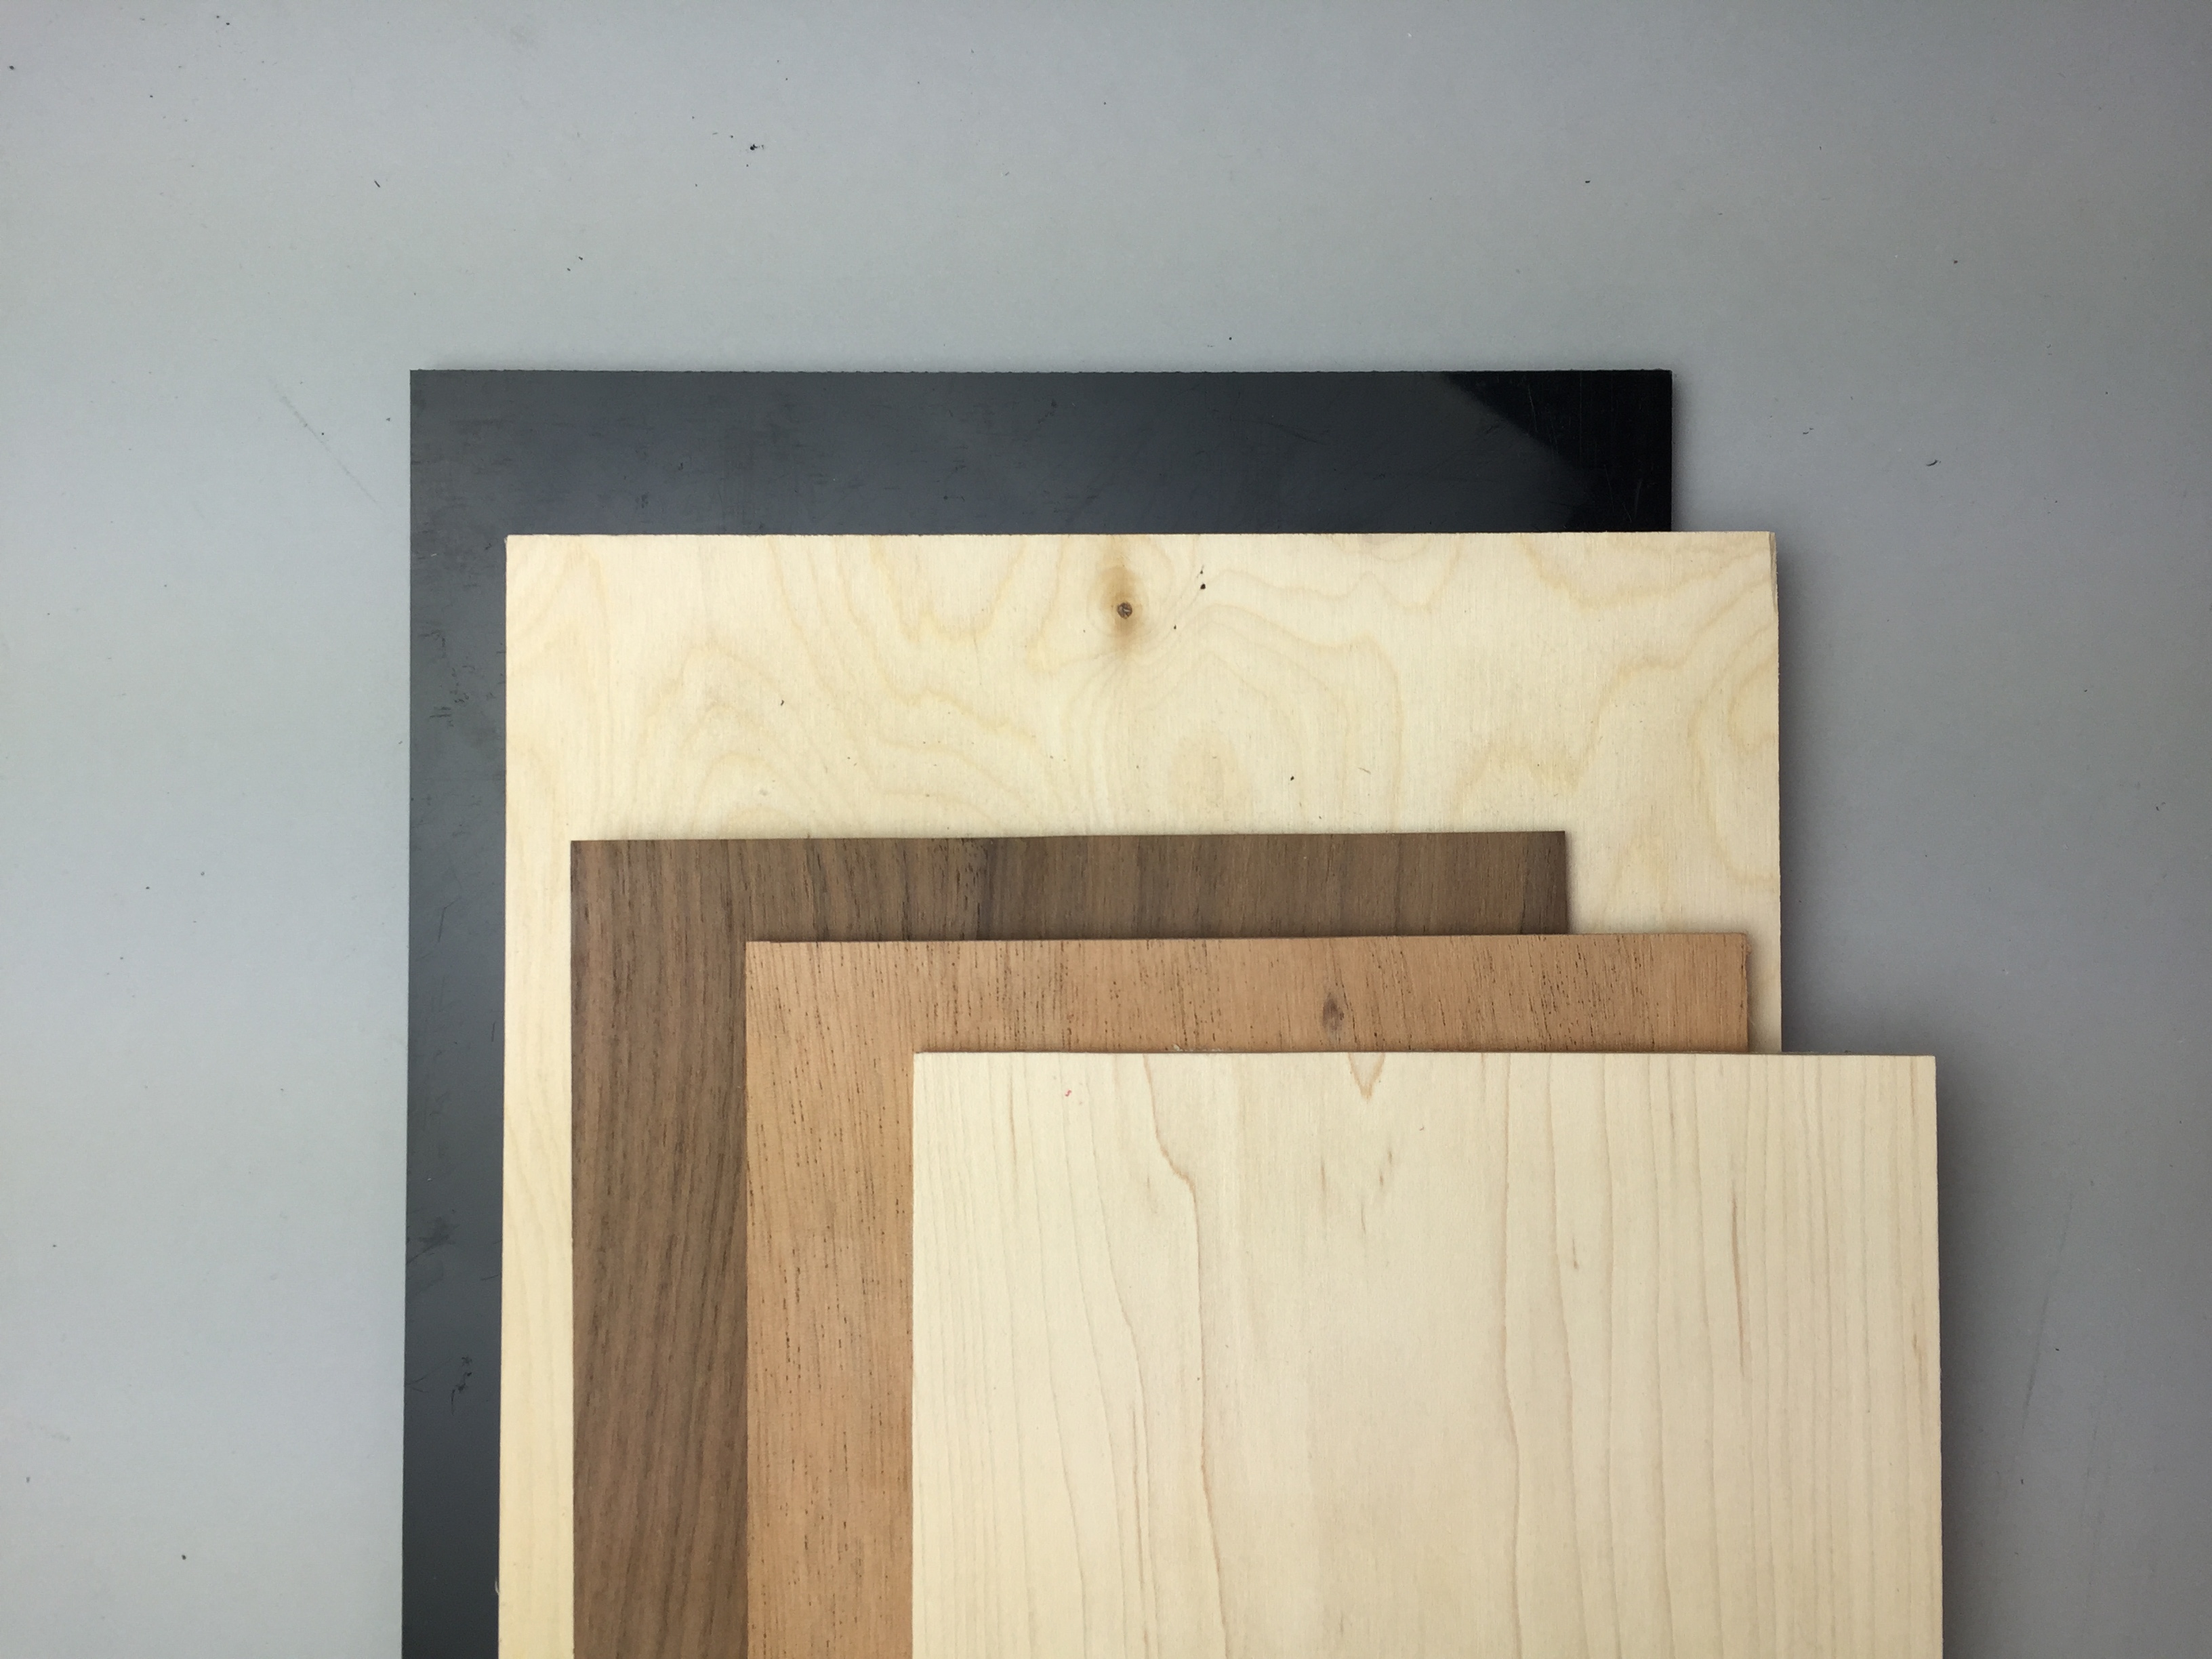
The cube trivet uses the wood’s natural colors to highlight the 3D cubical graphic. Maple, cherry, and walnut hardwood is positioned in order to see the 3D image of the cube frame within the 2D object.
| Material | Description | Price | ||
|---|---|---|---|---|

|
Baltic Birch Plywood |
8" × 12" × 3/8" Baltic Birch Plywood |
||

|
Black HDPE Sheet |
Thickness: 1/4 in, Dimensions: 8 in × 12 in |
||

|
Cherry Wood |
6" × 12" × 1/8" Cherry Wood |
$7.14 |
|

|
Hard Maple |
6" × 12" × 1/8" Hard Maple |
$7.14 |
|

|
Walnut |
6" × 12" × 1/8" Walnut |
$9.09 |
|
| This project's Bill of Materials is not complete. Add to Cart |
$23.37 |
|||
For maximum results, we found that a gradual gradient of shades works best when assembled together; particularly, maple, cherry, and walnut. To celebrate the pattern of the wood grain, the 1/4- inch Black HDPE was used as a locking insert piece. When selecting materials from the Inventables store, you may choose any three shades of 1/8- inch thick hardwood, 1/4-inch thick rigid locking piece, and 3/8- inch thick base to suite your artistic taste.
All hardwood may be substituted for plywood. However, the parts must be stained with a wood finish in order to achieve a similar result. For example, the plywood may be stained with a Mahogany Stain finish which will result in a similar shade to the Mahogany Hardwood."
120 minutes
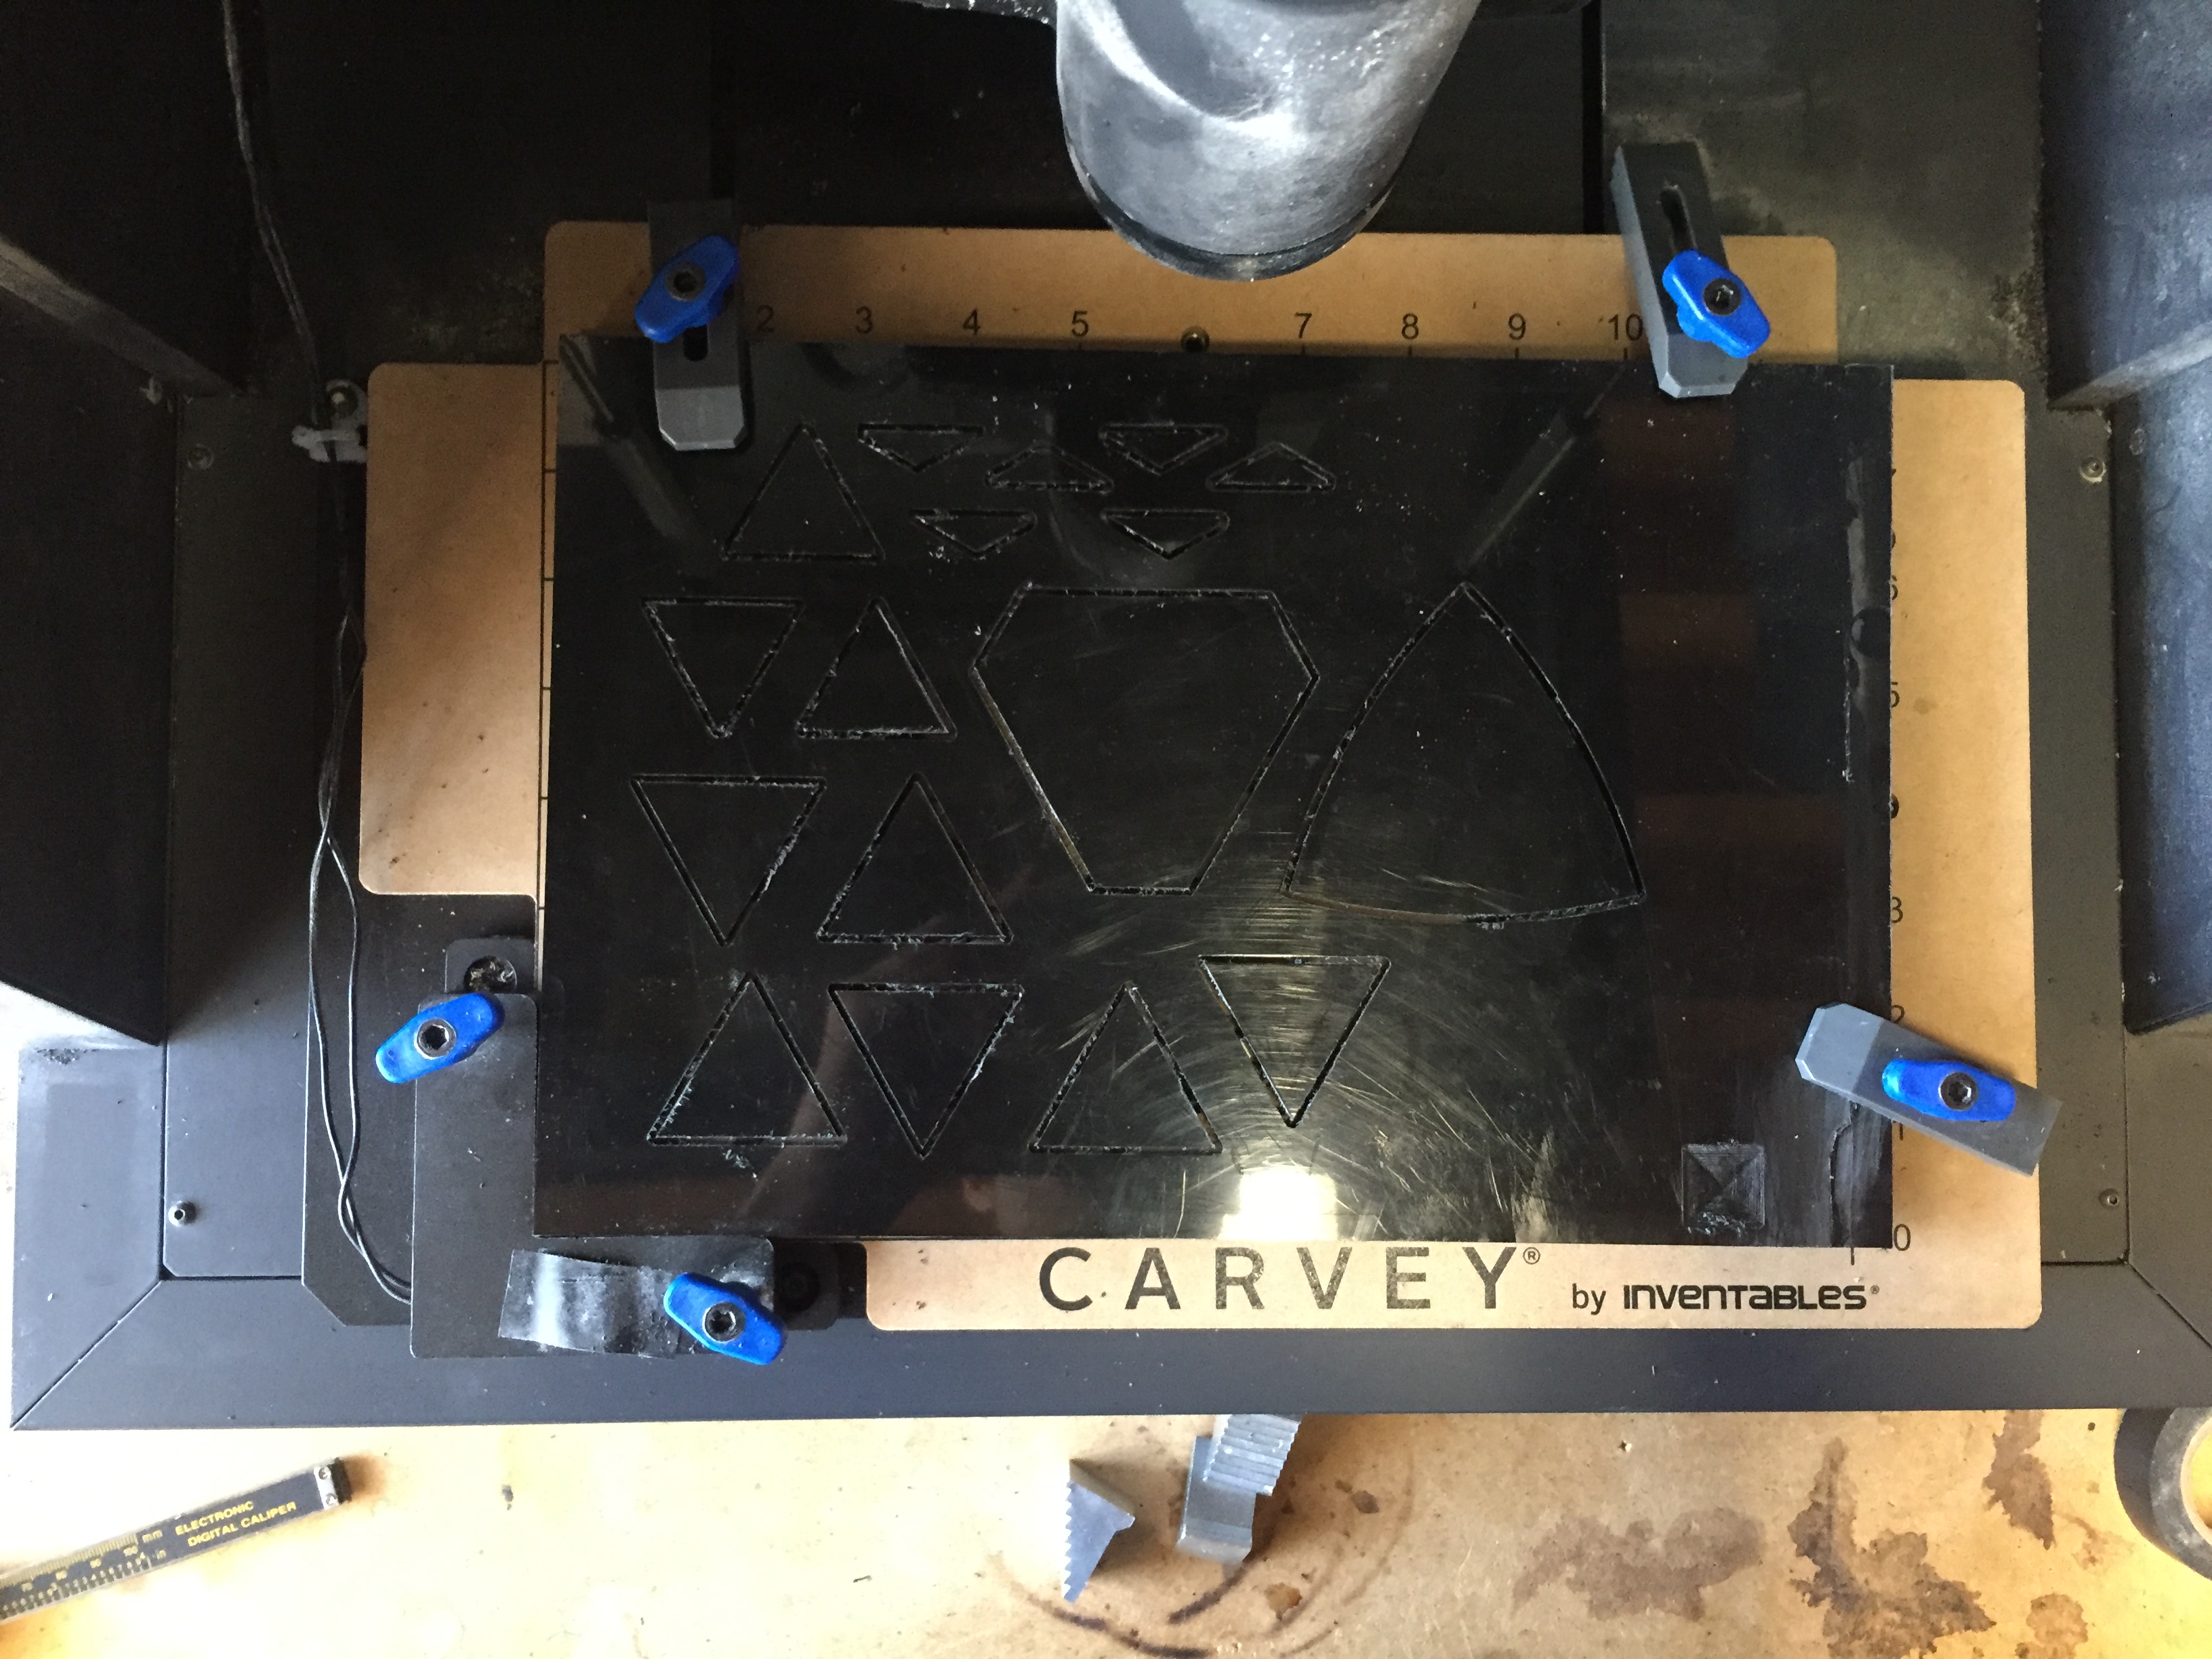
Cut the base shape out of 3/8-inch thick Baltic Birch Plywood from the Inventables store, and carefully remove the base from the cut piece by hammering the tabs with a chisel from the under- side of the cut piece. We used 3/8-inch thick Baltic Birch Plywood from the Inventables store, but any rigid materials between 1/4-inch to 1/2-inch can be used as a base.

60 minutes
Cut the six triangle locking pieces out of the 1/4-inch thick White HDPE from the Inventables store. Carefully detach the six triangles by cutting the tabs with a precision knife from the top side of the cut piece. It can be carved out of any material as long as it is 1/4-inch thick, but we think the black or white millable plastic from the Inventables store fits the design best.
60 minutes
Start cutting the main graphic patterns out of 1/8-inch thick Maple hardwood, and repeat the process with Cherry and Walnut hardwood. Carefully detach the cut out parts by hammering the tabs with a chisel from the under side of the cut piece.

120 minutes
Sand the individual pieces to smooth out the surfaces. Be gentle with the sanding process and do not over sand. We started with 200 grit sand paper to remove any surface imperfections and followed with incrementally finer grit. When you are finished sanding, apply 2-3 coats of Danish Oil to rejuvenate the wood grain.

5 minutes
Now, it is time to assemble all the pieces onto the base. First, insert the triangle HDPE pieces into each trivet base. We recommend using wood glue to safely secure the HDPE and the base. However, you can fit them into the base without any glue. You can choose to challenge yourself to assemble all three trivets without looking at the diagram. Otherwise, assemble all the parts to create the trivet. For the smaller pieces, we recommend not using glue because you can challenge your dinner guest to solve the puzzle element of the trivet. Have fun!


