Sean Keplinger
Milford, Ohio
Have you ever seen a weapon in a video game and thought to yourself, “I wish I could have one of those!”
Well grab your X-Carve and a few sheets of MDF — this project will walk you through the process! Many of the techniques used here can easily be translated to make just about anything.
| Material | Description | Price | ||
|---|---|---|---|---|

|
MDF Wood |
|||
360 minutes
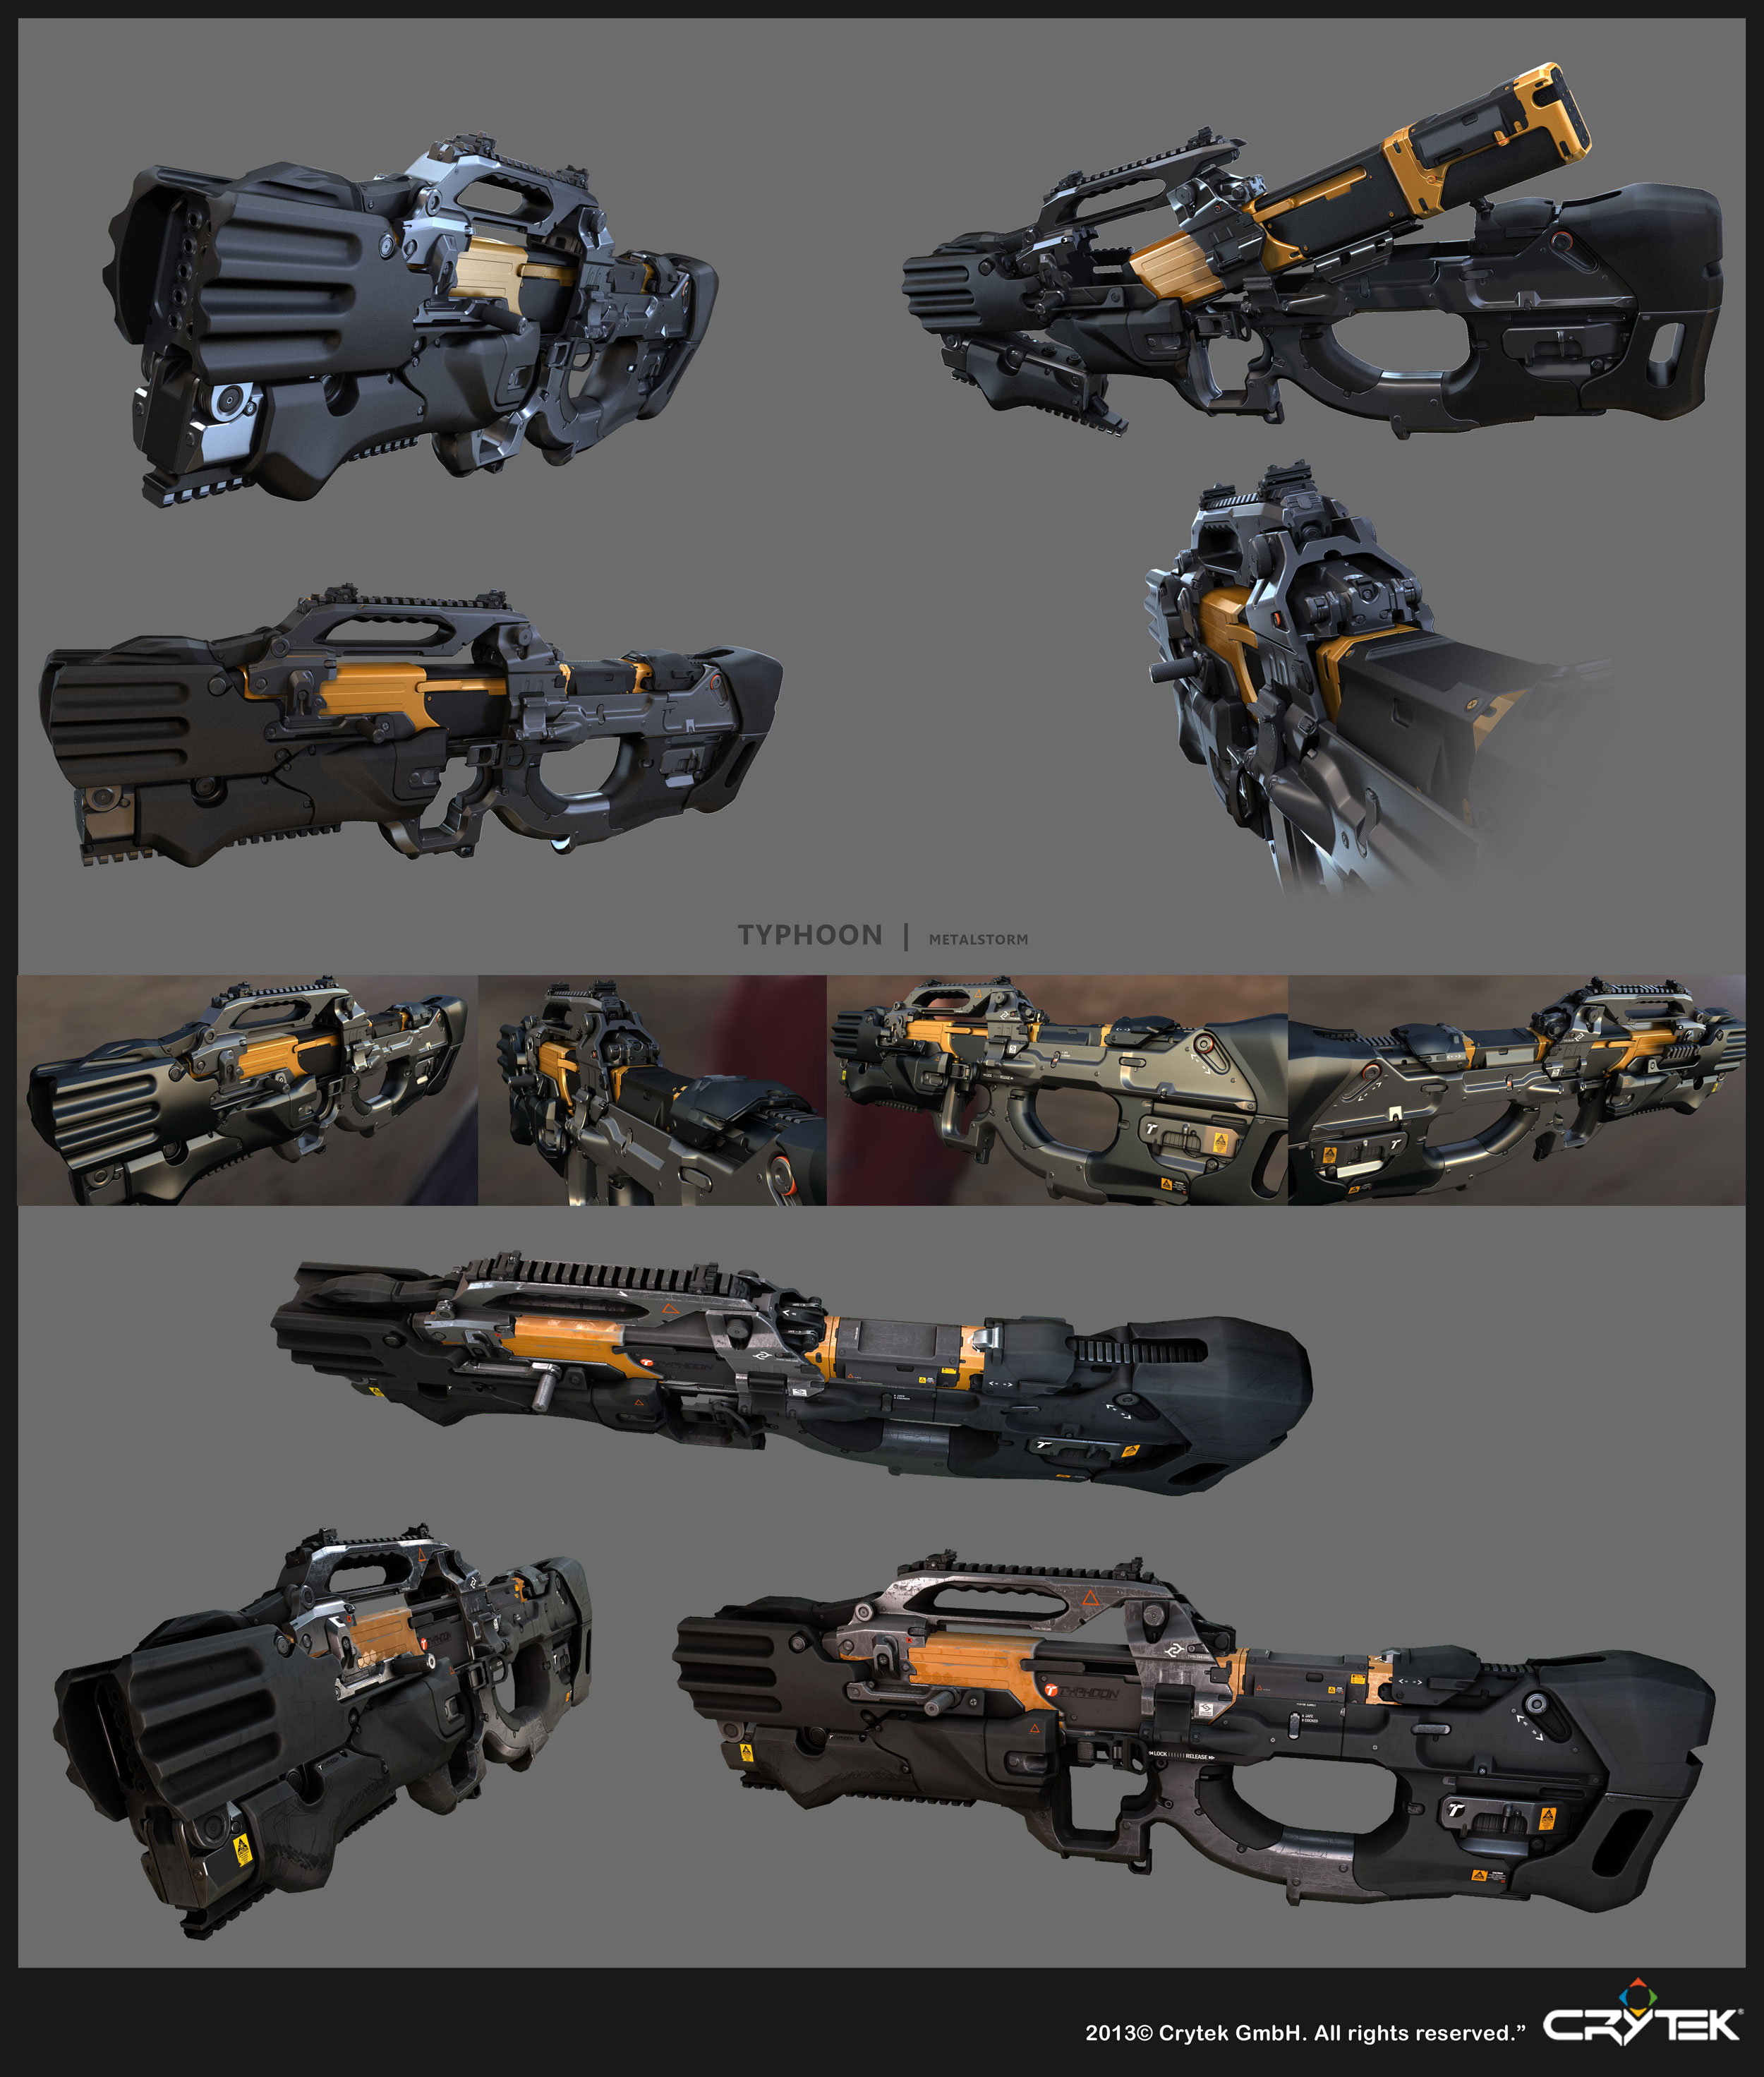
The most important part of building a replica prop is to go out and pick an awesome model. There are so many choices that it’s almost overwhelming.
Spend a lot of time studying reference photos to try to understand what the model looks like from the side, the top, the front. Visualize each layer and how you could stack up pieces to achieve the right effect.
Pick a good side photo and import it into a vector drawing program. Size the model to “real world” dimensions. Use a tape measure to measure your hand and figure out how long the grip needs to be or the stock. Once you get everything to scale, start tracing each layer. This is the most difficult and time consuming part of the build.
In this case, I’ve provided you with a shortcut so you can skip to Step 1!

120 minutes
Materials needed for this step:
– 2 × 1/2" MDF sheets (30″ × 12″)
– Wood Glue
The basic construction technique involves cutting out multiple layers and then stacking them up to form the details of the model.
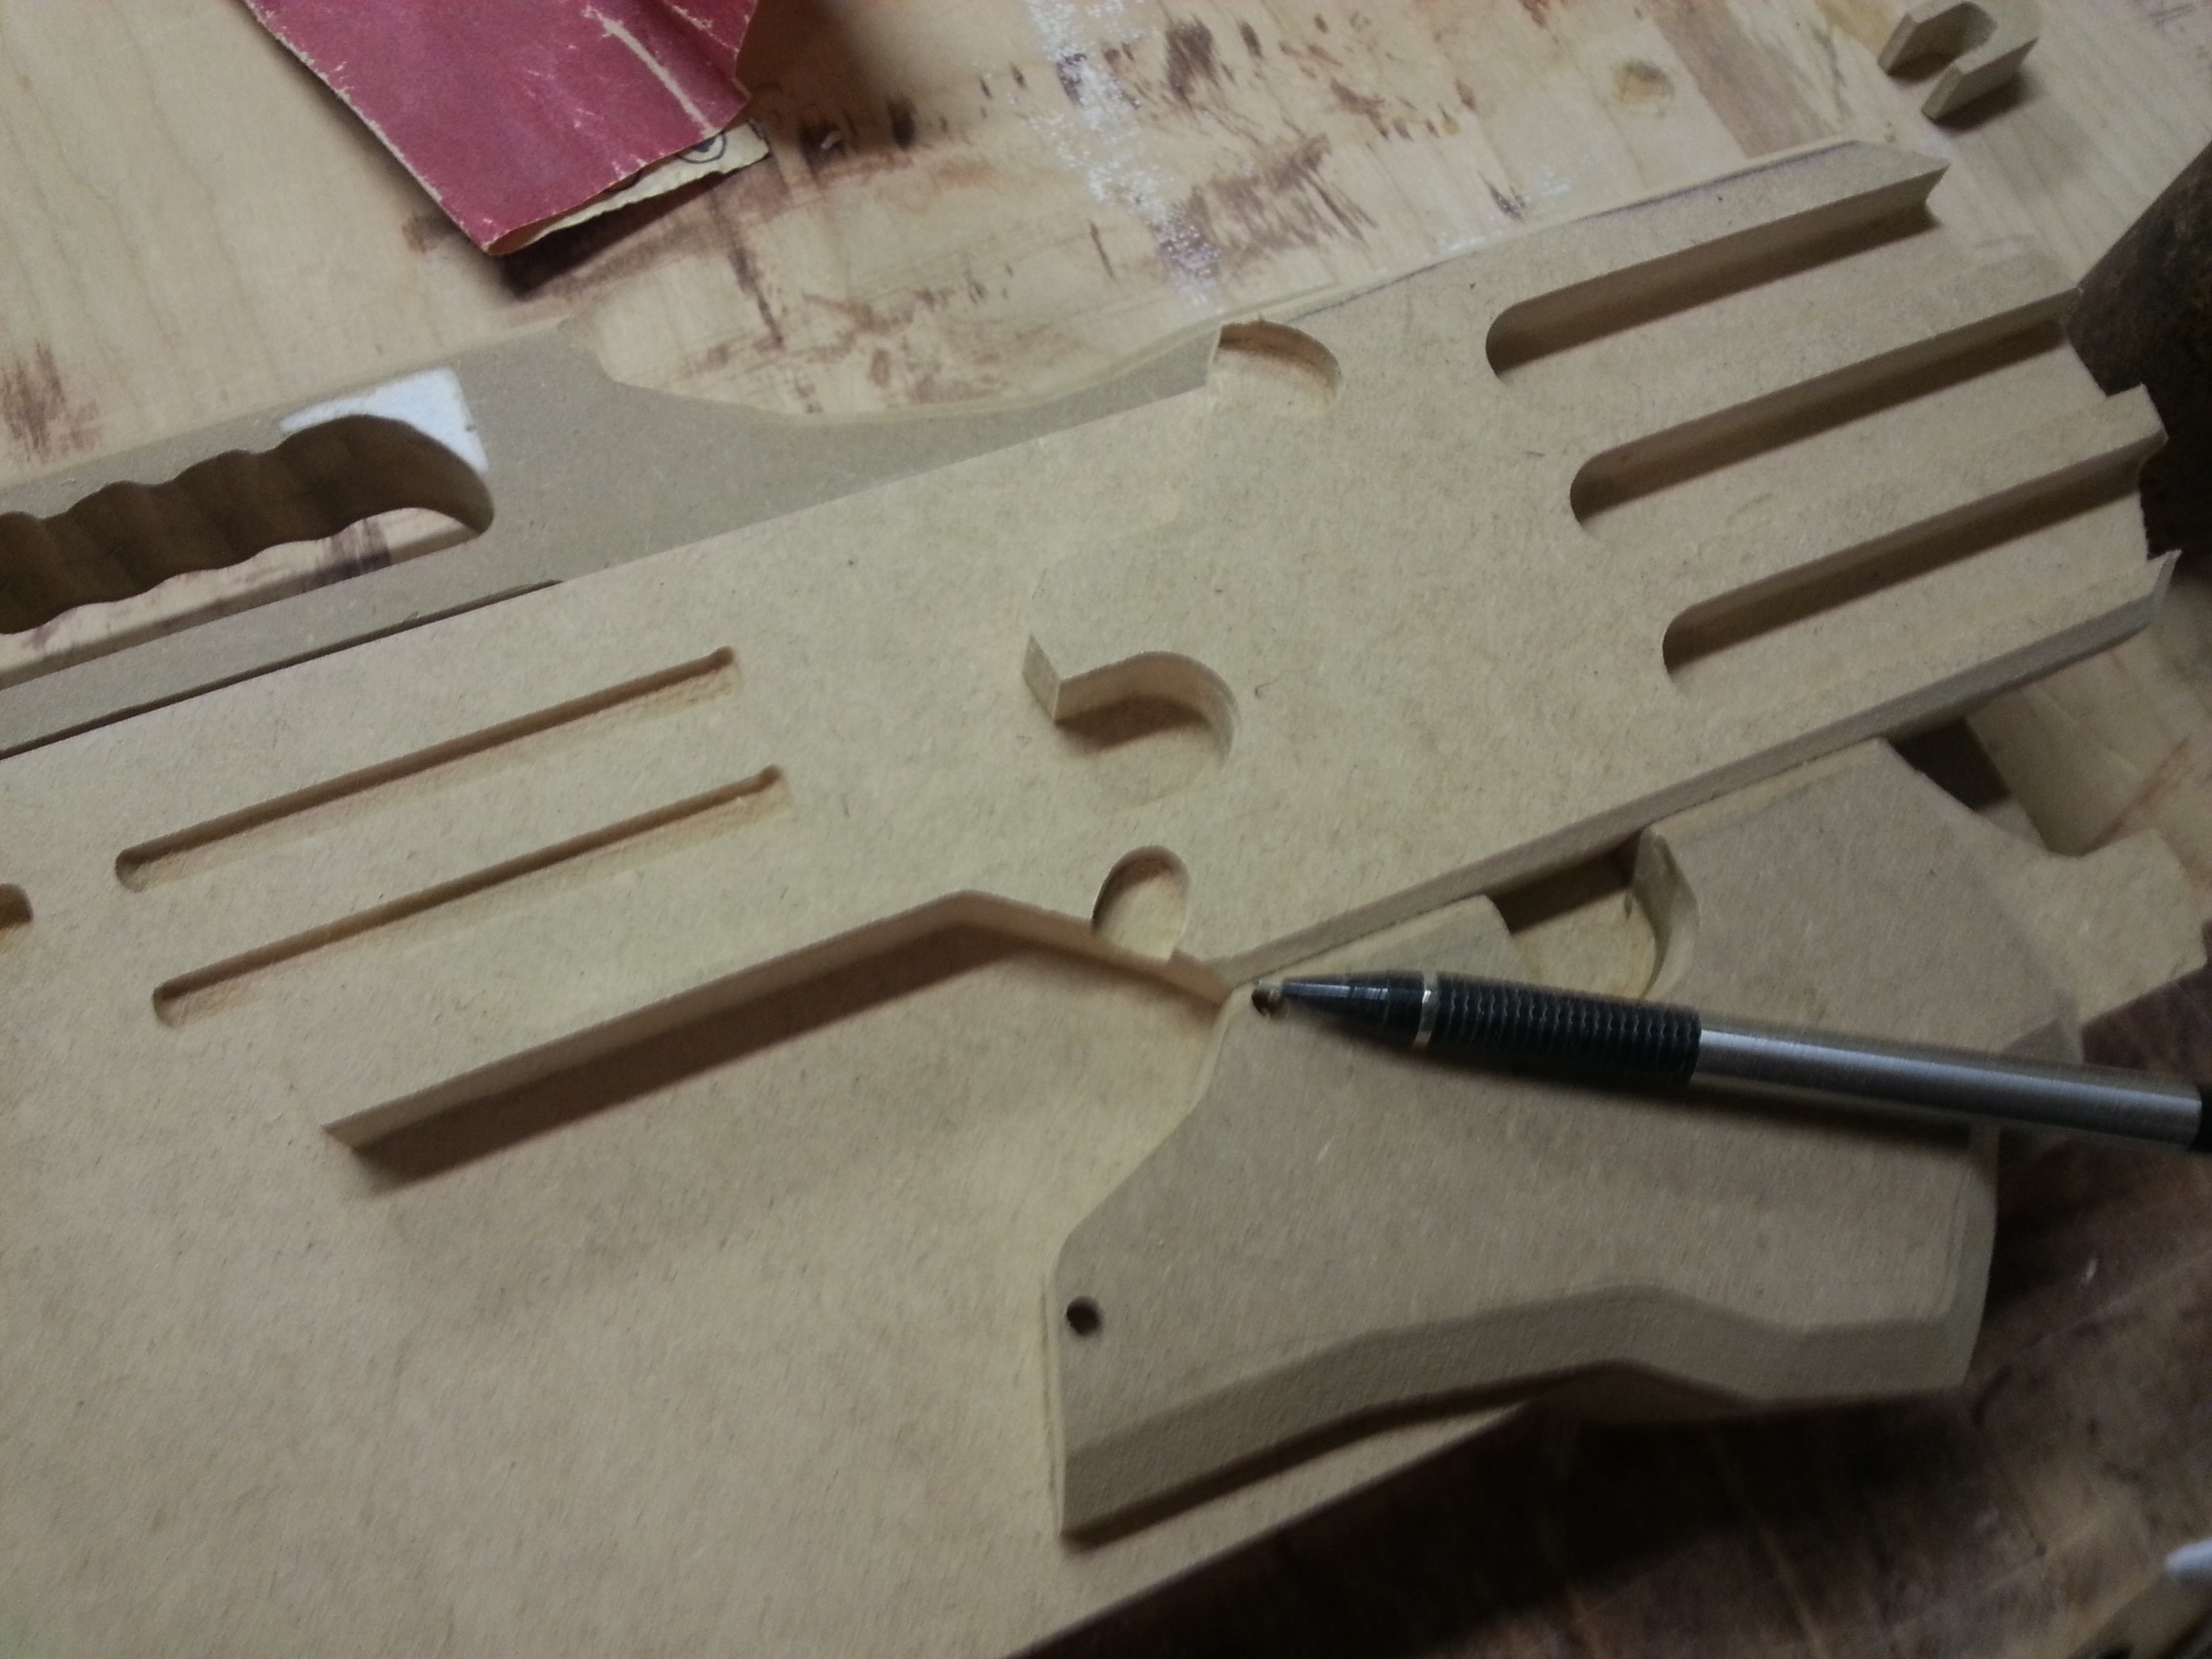
Start by cutting out the core from two sheets of MDF. The rectangular area towards the front of the model is designed to save on weight. Be sure to keep that off-cut so that you can use it for other parts.
I used a 1/8" down-spiral bit to cut out the core. Remember to cut both left and right-hand versions to preserve the detail. You can do this by selecting the entire shape in Easel and then selecting “shape→mirror horizontally.”
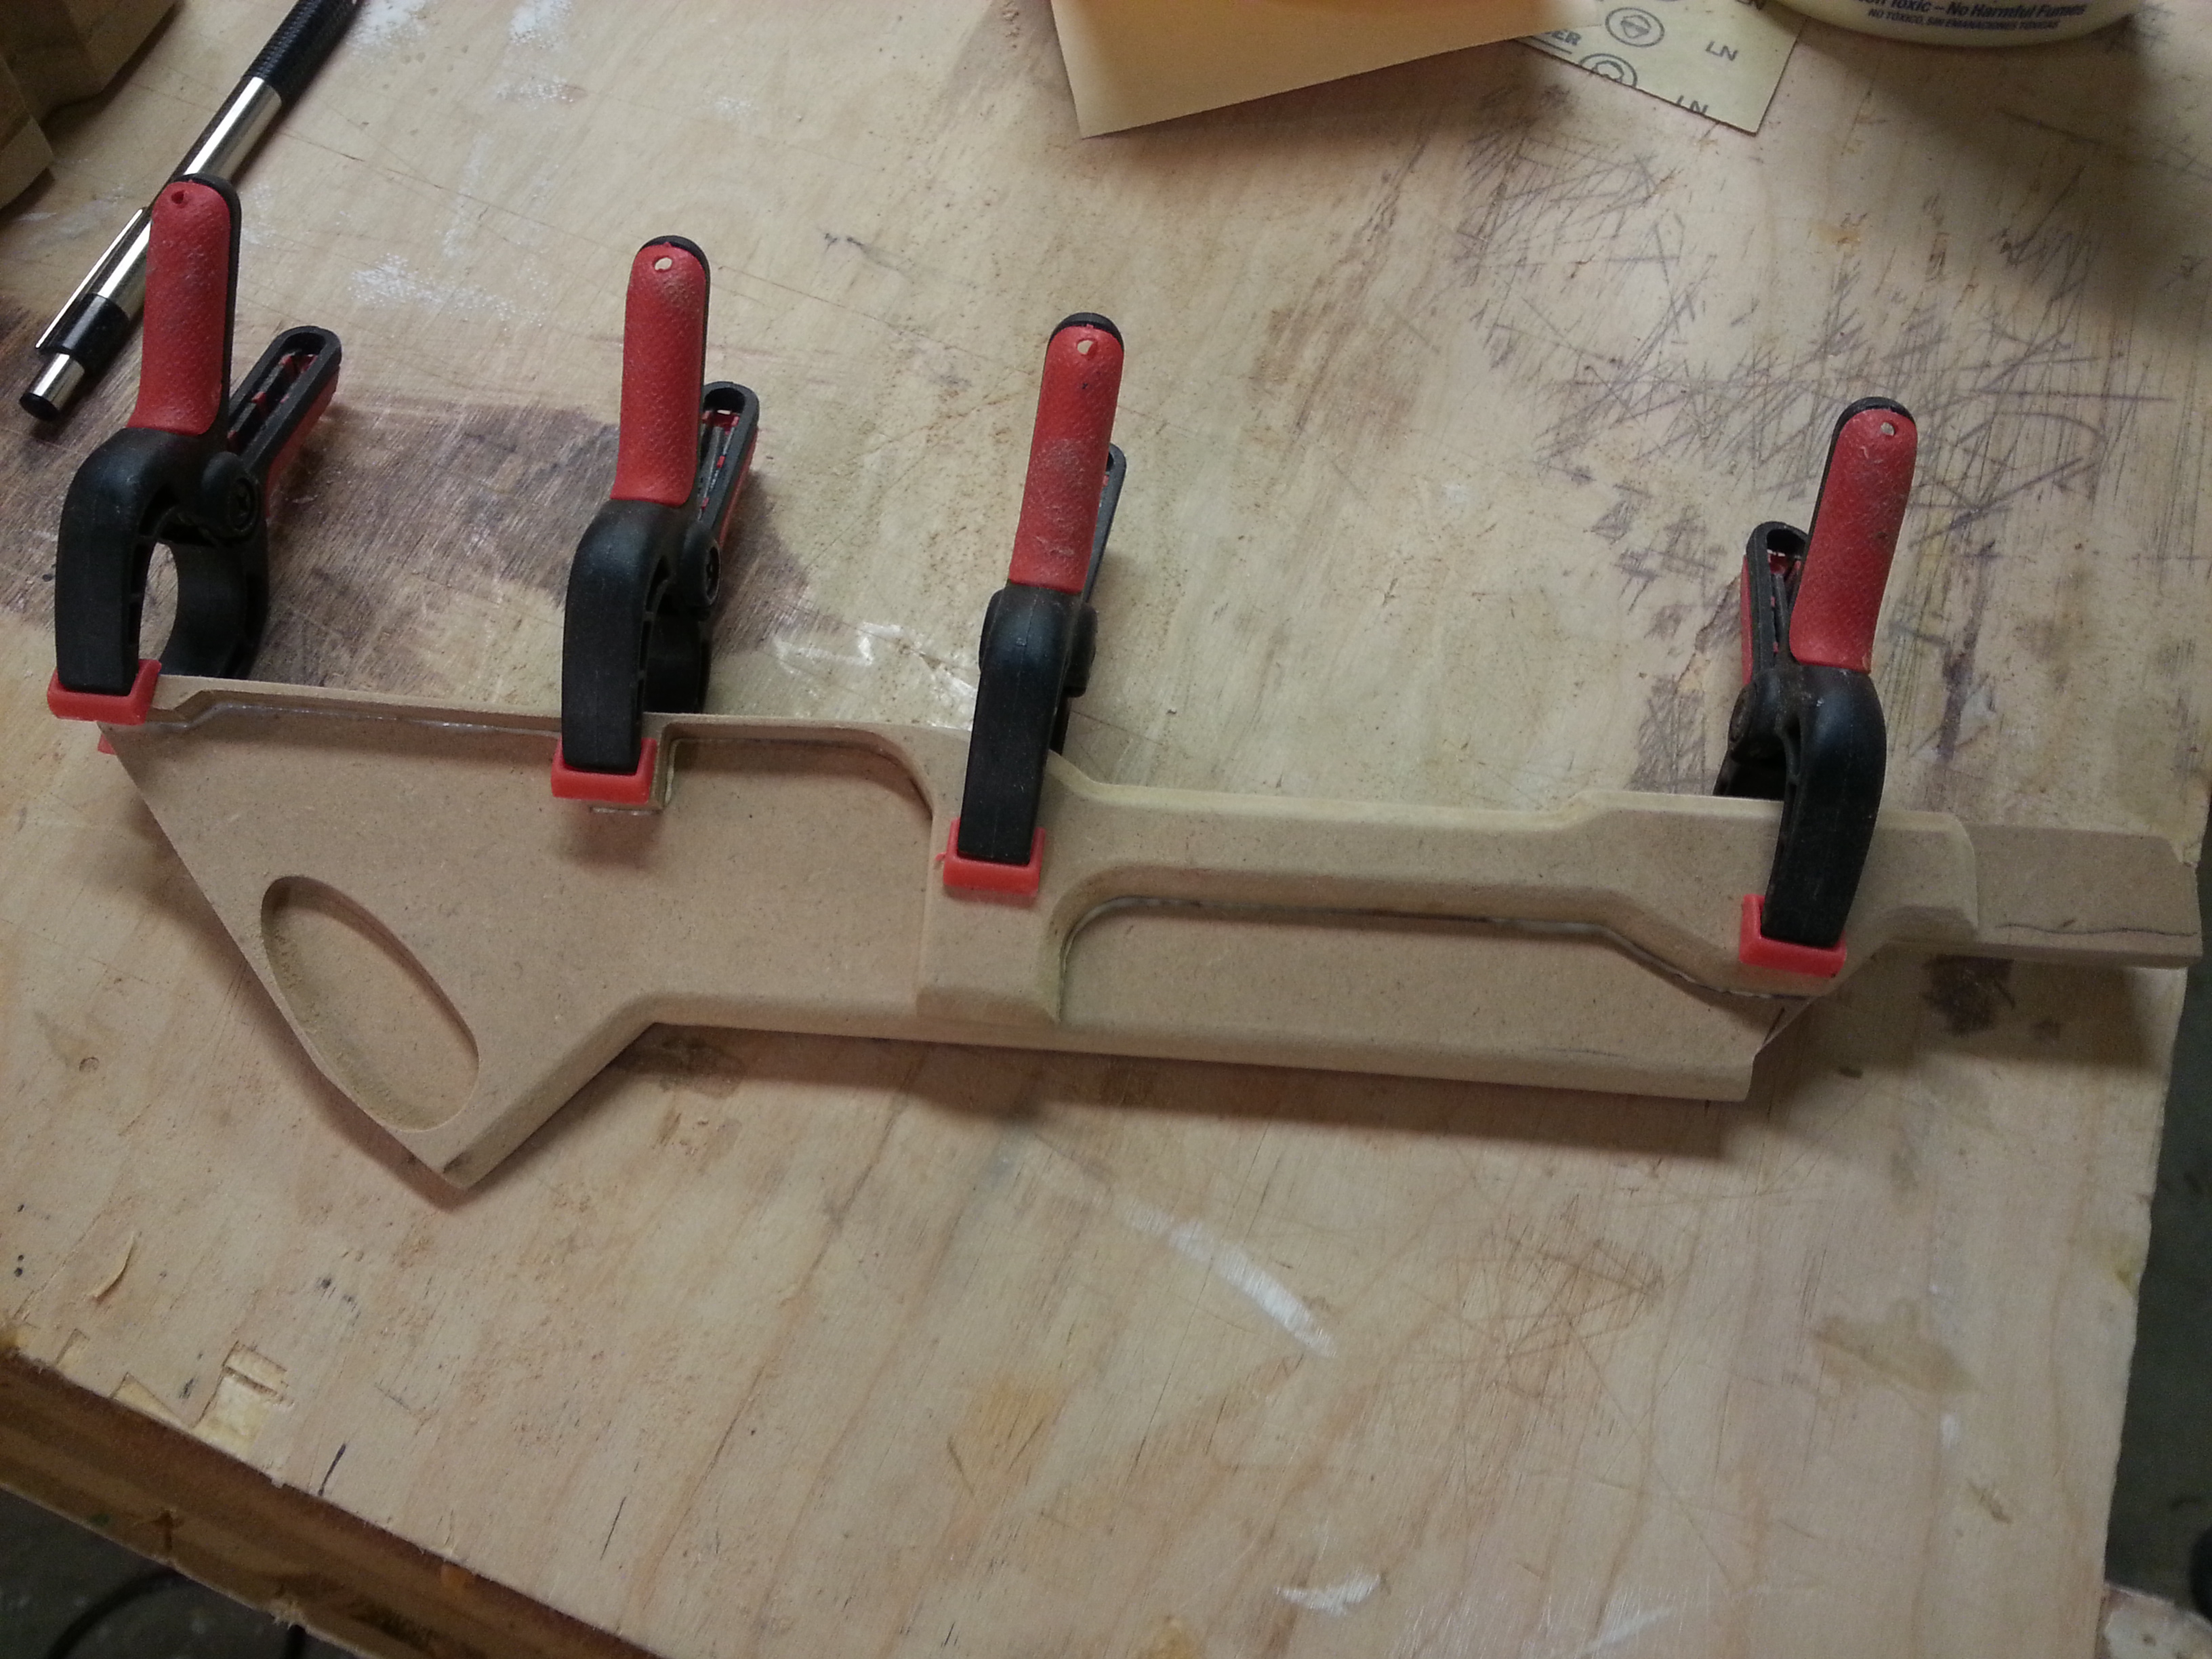
Glue the two halves together with wood glue. I use a roller to ensure that the glue covers the entire surface. Use clamps or place something heavy on the pieces so they adhere well. You’ll be surprised how quickly the wood glue dries (usually in less than 15 minutes.)


120 minutes
Materials needed for this step:
– 2 × 1/2" MDF sheets (30? × 12?)
– Wood Glue
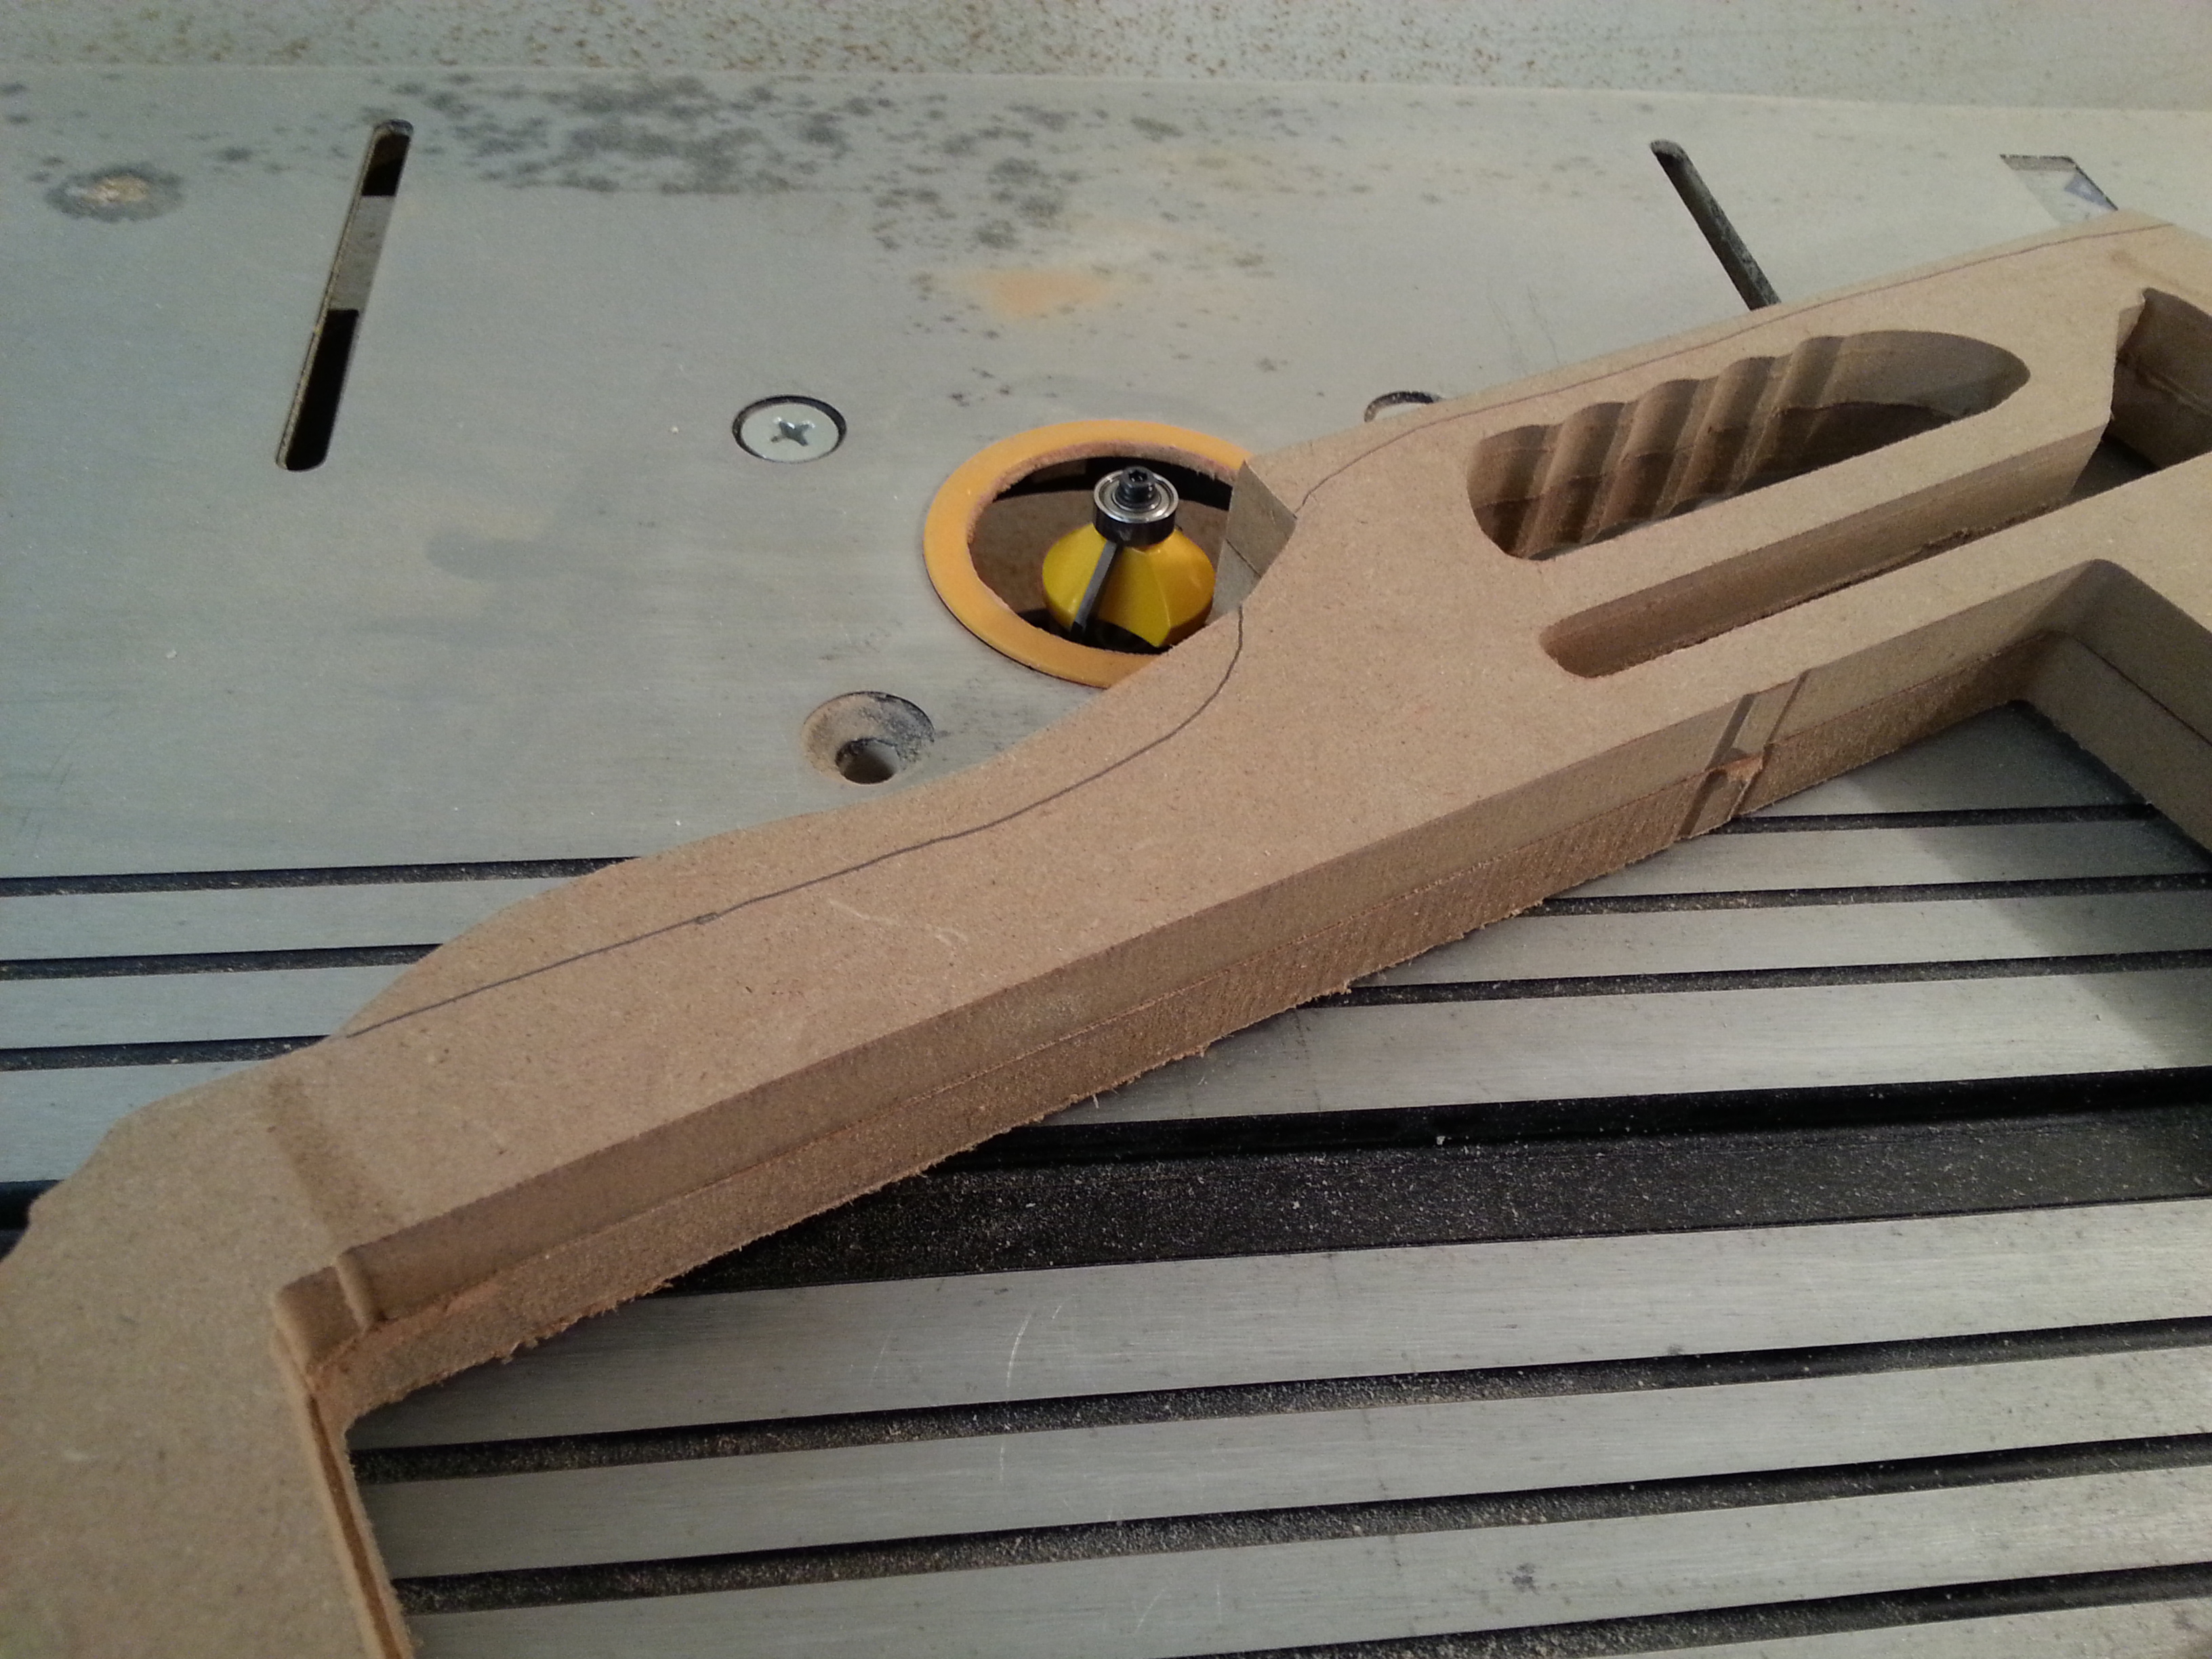
Again using the 1/8" down-spiral bit, cut out the two “inner-outer” sections of the model. Be sure to make a mirror so the detail shows up on both sides.
With a chamfer bit in a router, route around the grip and other marked areas. Safety first – use a push block! If you don’t have a router, you can do this with sand paper but it will take a lot longer.


40 minutes
Materials needed for this step:
– Scrap 1/2" MDF sheets (you should have plenty left over)
– Wood Glue
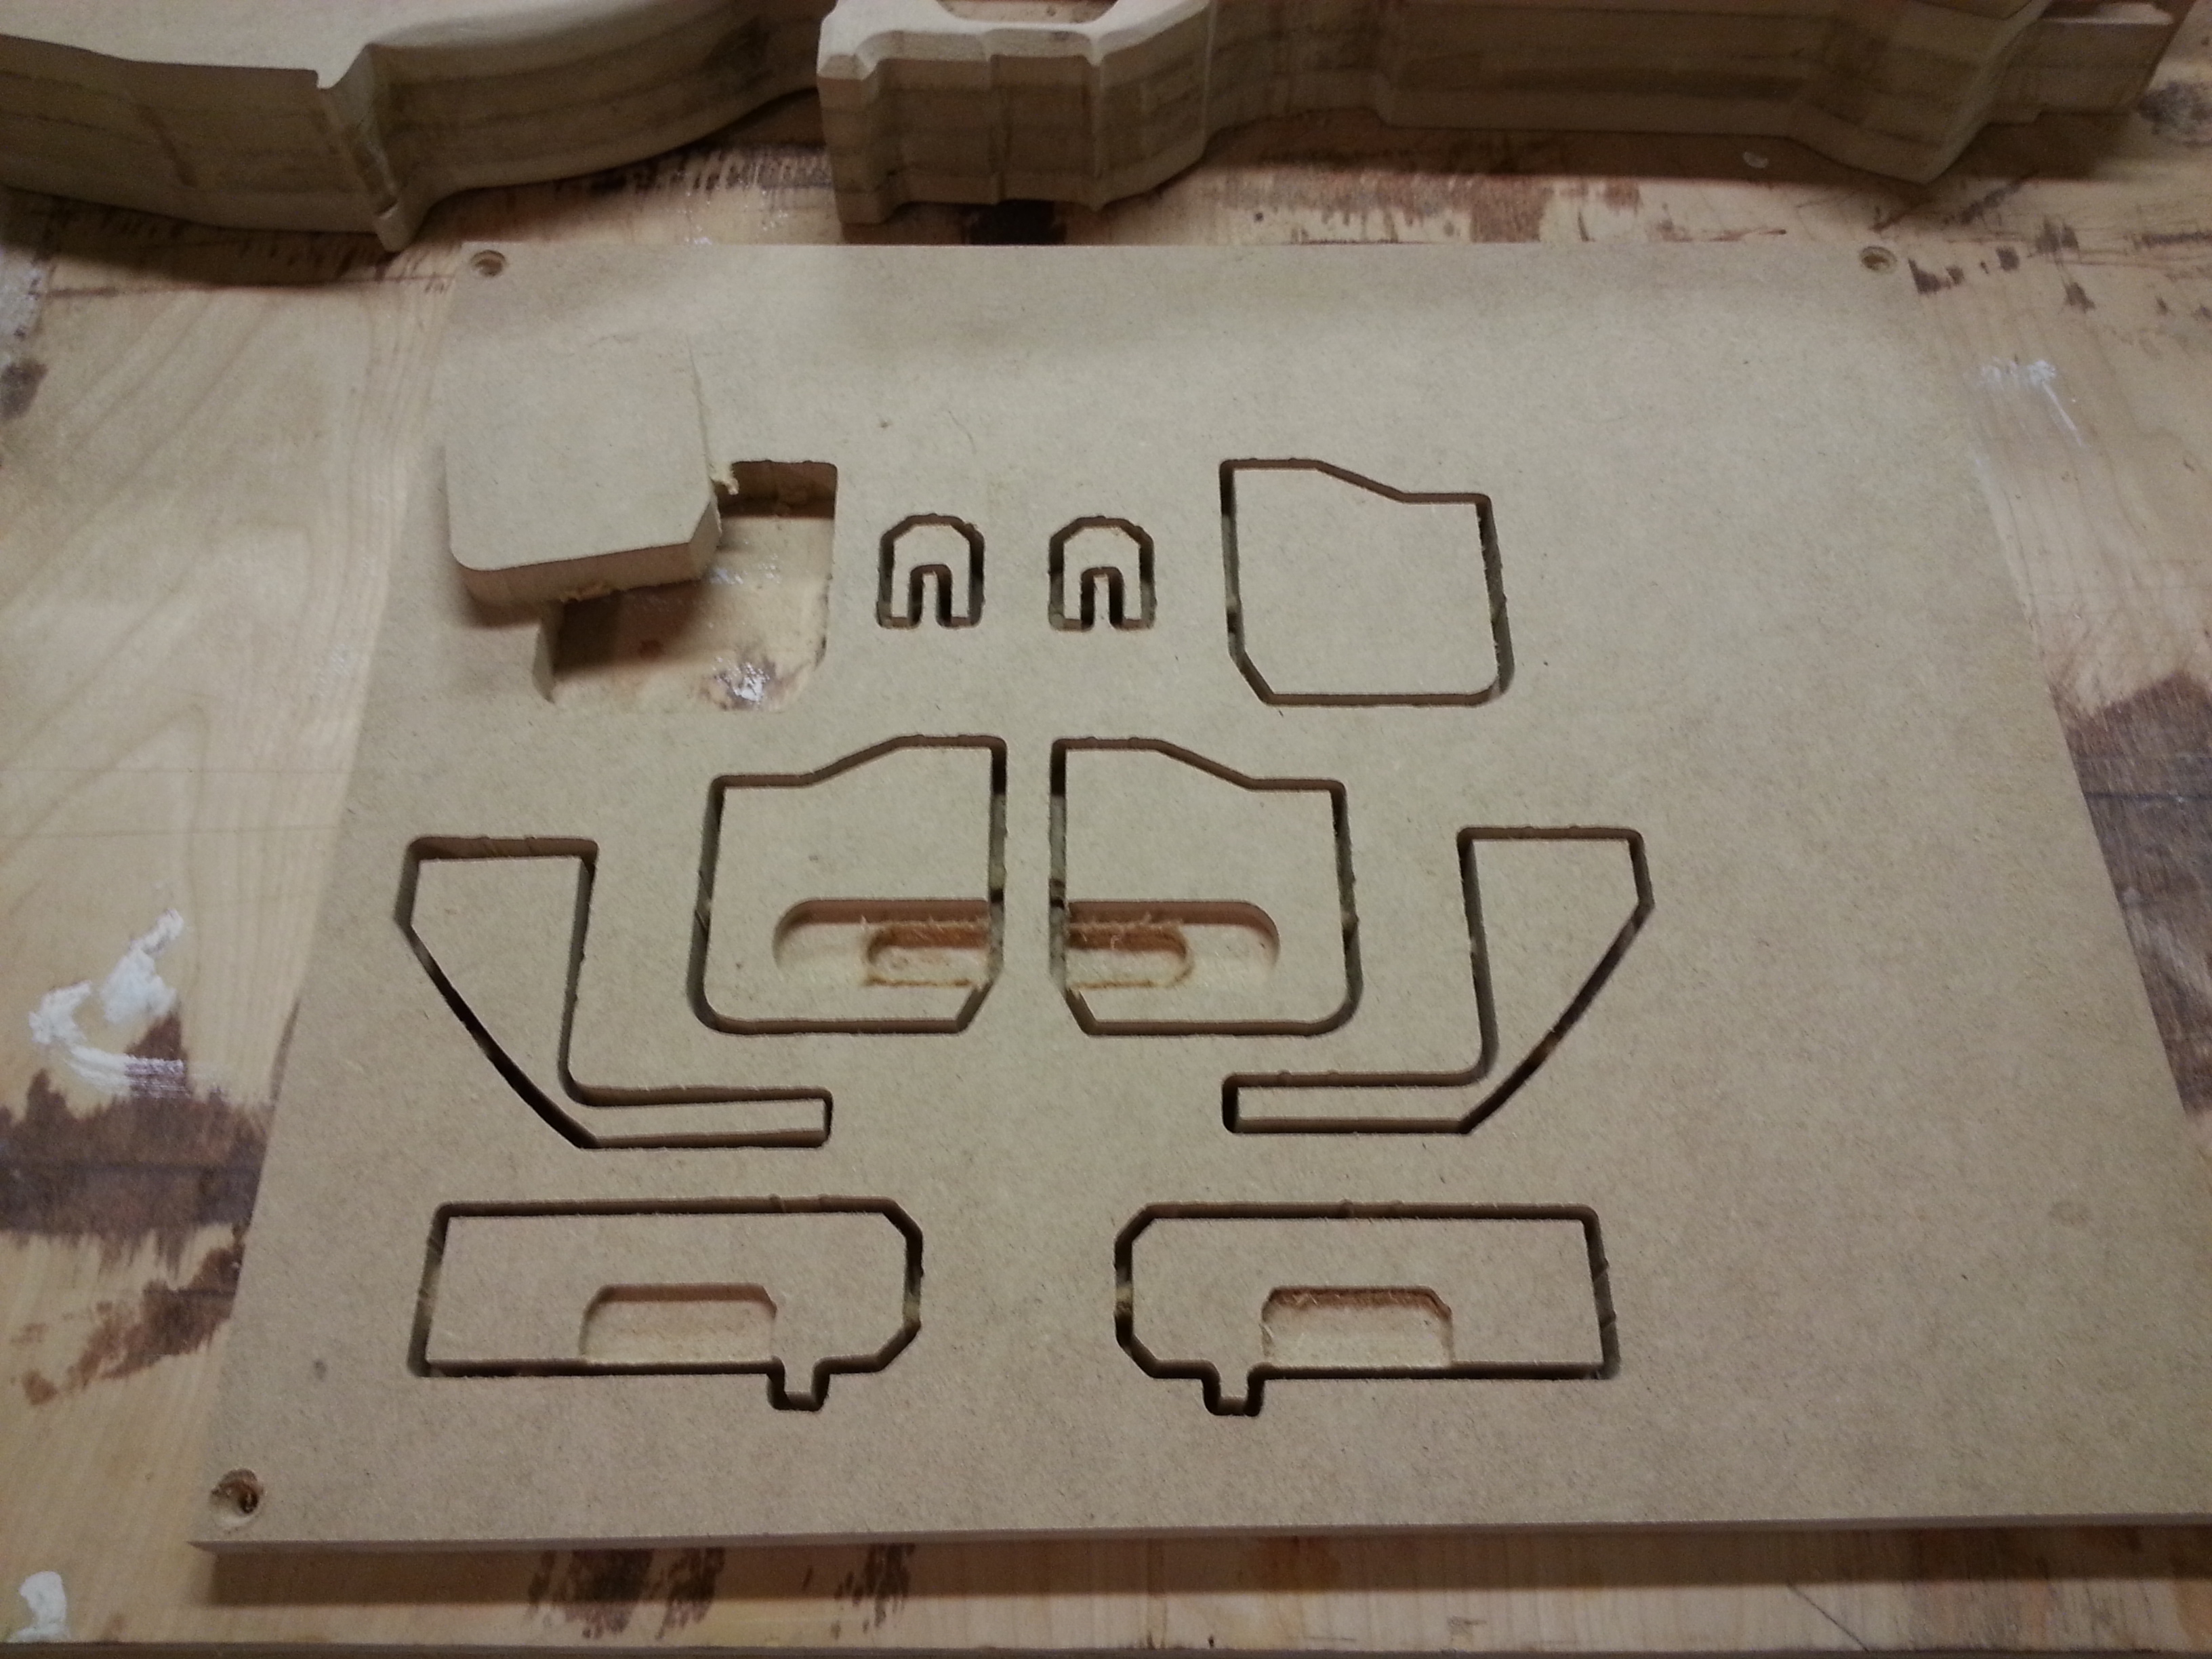
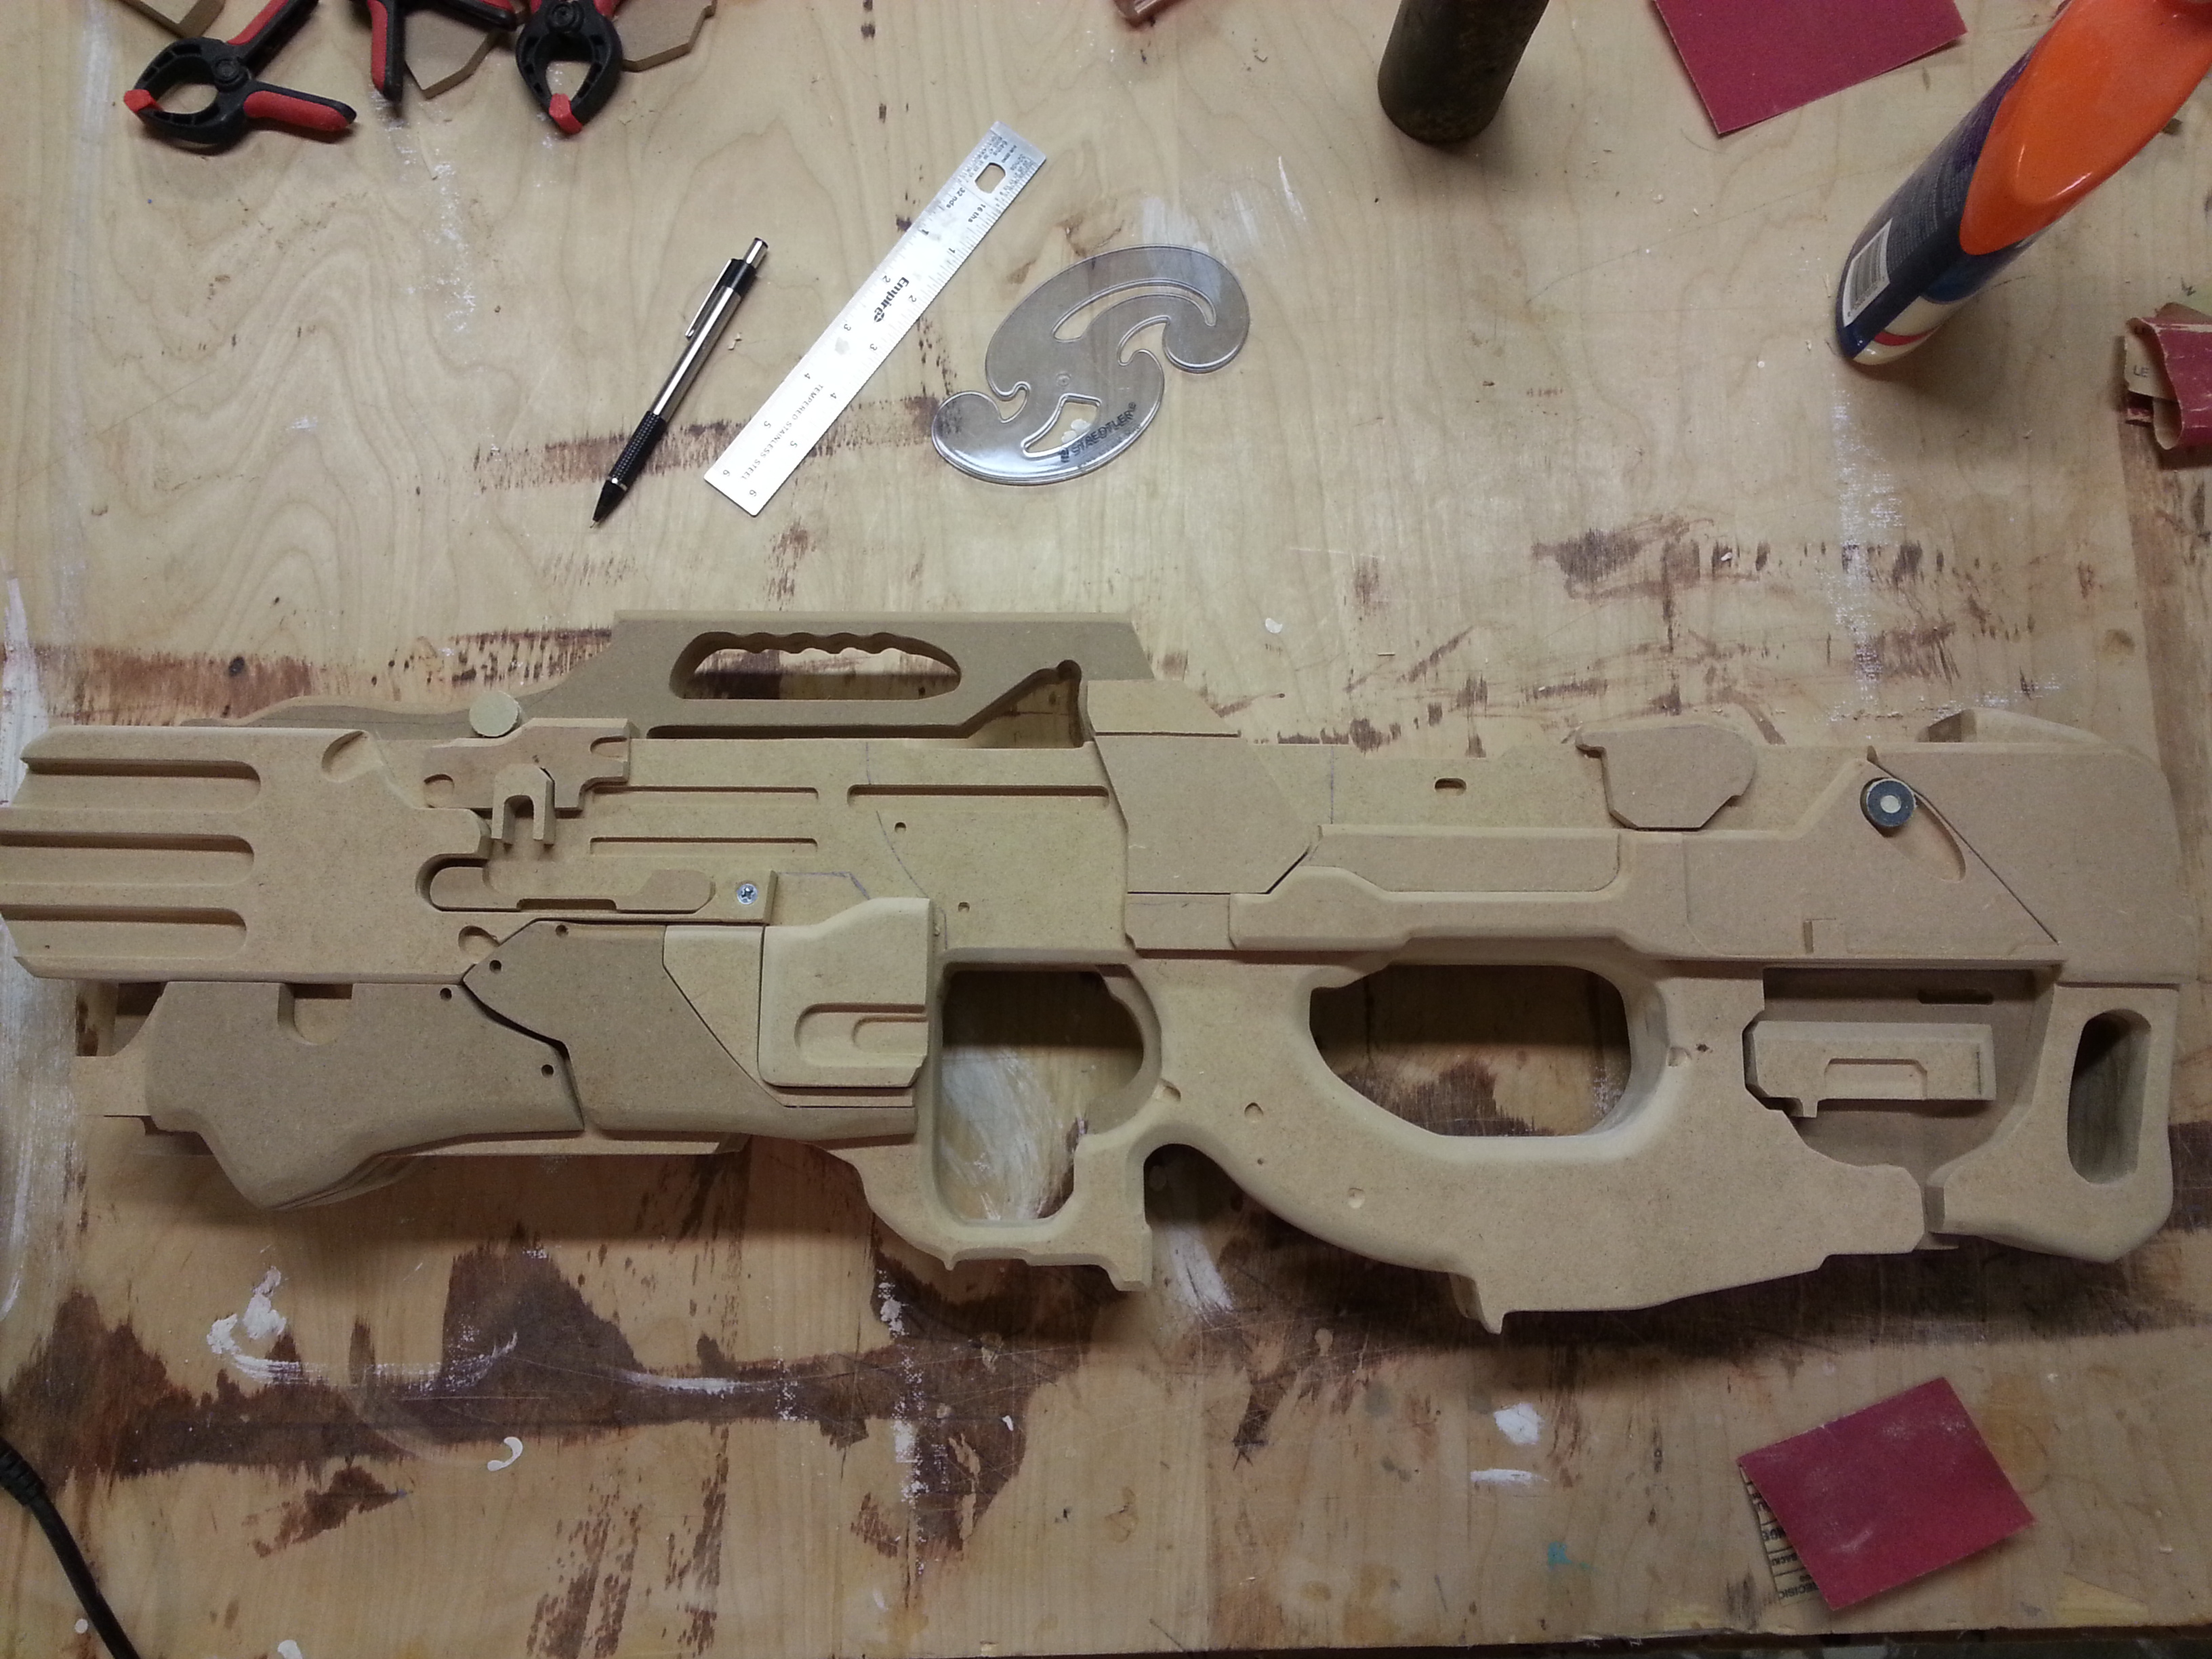
Now that the model shape is starting to come together, it’s time to cut out all of the 1/2" detail pieces that go along the front. Chamfer the edges as shown on the router. Again, experiment with a scrap piece to get the depth right.
Carefully sand everything with 150 grit sandpaper. Sand everything, the body, the detail pieces, your fingers. Everything. Do this a lot. The more time you spend smoothing out the pieces now, the less time you’ll spend trying to get into tiny cracks and spaces.
Start by referencing the grip along the bottom of the model. Apply glue to the entire back side and clamp it into place or place something heavy on it. Be sure that it doesn’t shift!
Once that’s dry, line up the heat-sink referencing the edge as shown. It’s a good idea to dry-fit all of the pieces at this point so you get a good idea of how they go together. Then, glue them down one by one.


30 minutes
Materials needed for this step:
– 2 × 1/4" MDF sheets (30? × 12?)
– Wood Glue
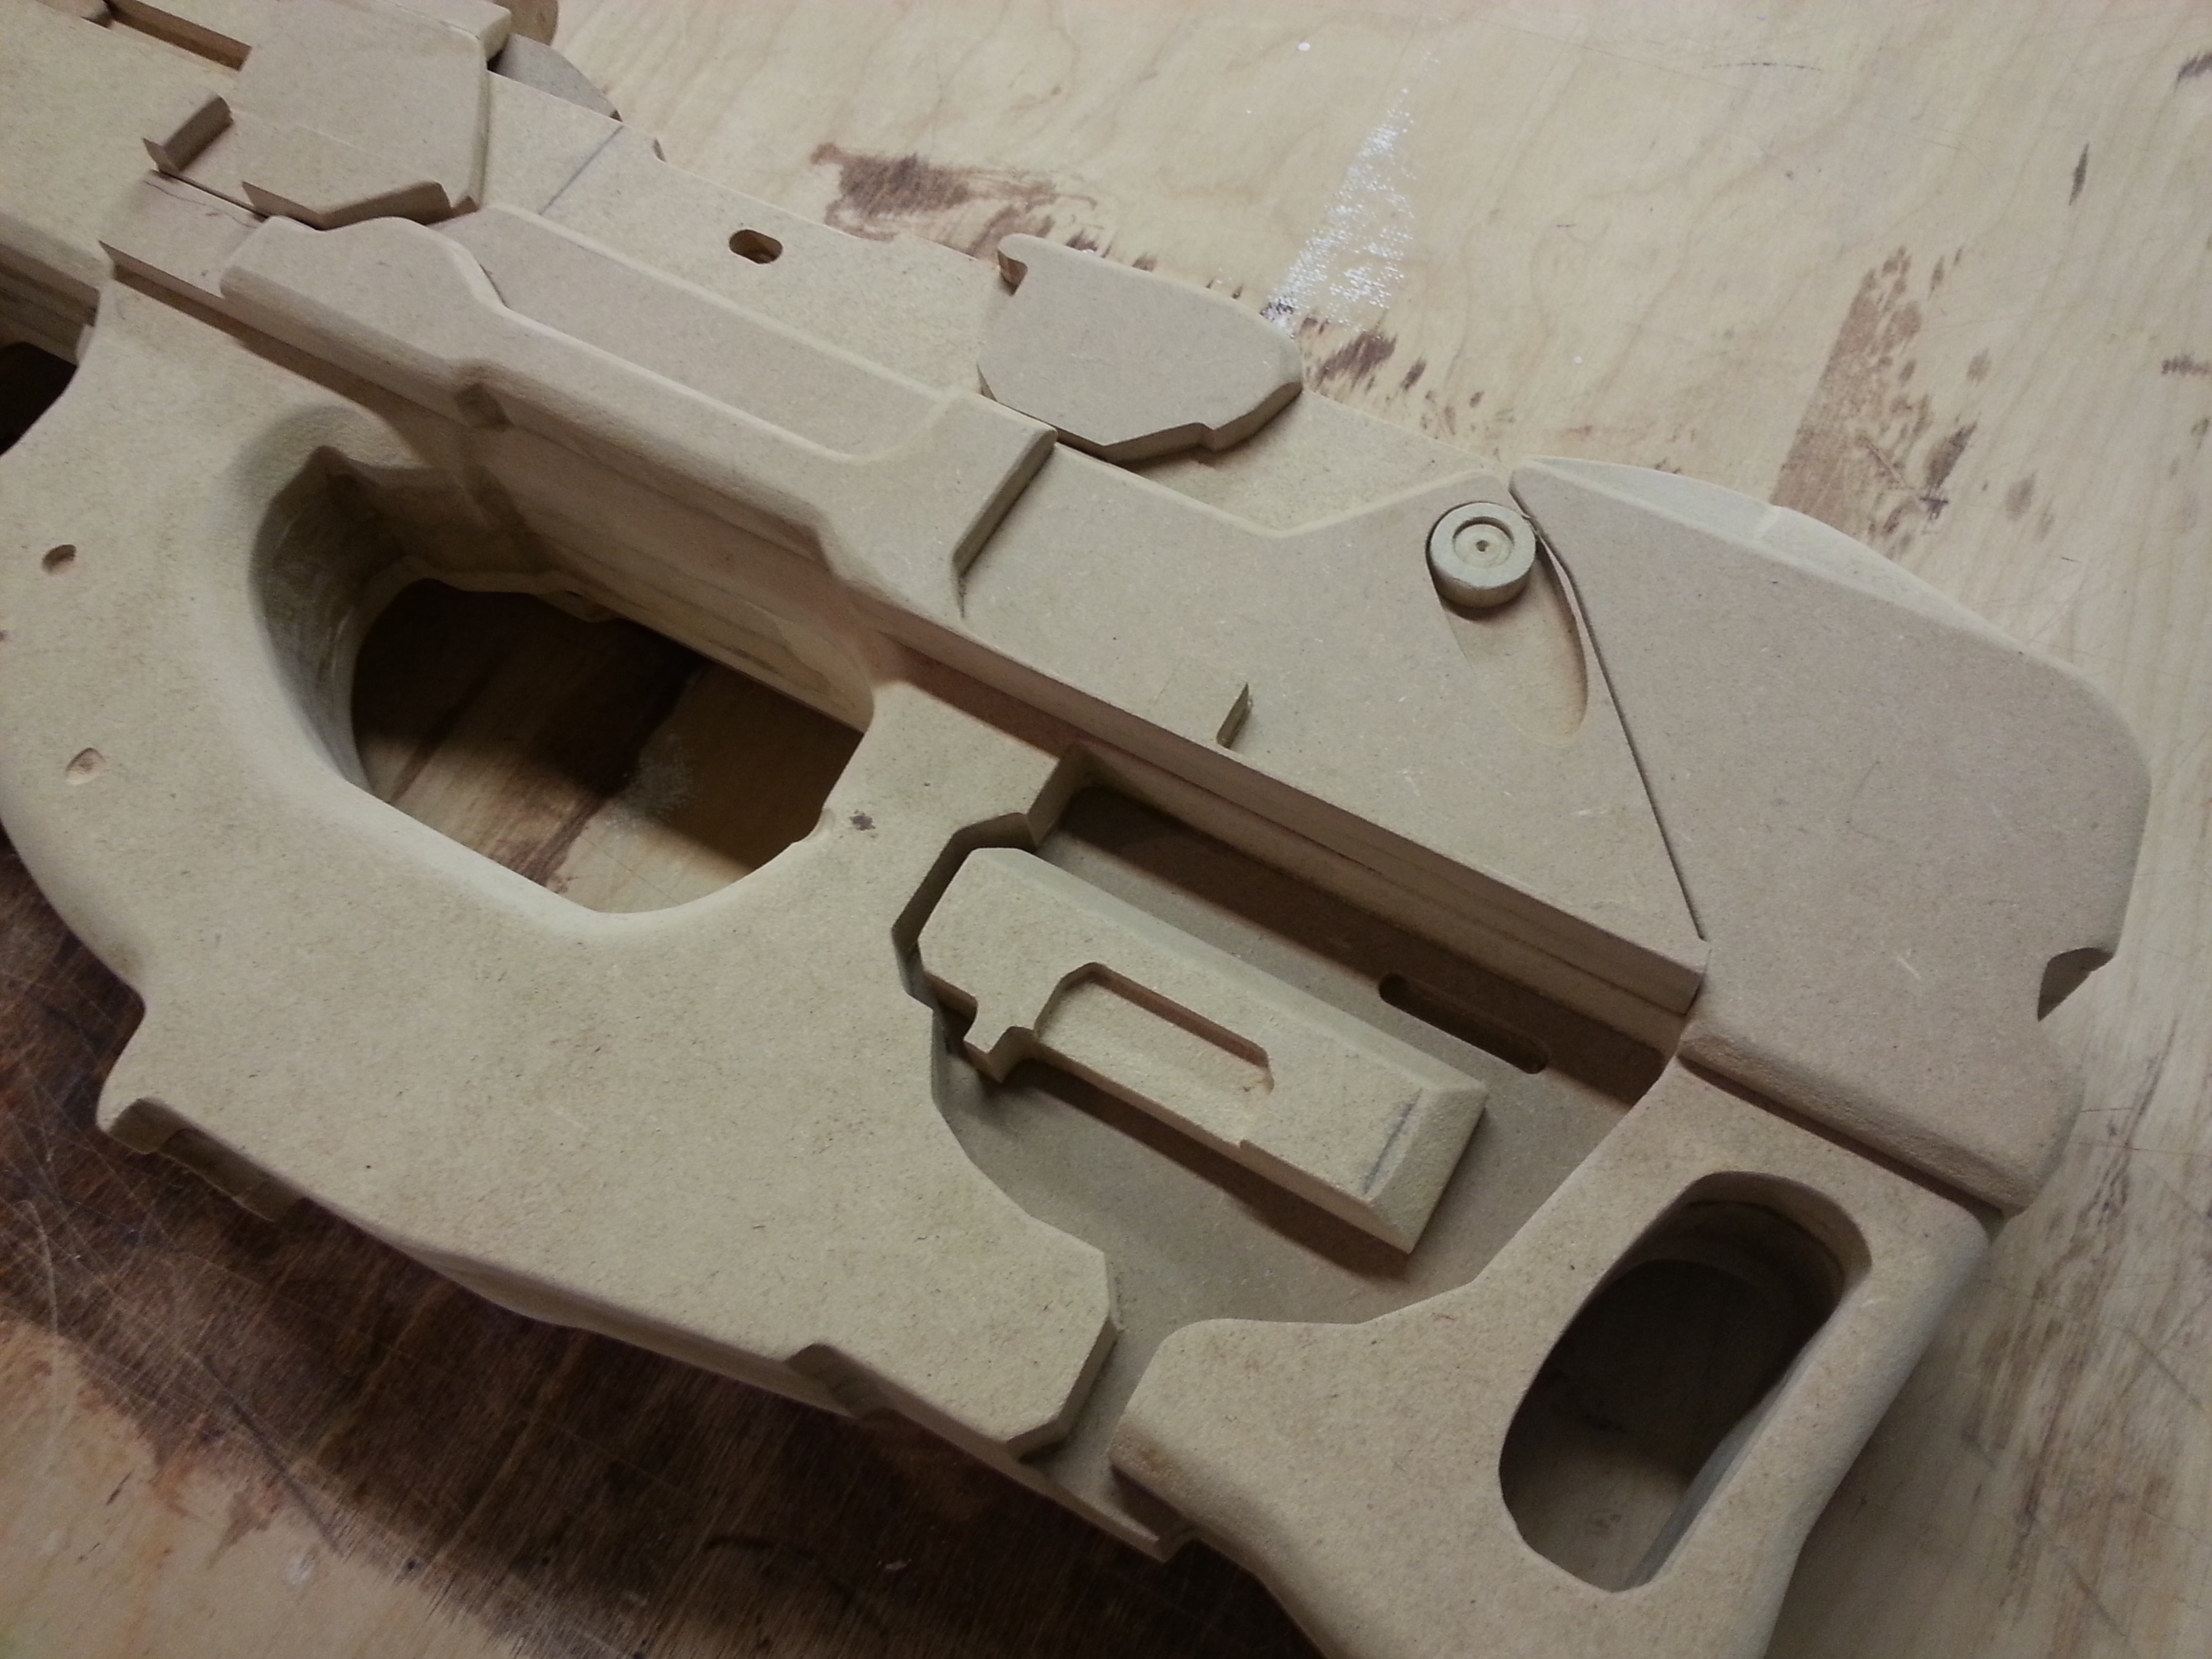
Now that the base of the model is complete, we can start adding in details. This is the secret sauce — building up pieces of MDF to make them appear to be one piece. Be sure to thoroughly sand and chamfer the edges on the router table before you glue them down — you won’t be able to do so afterwards.
Use the original color-coded model for reference when attaching parts. Dry fit everything before applying wood glue!

30 minutes
Materials needed for this step:
– Imagination
– Various scrap pieces, dowels, washers, belt buckles, screws. craft foam
– Wood Glue
What the heck are greeblies? According to the Urban Dictionary, greeblies are: “The creatures that cats chase and wrestle with. Greeblies are invisible to humans. They are mainly nocturnal creatures, but have been known to be active during the day.”
Actually, greeblies are all of those detail bits that make a model look more realistic. Drill a hole and drop in a screw. Cut off a dowel and attach it as a dial. This part is totally up to your imagination. Craft foam also works really well to add subtle detail.


30 minutes
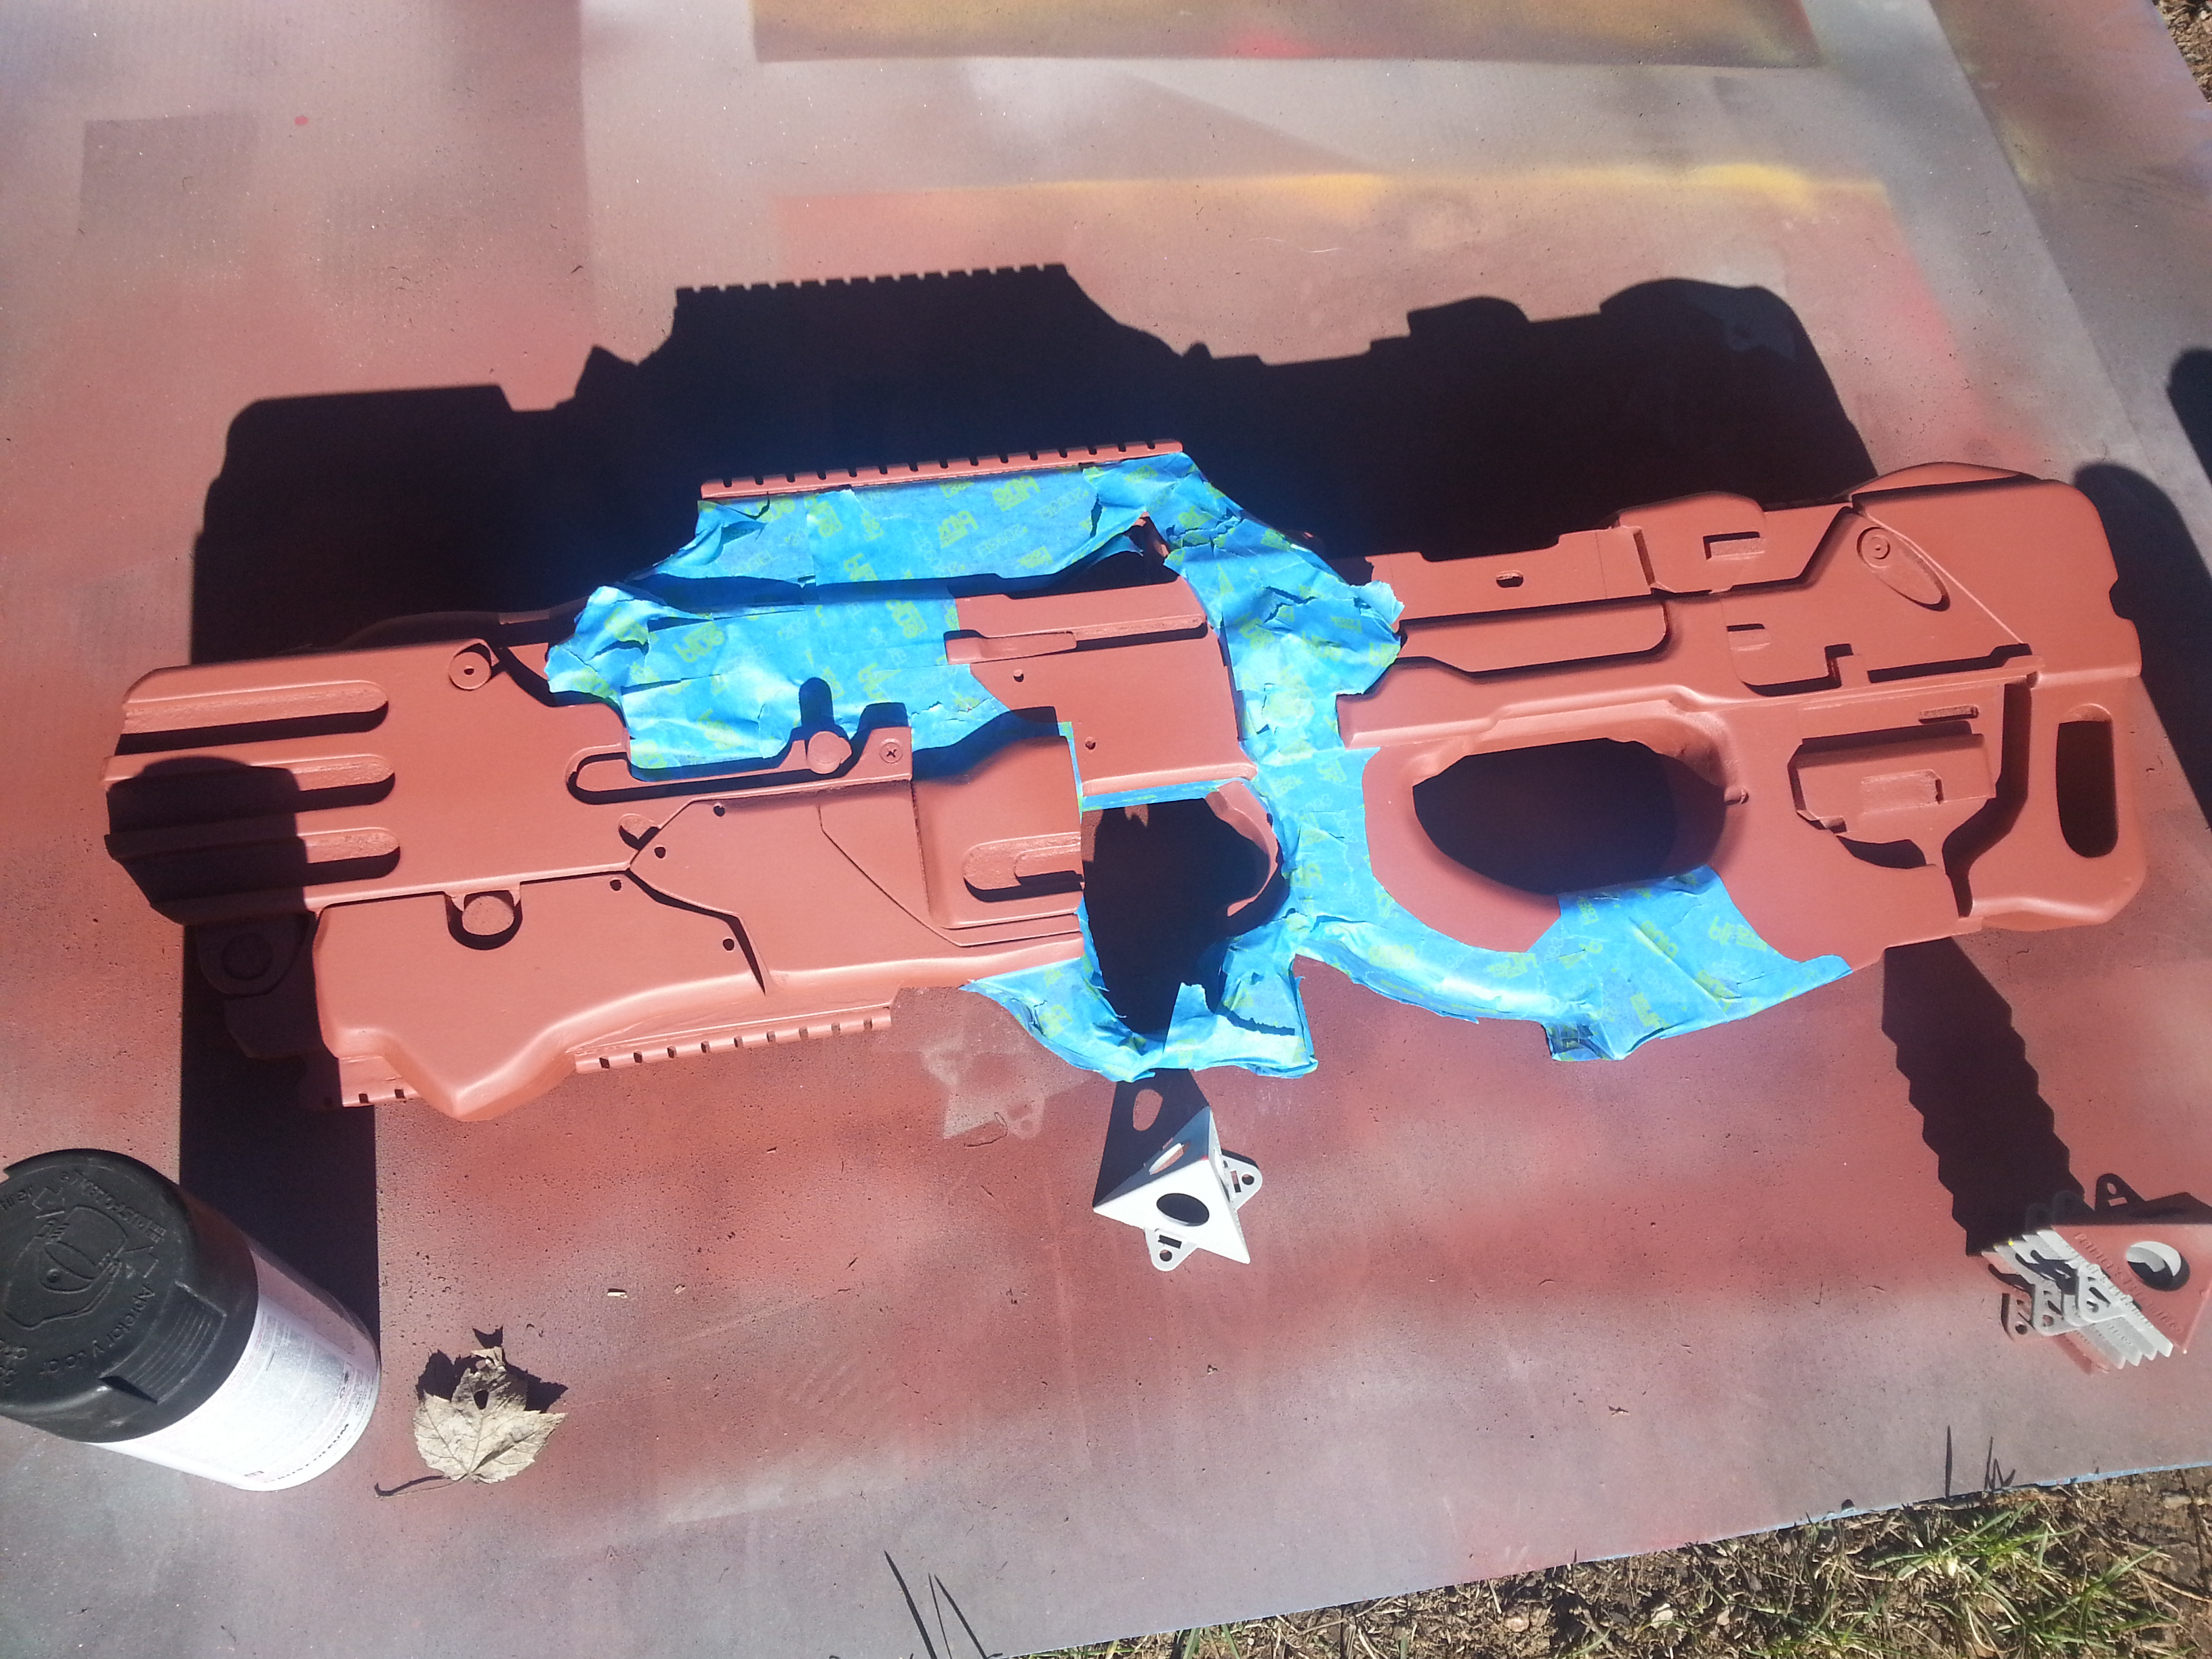
We’ve reached the finish line! Well, almost. Now it’s time to prep your model for paint. This is the Long, Dark, Tea-time of the Soul.
First, since MDF has a tendency to soak up paint, you have to seal the surface. I prefer ModPodge since it can be easily done indoors and covers nicely. I recommend sealing even before you lay down a primer.
Second, grab some grey (sandable) automotive primer and carefully spray down the entire model. Don’t rush — apply light, even coats. You don’t want to have to sand out a run!
Once the paint has fully cured, take it back inside and sand, sand, sand. Use 150 or 220 grit sandpaper and then follow it up with some 000 steel wool. This will leave a nice, smooth surface.
Carefully look over the model for any imperfections. You can use Bondo or plastic wood putty to fill the blemishes and re-sand. This is why you take your time and sand pieces before application! Take it back outside and lay down another coat of grey primer.
Rinse, repeat until you’re happy with the look. Read the paint can and ensure you follow the instructions for cure time before proceeding.


999 minutes
Finishing can take forever. There’s always one more thing you can do to perfect your model. In my case, I spent a couple of months agonizing over the finish.
I recommend laying down a coat of silver followed by orange (for the detail) and then flat black. Don’t worry about the finish — you can always add a coat of clear in whatever finish you want (e.g. matte, satin, glossy).
I highly recommend Harrison Krix’s ebook on painting and weathering: Painting and Weathering for Props and Replicas
Also, be sure to throw in some real screws — this helps to sell the effect. I found some cool buckles at Home Depot that while they didn’t match the exact design, did make the model look more complete.
In the end, make sure you have fun with it! Use your imagination!