
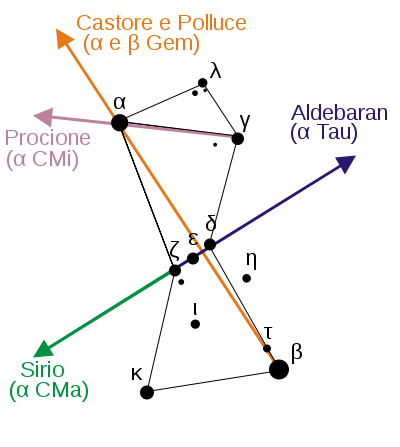
Constellamp is a night stand lamp for science enthusiasts.
A series of clear acrylic panels shows stars in its position and magnitude.
A LED source will light up the panels from the bottom, making the star holes bright, as per Cristiana’s Wall Lamp.
| Material | Description | Price | ||
|---|---|---|---|---|

|
Clear Acrylic Sheet - Cast (×5) |
Dimensions: 12 in × 24 in, Thickness: 1/4 in, Material Type: Extruded |
$105.85 |
|

|
Hard Maple |
6" × 12" × 3/4" Hard Maple |
||

|
Powered LED Strip - White |
|||
| This project's Bill of Materials is not complete. Add to Cart |
$105.85 |
|||
Constellamp portraits a constellation.
The example is build with Orion, but you can build it with any constellation you like.
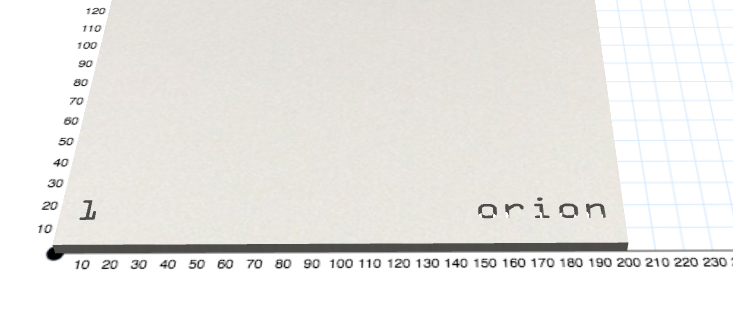
A constellation is a group of stars. Each star is “big” or “small”. Actually what we see from the Earth is a combination of the star size and the distance from us.
The attached image represents the 3D position of the stars in the space, together with its magnitude. The numbers you see in the 3D plot is the distance, in light-year, from Earth: the first row contains anything that lives between 0 and 25 light-year, the second row contains anything between 25 and 50 light-years, and so on…

28 minutes
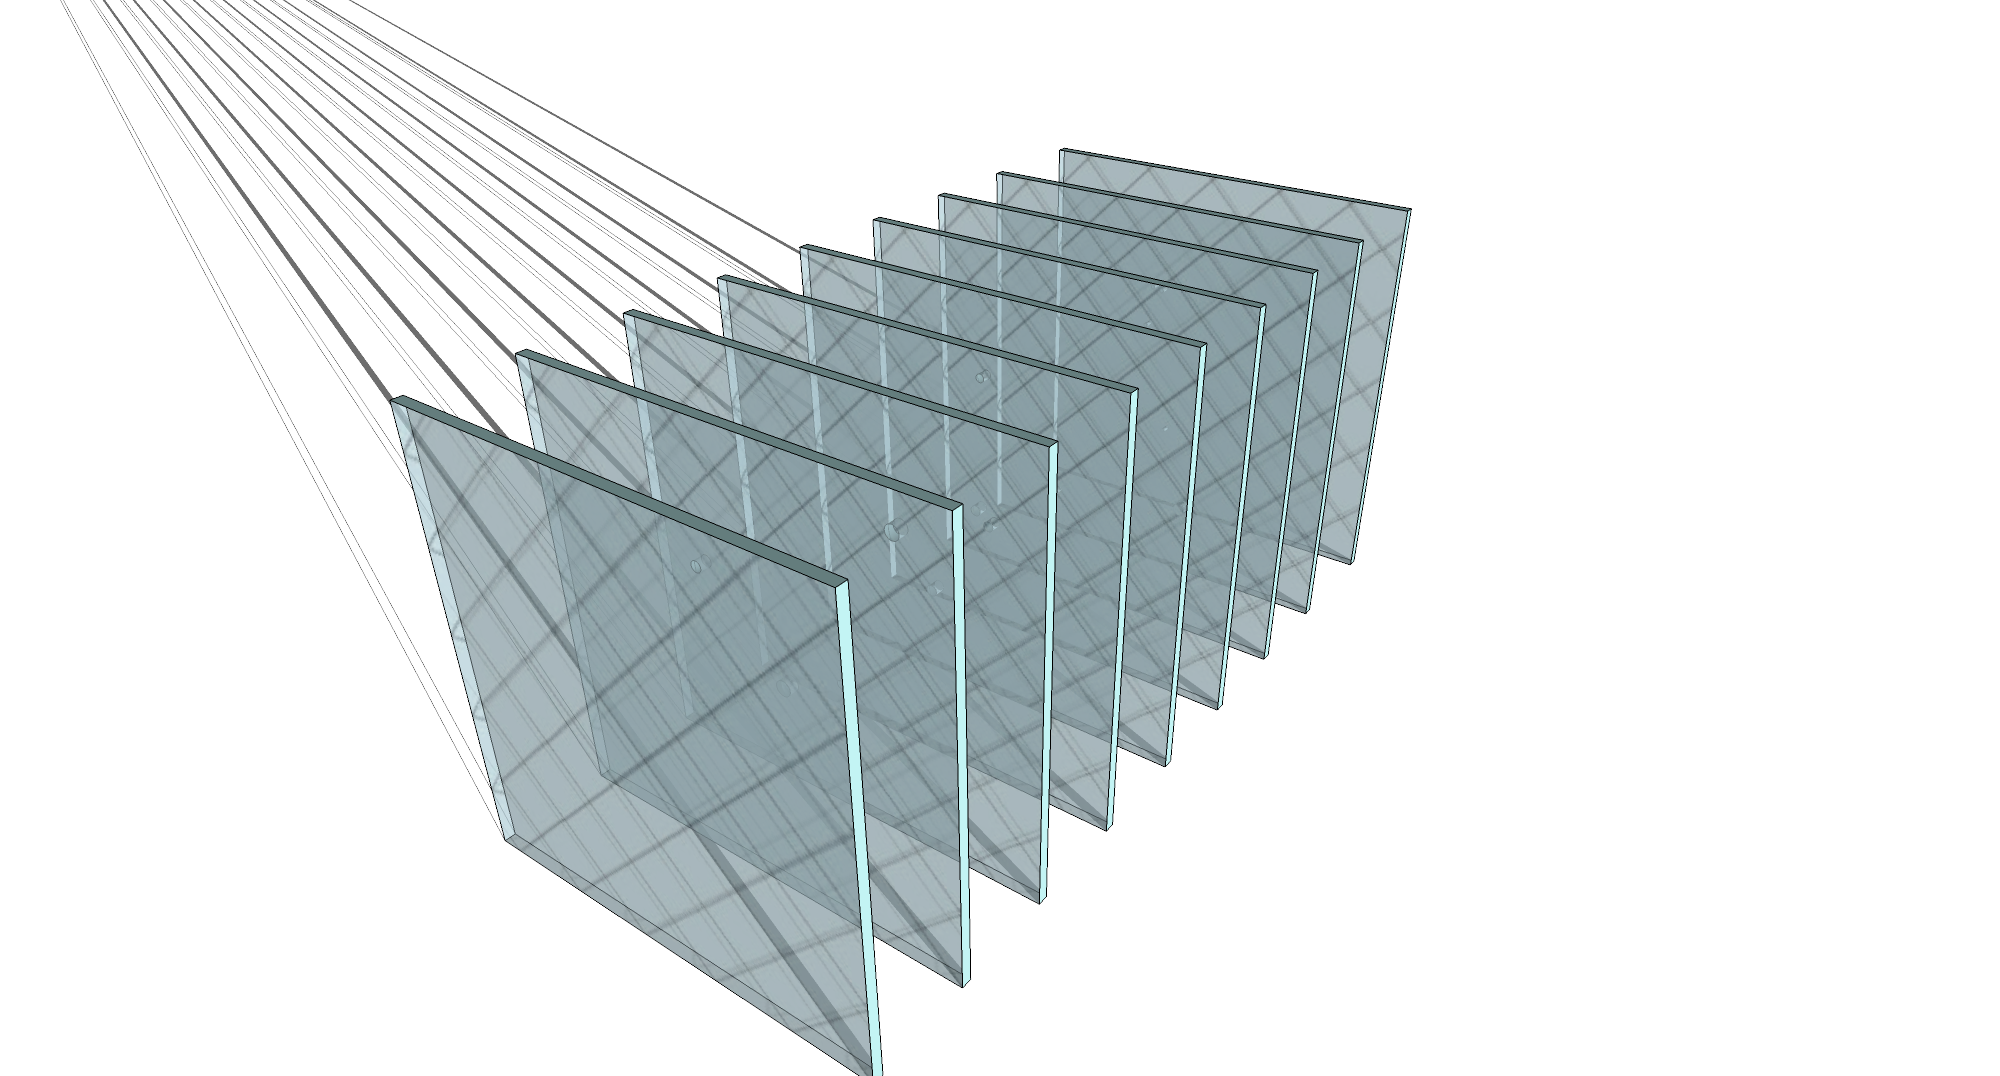
So we will take 9 pieces of clear acrylic and carve, in each panel, the stars contained in that space section. The hole size will be proportional to the star magnitude.
In each panel we will carve the panel number, so that we recognize the right position. The first number will be just 5 mm from the left border of the panel, the second number will be 15 mm from the left border, and so on, so that we can verify each panel is in the right position.
The first panel will also display the constellation name.


1 minute
Once the panels are ready, we can stack them up.
Then we can position them on the constellation holder.

6 minutes
The holder is built with three layers or hard maple. The bottom one is just a plain 85 × 240 mm rectangle, 10mm thick. Its mission is just to keep the LED lights.
The second layer is just a spacer, with a small hole in the back that will allow the power cord to reach the LED lights.


24 minutes
The top layer needs two different tasks, with two different bits. The first one is the name carving, with a thin bit.
Then we will carve a big hole, with two small steps on the two sides.


1 minute
The steps in the holder will keep the acrylic panels in position, giving the LEDs a small free space. The panels will then be enlightened from the bottom, allowing to see the stars, the constellation name and the number with the same effect you can see here:


