
These beautiful, reusable wooden gift tags can be used for years to come. They can be used for birthdays, holiday gift exchanges, or special occasions.
| Material | Description | Price | ||
|---|---|---|---|---|

|
1/8” Bit Set for V-Carving |
Quantity: 2, Shank Diameter: 1/8 in |
$44.23 |
|

|
Carbide Tip Straight 2 Flute - 1/8 in Cutting x 1/8 in Shank |
Quantity: 1, Shank Diameter: 1/8 in, Cutting Diameter: 1/8 in |
$5.99 |
|

|
Soft Maple - Hardwood Type (×2) |
Thickness: 1/8 in, Dimensions: 6 in. × 12 in |
$10.74 |
|
| Add to Cart |
$60.96 |
|||
15 minutes
For this project, I used a 2-stage carve. This allowed me to maximize the level of detail for the carves. Even though I used a 2-stage carve, I built everything in one workpiece so I could lay it out correctly.
Build the entire file—text and tag shapes—in the first workpiece. Add in text and icons and lay everything out as you’d like it to carve on your material. Keep in mind that you can also resize the tags so they work for the names and pictures you’d like to use.
There are some fun holiday icons in the last workpiece!
If you want to add more tags, the Easel drill bit feature is super helpful for these tags. I found using the drill feature to make 1/8" holes (with a 1/8" bit) were perfect for stringing ribbon or string through the tag.
Once you have everything in place, duplicate the workpiece twice.


3 minutes
This should leave you with three workpieces. Edit the workpieces as follows:
Workpiece #2: In one duplicated workpiece, delete the outlines and keep the text. Set the bit to a v-bit (90-degree or 60-degree).
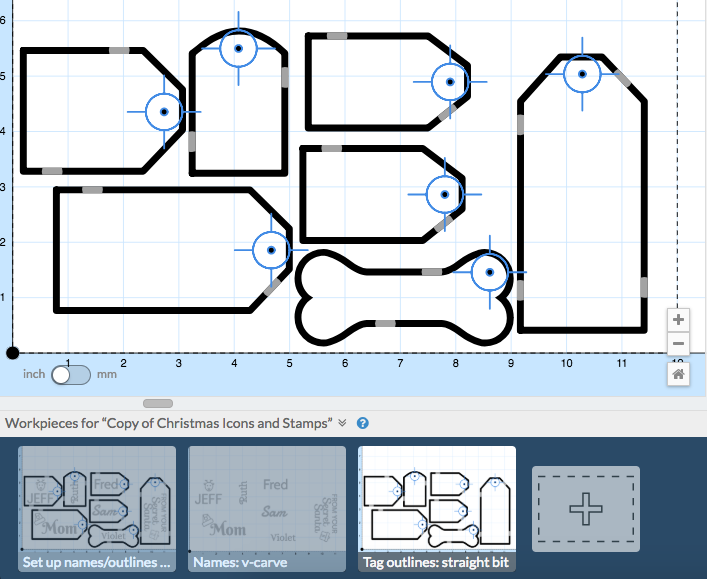
Workpiece #3: In the other duplicated workpiece, delete the text and keep the outlines. Make sure you keep the drill holes in this workpiece. Set the bit to a straight-cut bit.
This should leave you with three workpieces: one with everything laid out (#1), one with text only and a v-bit (#2), and one with the tag outline only (#3).
Make sure you don’t move anything once the workpieces are duplicated!
If you have to make a change, delete workpieces #2 and #3. Make the changes in the first workpiece, then duplicate the workpiece again (as described above) and set up the “text only” / “tag only” workpieces again.

15 minutes
Set up the material on your wasteboard. Since I used a thin piece of material (1/8" thick), using double-sided tape helps keep the piece secured to the wasteboard. This is especially helpful 2-stage carving and cutting the tags out at the end.
Using a v-bit, carve workpiece #2 with the text only.
10 minutes
Once the v-bit is done carving, change the bit to a straight-cut bit. Home the bit in the exact same location as the v-bit and carve workpiece #3 (the tag outlines only).
Once carved, you can sand any sharp edges and finish the tags as you’d like. I only used mineral oil for finishing, but you could paint the inside of the letters for some extra flair!


