
Alex Berger
Chicago, USA
Rep Chi AND stop losing your keys
| Material | Description | Price | ||
|---|---|---|---|---|

|
Acrylic Adhesive SCIGRIP Weld-On 3 |
|||

|
End Mill Sample Pack, 1/8 in Shank |
|||

|
Needle Tip Applicators |
|||

|
Red Acrylic Sheet |
Dimensions: 8 in × 12 in, Thickness: 1/8 in |
$6.49 |
|

|
Silver Metallic Acrylic Sheet |
Dimensions: 8 in × 12 in, Thickness: 1/8 in |
||

|
Two-Color HDPE - White on Blue |
Thickness: 1/4 in, Dimensions: 12 in × 12 in, Quantity: 1 |
$9.71 |
|
| This project's Bill of Materials is not complete. Add to Cart |
$16.20 |
|||
I designed this project using Easel (www.easel.com).
This HDPE is white on top, but when you engrave it deeper than .05", it reveals a thick layer of blue. Use the following depth settings for each part of the file:
2 Rectangles – .07"
4 Stars – .25" to cut all the way through the HDPE
5 Squares – .25" to cut all the way through the HDPE

Mill the HDPE. I cut this on a Shapeoko 2 with a speed of 15 and a depth per pass of .04". I used a carbide 2 flute straight flute end mill found in the Inventables End Mill Starter Set. The material milled beautifully.
Next mill the silver acrylic hooks and the red acrylic backer. I cut these on a Shapeoko 2 with a speed of 25 and a depth per pass of .02"

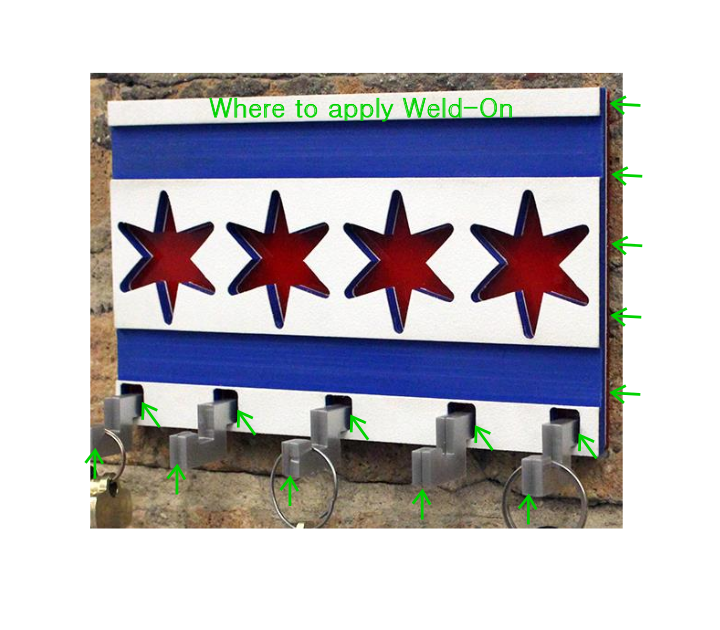
To attach the red acrylic, carefully cover the back of the cut HDPE with Weld-On. Line the red acrylic up and press it against the back of the HDPE. Apply pressure for a few minutes until the pieces are fused together.
After cutting the metallic silver acrylic, you’ll have 10 hook pieces. Each hook is made from 2 of these pieces sandwiched together. For each hook, apply Weld-On to the large flat surface of one piece, then line the 2nd piece up the same way and press them together. Apply pressure for about a minute until the 2 pieces are fused together.
Attach the hooks to the HDPE/acrylic piece one at a time. Put a few drops of Weld-On into one of the 5 square holes, making sure it covers both the inner edges of the HDPE and the red acrylic. Put a few drops on the back of the hook, then insert the hook into the hole. Apply pressure and hold for a few minutes until the hook is secure. Repeat in the other 4 holes. Let the Weld-On dry completely for a couple of hours before using the hooks.
I hung this on the wall using basic mounting/hanging strips meant for photos.
Lightly sand the milled portions of the HDPE to remove tool marks. This will leave the blue parts a little white/dusty – apply a small amount of mineral oil to restore the color and add a polished finish.


Michael Audette
Alex Berger
Sarah Massey