
JDM
USA
This was a really cheap project to make. I bought the clay at Michaels and used the coupons on their website. It was about $8 total for the clay.
The other materials I had on hand. I used a piece of oak planed down to about 1/4".
10 minutes
The project needed to be baked at 275 degrees F so I opted for a chemical solution to blacken the wood. A paint, stain or other finish would have been a mess in a hot oven.
We need two solutions; acetate and tannin, both easily made with common items.
Acetate: submerse a couple of steel wool pads in vinegar in a jar. I put my solution in a double boiler for a few hours on low to speed up the process. After sitting overnight, it was ready. The longer it sits, the stronger it gets.
Tannin: Brew up a batch of really strong tea (use a plain unflavored). My tea was about 4 times stronger than normal.
The acetate reacts with the natural tannin in the wood and turns black. Some woods, especially hard woods have a higher content of tannin. The tea adds extra.

30 minutes
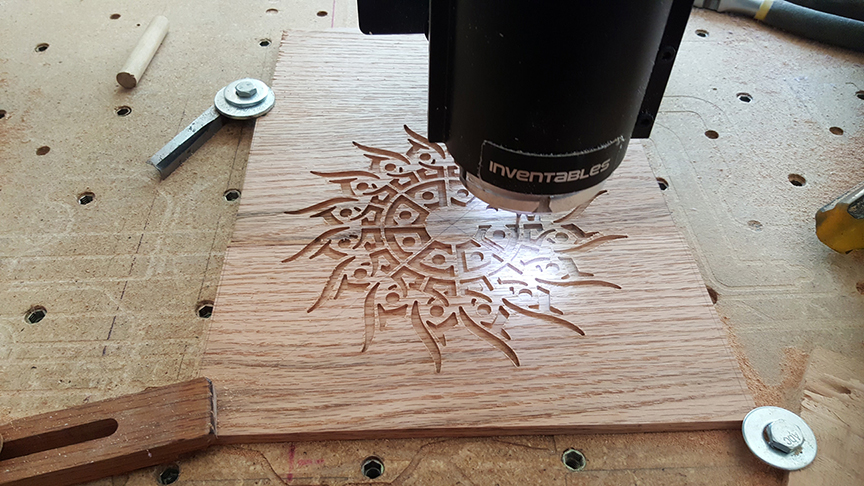
Choose your material and set up the size and depth of the cut.
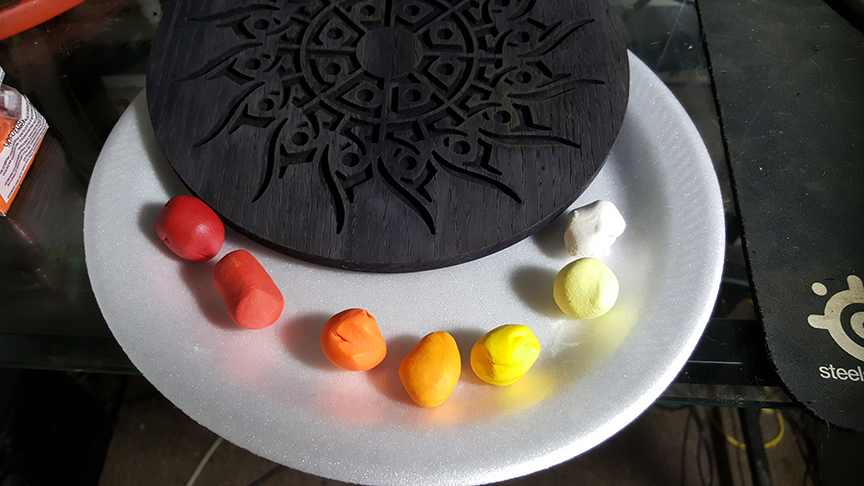
I used 4 colors of Sculpey III for my project, white, yellow, orange, and red. I mixed equal parts of the adjacent colors to make 3 more colors to fill in between.
Using a cheap brush, moisten the surface of the wood with the tea. cover the entire surface of the wood including the edges and back. It just needs to be moist, not dripping. You may let it dry and apply more tea in stages to increase the tannin content.
*the wood may bow a little. Don’t fret. It will dry and return to normal.
Clean your brush with water to not contaminate the acetate solution. Brush on the blackening solution and it will begin to turn in a couple of minutes.
Repeat until you get the color you want.

180 minutes
This part is up to you. Depending on the colors you chose or the gradient you wish to use, start rolling little balls of clay and pack them into the inlay pocket.
You want to use some care to keep the clay off the surface of the wood. It can be difficult to clean up.
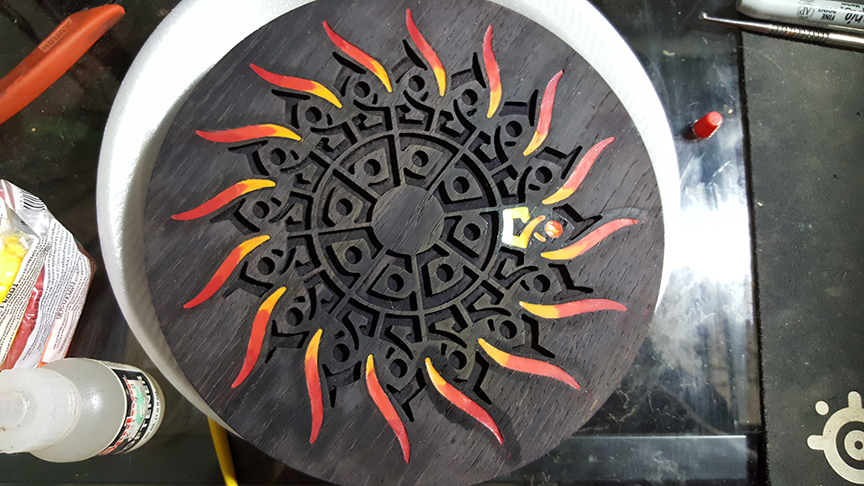
Once the clay is in the pockets, you can use your finger or a sculpting tool to start smearing the adjacent colors together to create a gradient. If you don’t like a section, dig it out and put more clay in.
Put on some relaxing music like Gojira or Slayer and mush away.
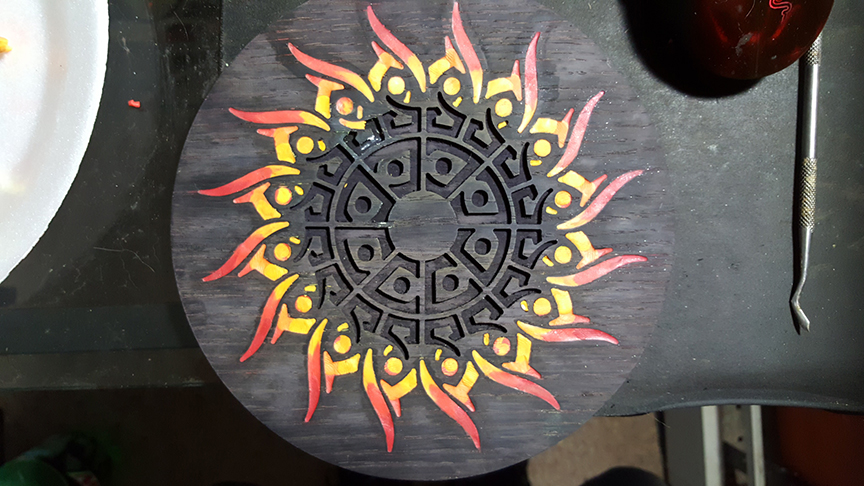
The Sculpey III package says to bake at 275 degrees F for about 30 minutes. I went a little less than 30 because the clay wasn’t very thick. You can let it cool and check it by poking it. If it is springy, it needs to go back in for a bit.
I dusted the surface with a quick dry lacquer.
Don’t use any oil based finishes on polymer clay. It reacts with the clay and leaves a tacky surface. I think Sculpey makes a clear coat formulated for use with their clay.


Jose Danilo Doromal