
Steve Carmichael
MONROE, GA
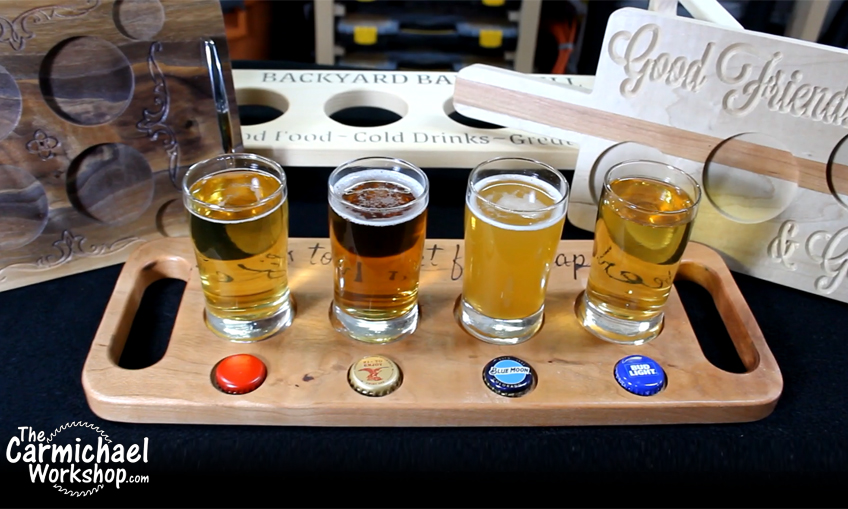
Steve at The Carmichael Workshop makes four different styles of Beer Flight Glass Carriers
10 minutes
Beer flights are easy to make and they make great gifts. You could even make some extra cash by selling them at craft fairs, or by landing a deal with a local craft brew pub that wants to order a bunch of them at once. Personalize them with logos, names, or your favorite beer drinking slogans. In this video, I make four different styles of beer flights for different size glasses. Check it out!
60 minutes
I bought a 4-pack of 5 Ounce Beer Tasting Glasses and also used some full-size pint glasses I already had. I recommend acquiring the glasses first so you can get accurate measurements for your designs. You might have to adjust my designs to fit your glasses. Once your design is ready, cut a board that can be used to carve the project. Get creative and glue multiple wood species together to make stripes. You could also use plastic materials. Mount your blank on the X-Carve.
If your project has any text or design library elements that require EASEL PRO V-Carving, I recommend doing all V-Carving first. I used a 90 degree V-Bit. You could place the V-Carve elements on a separate workpiece, or you could delete all other elements and undo the delete after you finish v-carving to bring the other elements back.

60 minutes
These beer flights can take about 1-2 hours to carve depending on the design. I used an 1/8" straight bit. For any parts that will be cut all the way through the board, use tabs to keep the part fastened to the rest of the board. I usually delete any text that I’ve already V-Carved, then undo the delete after the carve to bring the v-carved elements back. When finished carving, I use a multi-tool to cut the tabs to release the parts.

30 minutes
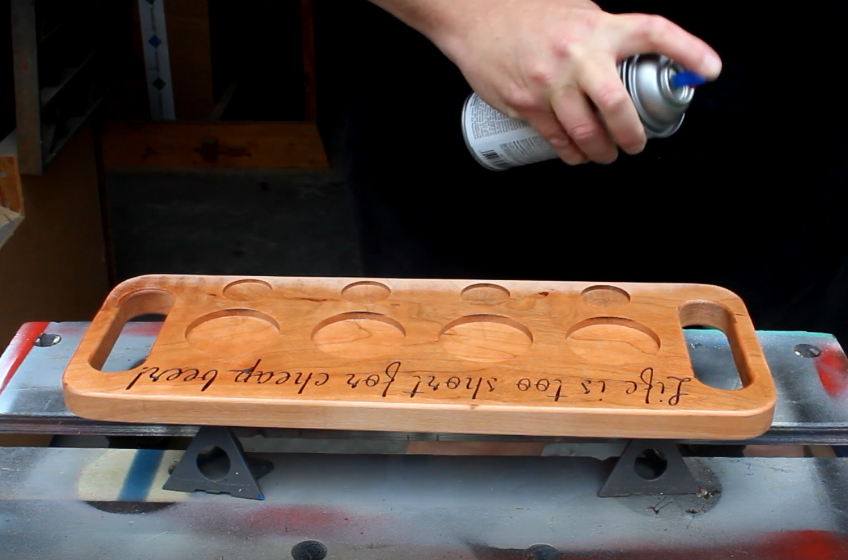
Sometimes I like to paint the carved elements so the color pops. I spray a 2 coats of clear sealer over it to seal the pores in the wood. After that dries, I surround the elements with masking tape to prevent paint overspray on the project. I spray as little paint as possible to fill it in. After the paint dries, I remove the tape and use a random orbit sander to sand off the excess paint on the surface. Vacuum the dust out of the painted crevaces.

Beer flights will be around a lot of moisture and condensation. This makes choosing a finish a real challenge. No matter what you use, plan on refinishing or replacing a beer flight in the future. The length of time that it lasts depends on how frequently it’s used and how well it’s cared for.
Exterior paint or a marine varnish would be the longest lasting finishes. I used spray lacquer since my beer flights are for infrequent home use. Some beer flights have a chalkboard paint applied on one section of the board for labeling the beers, so if you consider this option, you may want to do a test piece to make sure it reacts ok to the finish it’s being applied over.
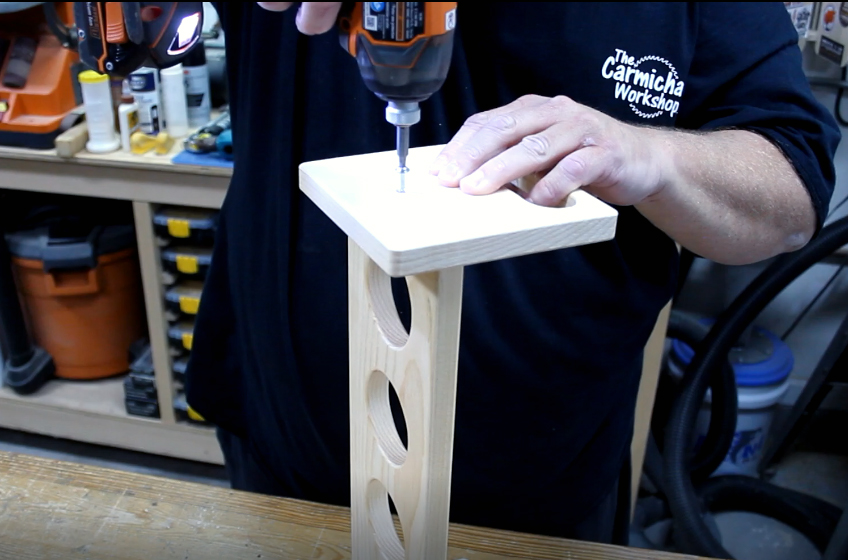
If the beer flight is made up of multiple parts that need to be assembled, it will most likely be easiest to finish the parts before assembly. Avoid getting finish on any areas that will be glued together. Complete any sanding and easing of edges before applying a finish.
Many beer flights are made from just a single board and do not require any assembly. On one of my beer flights, I added some cabinet handles and rubber feed to the board after the finish was applied. My pint glass beer flight has two sides that are screwed onto the main board that holds the glasses. You might want to attach other hardware, so think about the order in which you paint letters, sand, and finish the project. Some steps are easier to complete prior to assembly.
Enjoy using your beer flight at your next party or outdoor barbeque! These are sure to be a big hit with your guests. I hope these different beer flights gave you some good ideas that you can use in your designs. It was fun experimenting with V-Carving, as well as incorporating fun text phrases and adding other hardware to them.
I have hundreds more project videos on my YouTube channel:
‘The Carmichael Workshop’:https://www.youtube.com/user/carmichaelworkshop.
Also, visit my website for lots of free plans:
‘TheCarmichaelWorkshop.com’:http://www.TheCarmichaelWorkshop.com
Thanks for checking out my beer flight projects! Steve…


Aaron Grace