
These fun vegetable characters are carved on acrylic for a colorful, waterproof, and easily identifiable way to label your garden. With a carve time of under 2 1/2 hours you can carve a set for yourself and another for a friend.
180 minutes
The file is all set up and ready to go in Easel for you. I found the most success with leaving the paper backing on the bottom side, and removing it from the acrylic on top, where the bit connects with the material. Doing so allowed the sticky backer to stay in place through the carve and made for easy removal at the end.
Begin by carving the main bodies that are set up as different workpieces by color. Use carpet tape rather than clamps to hold the carve in place. With these larger pieces there should not be a problem, but when you get to the smaller pieces on the green acrylic board be sure to tape liberally, focusing particularly on the spots with smaller carves. Do not use tabs on any of the pieces. Acrylic does not cut like wood, and will not necessarily snap where you want it.

5 minutes
Once all of the pieces have carved gently remove the acrylic from the X-Carve and remove the backing. I did a quick smooth of any rough edges using my spindle sander. Really, any sander should work for it, just be careful not to be aggressive with the sanding.

5 minutes
You will notice that all of the leafy sections of the plants carve twice – once on the color of the vegetable (or fruit), and again in green. Glue the leafy sections to the rest of the marker using CA glue and accelerator. (Apply the glue to one piece, spray accelerator on the other, and then joint them. Warning: It will dry in seconds, so place it well.)
The exception to this is the beet. You’ll glue the red parts on top of the leafy parts.

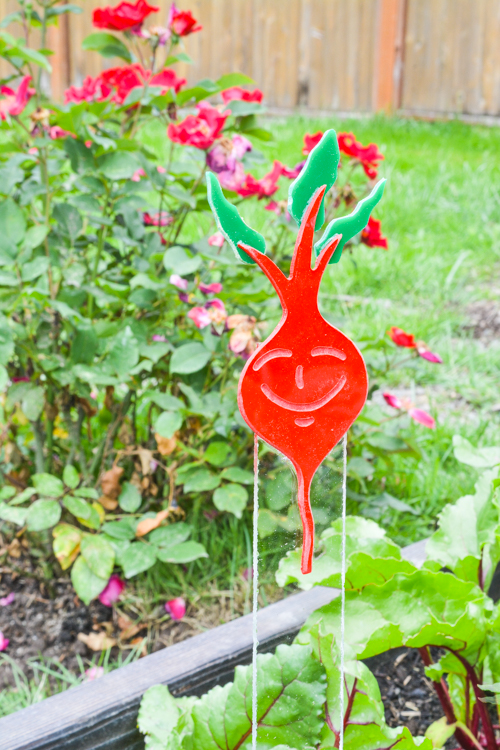
The sixth workpiece contains a layout for the clear plexiglass stakes to which the characters are glued. You can either choose to carve these on the CNC, or cut them out on a bandaw or tablesaw. Or skip this part entirely and glue the acrylic to wooden stakes.
The cool thing about the clear stakes is that in the right light they don’t show, making for a fun effect.
Carve time is 51 minutes if you choose to cut these using the CNC. It’s significantly less on the bandsaw. And less still with a wooden stake you don’t have to cut out.


Callum MacErlich