
Patrick Rainsberry
Alta Loma, USA
Here is a project showing how to use Fusion 360 to model a pine derby car, set up the 3D CAM and then cut it on an X-Carve.
http://youtu.be/agLS_PRQJLQ
Download Fusion 360 here:
http://autode.sk/Fusion360Download
After installation create an account to login. Fusion 360 is free for non-commercial use. It will start in a 30 day trial. At the end of the trial you can either purchase a license for $300/year for commercial use or select that you will be using it as a student, hobbyist or startup which allows you to use it free .
When you launch Fusion you will be in a new design.
Fusion 360 is capable of all kinds of different solid modeling and design. For this particular project we will be using the sculpt environment. This is a very easy way to develop complex shapes quickly.
Select the sculpt command to start a new shape.
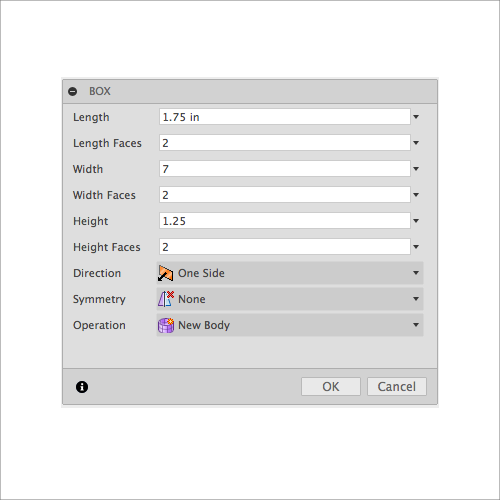
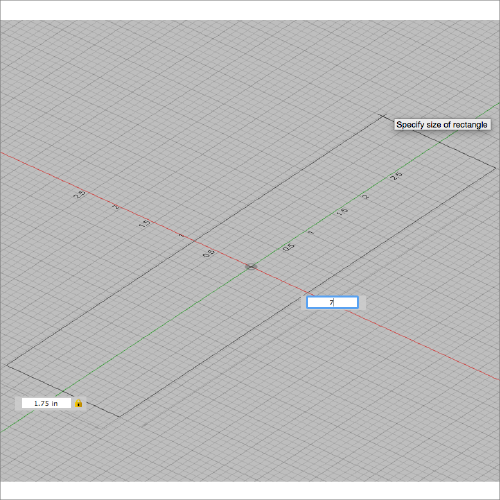
Create a new Box with the following dimensions 1.5 X 7 X 1.25
Select the crease command and crease all of the bottom edges
Select the symmetry command to apply symmetry to the model.
(You’ll notice in the video I modeled the car a little wider. I will then scale it down later)


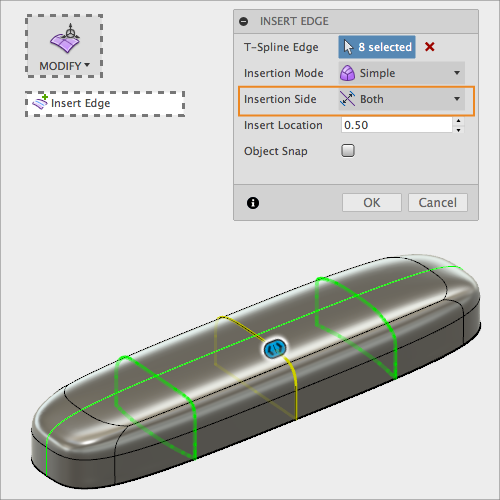
Insert Edge will allow you to create more definition in the model.
Double click to get an entire loop
Insert an edge on “both sides”
As you continue to refine the shape you can continue to insert edges to achieve the desired result
Begin dragging edges with the modify command.
Start with a basic shape and refine it as you go.
You can drag Edges, Faces, or Vertices
Don’t worry too much about the options in the dialog at this point
Just select an entity in the window and use the manipulator to drag it around

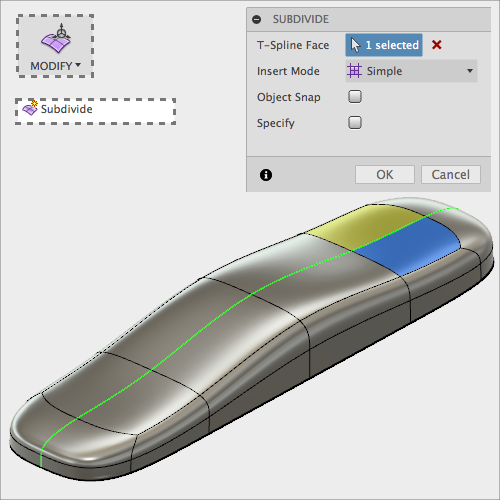
Select subdivide face command
Select faces onto which you want to create more definition
More faces gives you more control over the shape in that area


Continue to refine the geometry until you are happy with the shape.
Finish the sculpt command

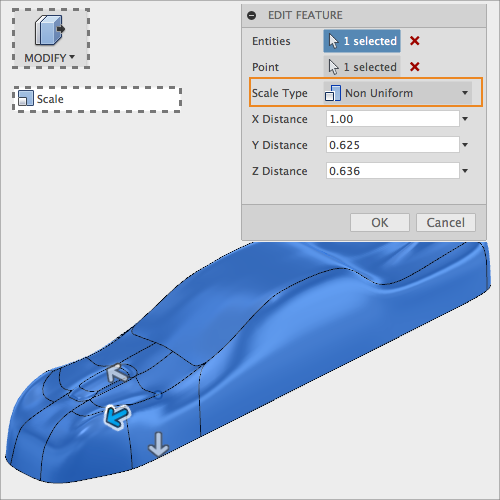
Possibly add a scale feature to your model.
In the video I modeled it originally to the wrong specs. It is sometimes very convenient to take an existing model and scale it to fit a particular piece of stock material. Also if you have a model you really like but realize your stock is just a little too small this is a really easy way to make some small adjustments to get it in there.
I have found the easiest way to manage tool paths in Fusion 360 for the X-Carve is to create a unique “setup” for each tool (and possibly part orientation). Each setup in the CAM tool will be easily processed as a single G-Code file. This is what you will use to actually communicate with the machine later.
Switch to the CAM mode in Fusion 360
Create a new setup
Select your model
Enter in specific sizes for Stock
Select the origin point for the stock. By using the bottom left corner of the model we can setup a zero that will easily facilitate changing tools.
Set the model to be at the bottom of the stock
(You can rename the setup or tool paths by slowly clicking the name twice)


We are going to cut this part in two phases: roughing and finishing. For the roughing pass we will use a flat end mill.
Create a new 3D Pocket tool path
Select a tool from the library (1/8” flat end mill)
Set the feeds and speeds. I used these based on some info I read in the forums.
Select the “Passes” tab
Set the Maximum Roughing step down to be .05”
Set the stock to leave to be .04”


Create a new setup
Use all of the same settings from previous setup
(Alternatively you can copy/paste the existing one and delete the roughing operation from the new setup)
**Important: Make sure you position the origin point in the same place in both setups

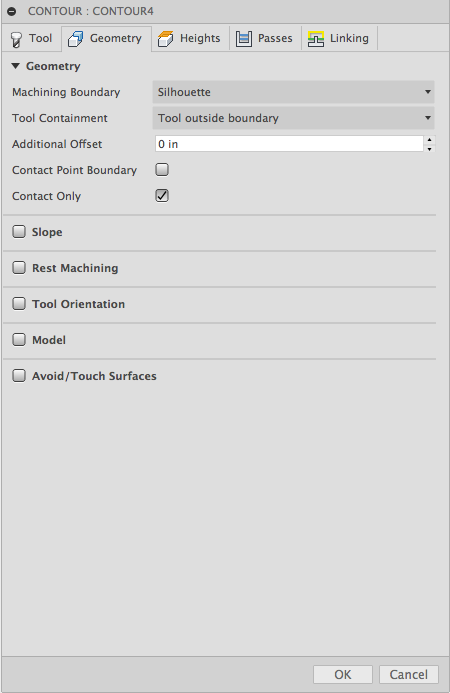
Create a 3D Contour tool path
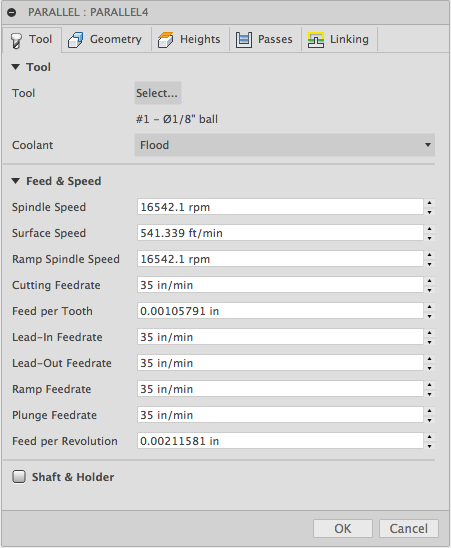
Select a tool from the library (1/8” ball end mill)
Set the feeds and speeds.
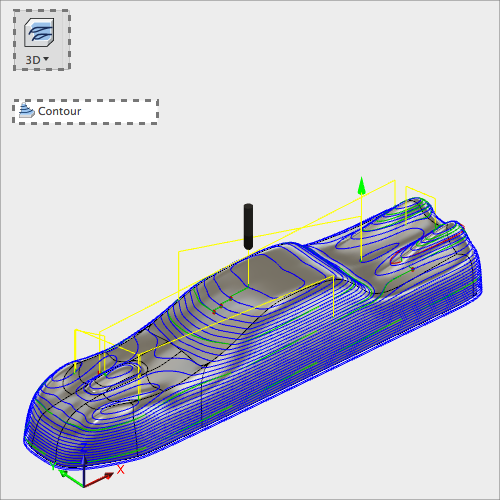


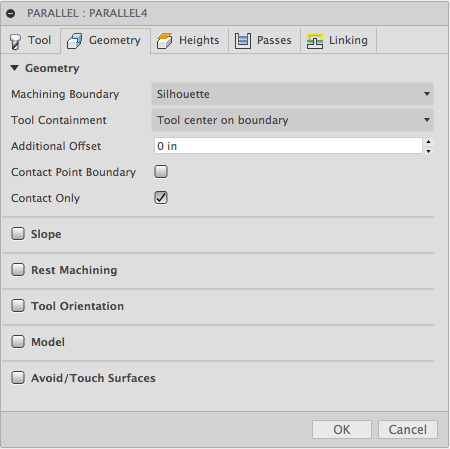
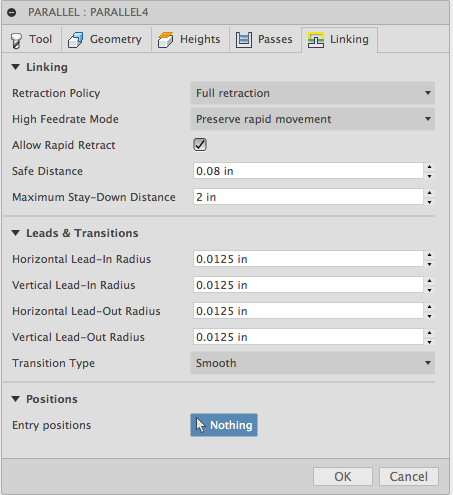
Create a 3D Parallel tool path
This is maybe a little over kill but thought I’d show two types of finishing
Set the set over to be nice and small like .04 (This isn’t high run production so lets not worry about time)


You can simulate the tool path to make sure everything looks good
Select a single operation, a setup or the entire Operations folder
Turn on Stock to see what is cut away
Turn off tool paths to see the stock better

Select the first setup (with the 3D Pocket operation)
Select Post process
Save it out with a name so you’ll remember: Pinewood_Flat_1_8
Select the second setup (with the finishing operations)
Select Post process
Save it out with a name so you’ll remember: Pinewood_Ball_1_8


Important: Have you set a G28 position? No?
If you don’t know what this is or haven’t set it you must open the g-code files and REMOVE the lines that start with G28.
I will add a tutorial at some point on this but for now if you don’t remove these lines you will probably crash your machine.
After exporting the G-Code Fusion will launch an editor where you can view the code. Use search to find G28 and delete those lines. (cmd+f. ctrl+f)
Typically there would be three lines one at the beginning and 2 at the end.
This is actually nice if you have set it as it will send your machine to a nice “home” position when it is done and before it starts.
I first did this with only tape and it knocked free after a while so I had to restart. I think it might have just been too hot in the garage usually this heavy-duty double sided paper tape is enough. Anyway I decided to fixture it much heavier.
I just put a couple screws in the bottom through a piece of scrap wood and then taped and screwed the waste board down.
Probably total overkill but after losing one part way in I didn’t want to waste any more.
Also I like to make sure to square the material nicely against the side of the X-Carve


If you want to really dial it in at this point you can measure the actual Z height off the work surface. Here you can see it is slightly off of the supposed height of 1.25”
After you take the measurement you would go back into Fusion 360.
Change the Z height in the Setup for the two tools to match this value.
Click “regenerate” on the operations.
Post the g-code again
Delete G28 commands if you aren’t using them!!!

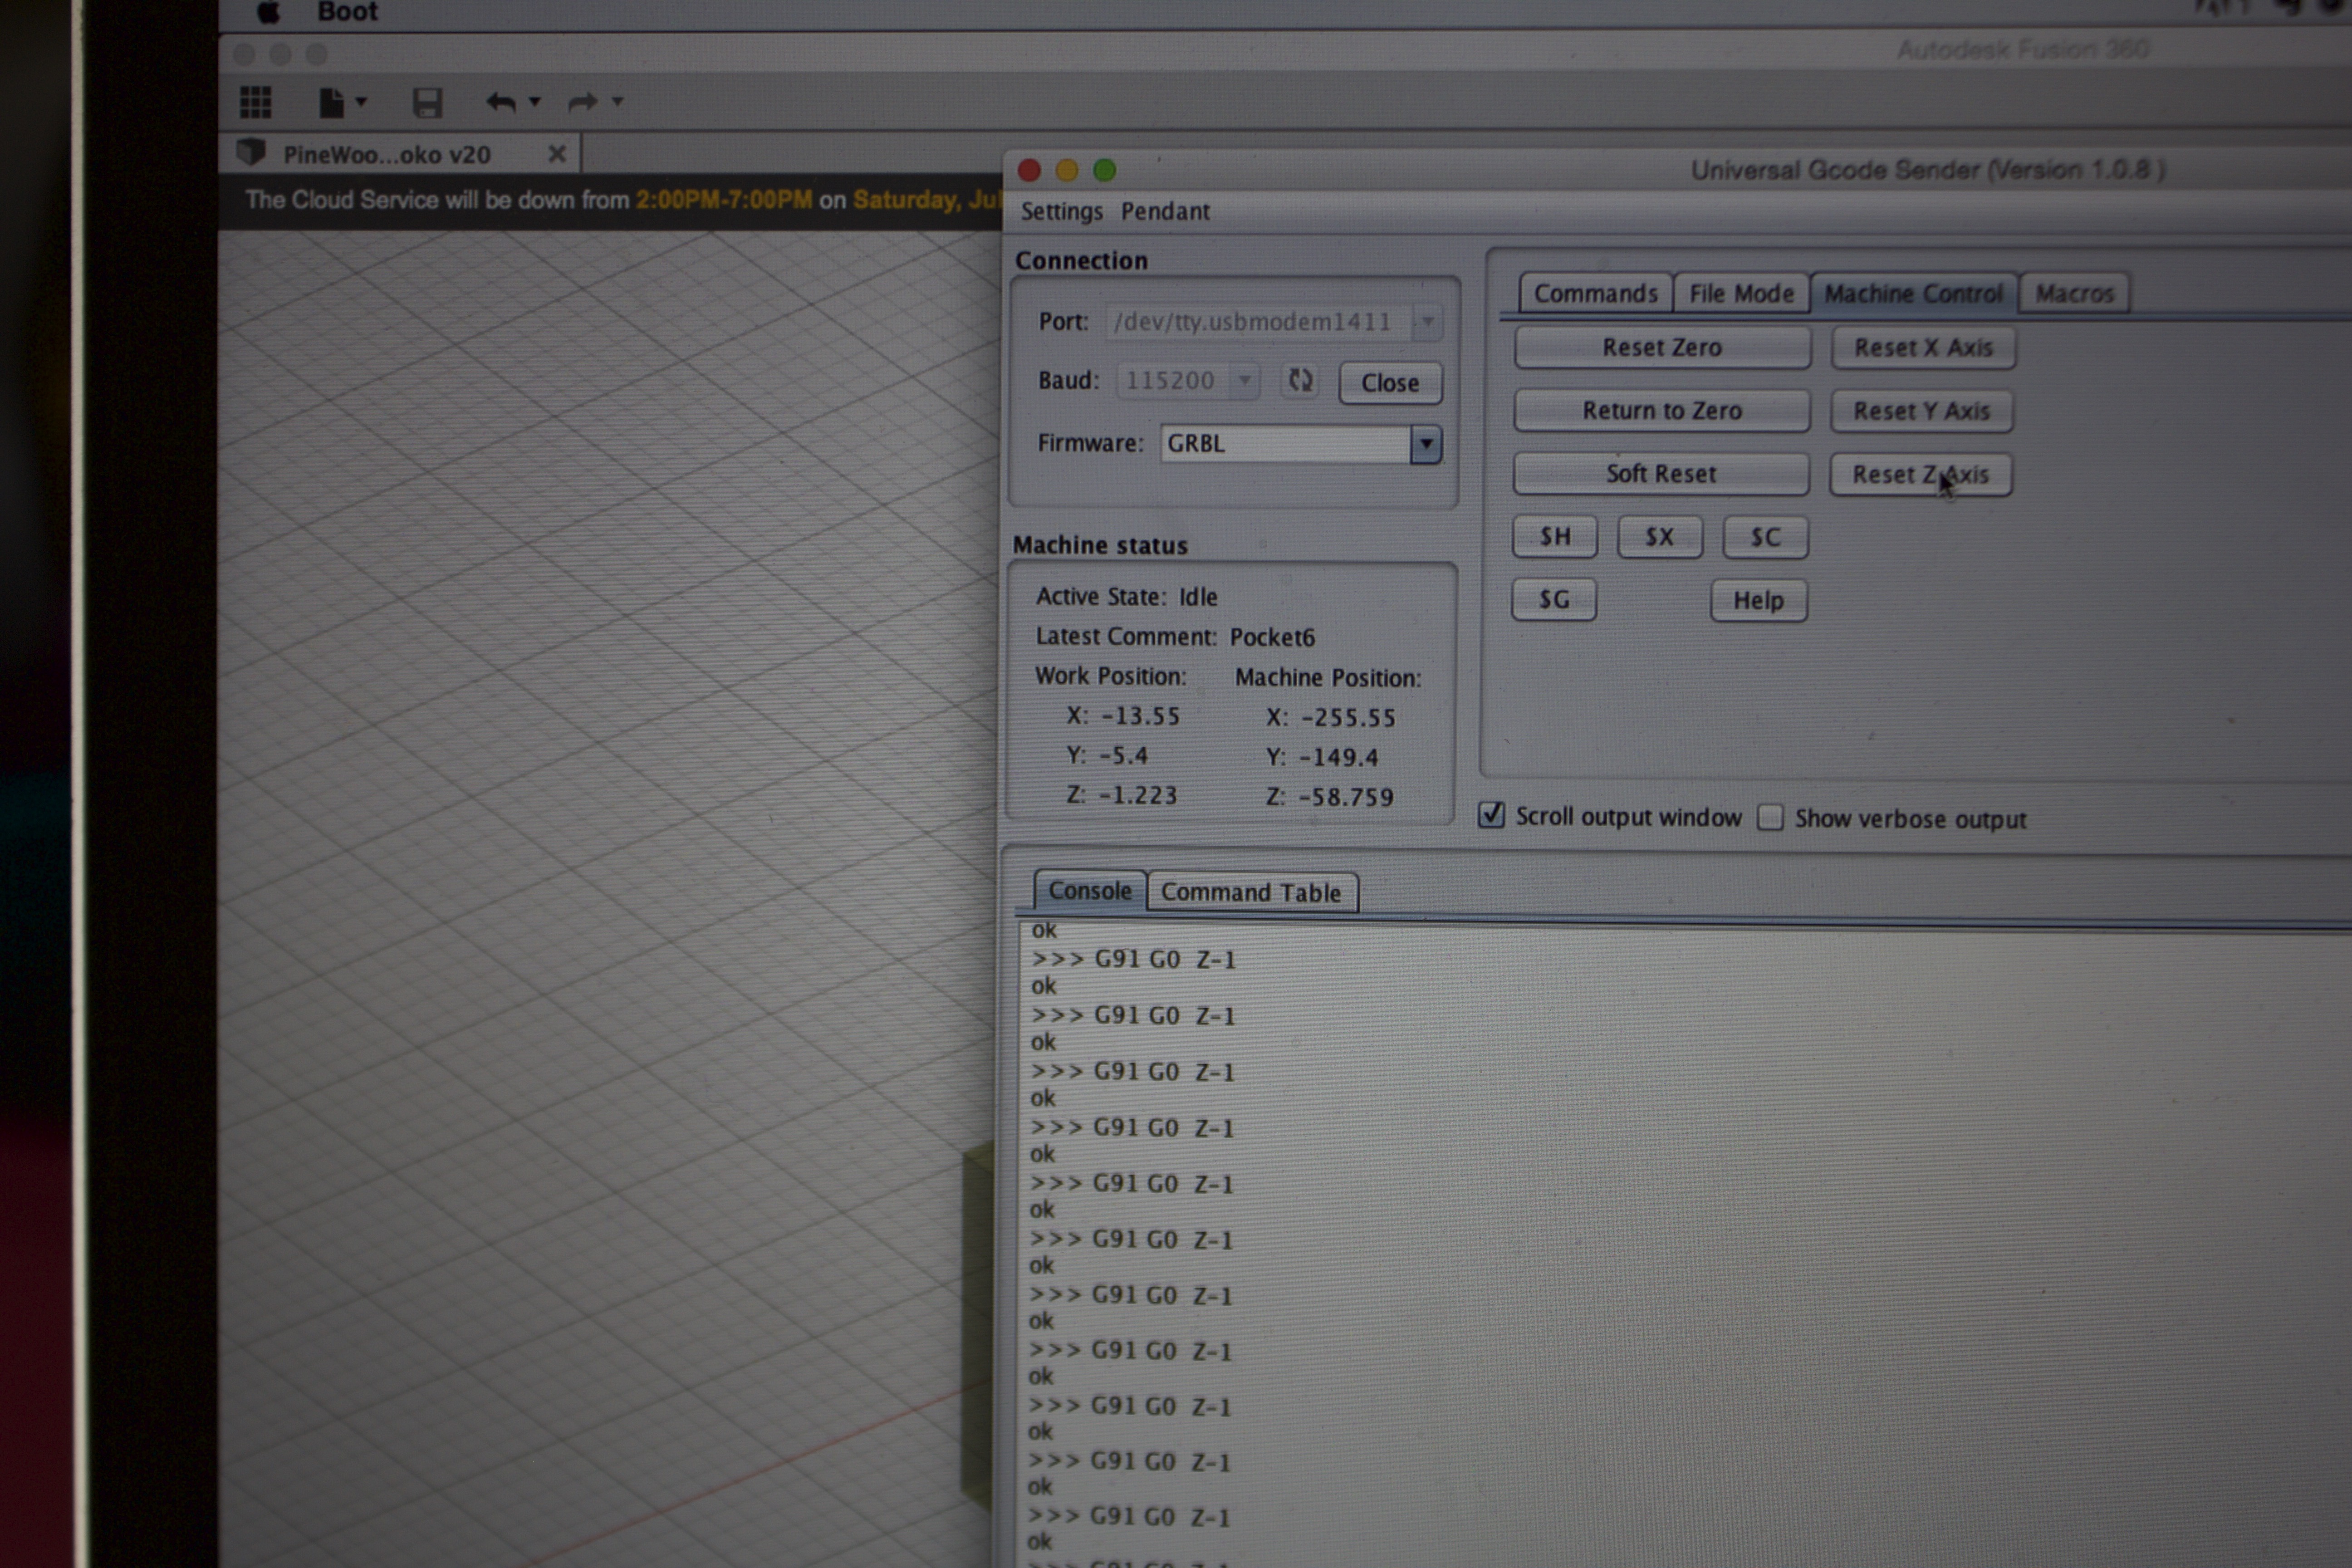
Open up Universal G-Code Sender (UGS).
Use the jog functions to move the tool (flat end mill) to the lower left corner of the wood.
Click Reset X and Reset Y in UGS.
Now jog the tool a little away from your work piece and bring it down to the work surface. A nice trick is to use a piece of paper under the tool. As you lower Z (use small increments) keep moving the paper until it won’t move anymore, then you are just touching.
Now click Reset Z in UGS.


Load the first file
If you are unsure you may want to set Z a couple inches up in the air and do a test run.
If the tool starts to take off in an unexpected direction you probably didn’t remove the G28 lines.
Run the G Code
When it is done cutting jog the tool to a safe place.


After the first code is done all of your zeros are still good for the part.
You may want to jog the machine to an easy location to change the bit.
Make sure not to ever forcibly move any of the axis or it will mess up your X/Y.
Change the bit to a Ball end mill
Now jog the Z Axis down so it is just touching the bed.
Zero JUST the Z-Axis (Your X and Y are still good)
Load the second file (Ball end mill)
Run the code


Well done congratulations.
Post some pics if you do this project and let me know what you think!!!


Paul Munger
Paul Munger
Patrick Rainsberry
Patrick Rainsberry
Patrick Rainsberry
Paul Munger
Paul Munger
Paul Munger
Patrick Rainsberry
Patrick Rainsberry
Patrick Rainsberry
Patrick Rainsberry
Paul Munger
Patrick Rainsberry
Paul Munger
Paul Munger
Patrick Rainsberry
Paul Munger
Paul Munger
Paul Munger
Paul Munger
Patrick Rainsberry
Patrick Rainsberry
James Moore
Paul Munger
Patrick Rainsberry
Paul Munger
Paul Munger
Patrick Rainsberry
Paul Munger
Patrick Rainsberry
Rick Troiani
Patrick Rainsberry
Rick Troiani
Patrick Rainsberry